
My first Kam Snaps
Seit geraumer Zeit sind ja Kam Snaps aus Plastik in aller Munde bzw an allen Klamotten zu finden und rufen durchweg Begeisterungsstürme hervor.
For quite a while now plastic Kam Snaps are what everybody seems to use and those plastic snaps get praise everywhere.
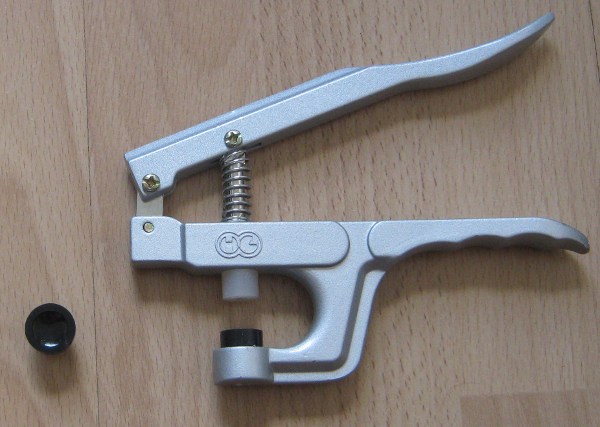
 Ich habe nur halb verstanden warum, aber als ich Zange und Snaps irgendwann Anfang diesen Jahres mal bei Alfatex gesehen habe, konnte ich nicht widerstehen und habe mir eine Zange und einige Knöpfe mitgenommen. Unter anderem in grau, weil ich schon an die Jacke dachte, die ich jetzt in Arbeit hatte. (Den Klammerentferner braucht man, weil die Packungen an jeweils zwei Stellen brutal zusammengeklammert sind. Die mit den Snaps ist zusätzlich noch mit Klebstreifen verschlossen, hier war jemand gründlich…)
I did not fully understand why everybody was so crazy about it, but when someday early this year I saw pliers and snaps at Alfatex I decided to grab a plier and some snaps. Some of them in gray, because I already had the jacket in mind I’ve been working on the last months. (The staple remover is a necessary tool because the packages are closed with two stabile staples each. The one with the snaps had been secured with additional tape also. Somebody wanted to make very sure…)
Nach dem Auspacken stelle ich erst mal fest, was es nicht gibt: Eine Anleitung.
After opening the packages the first thing I am finding is what I am not finding: instructions.
Gut, auf der Packung meiner Snaps steht drauf, daß sie Größe „T5“ sind. Und auf einem der schwarzen Teller steht ebenfalls „T5“. Aber wie bekomme ich den jetzt an die Zange?
Okay, the package of my snaps tells me they are size „T5“. And one of those black thingies has also „T5“ written on it. But how do I attach it?
Also erst mal google angeworfen und siehe da, bei einem englischsprachigen Kam Snap Händler gibt es eine Anleitung.
So I switched on my computer and google found me a Kam Snap Dealer in the US who offers a tutorial.
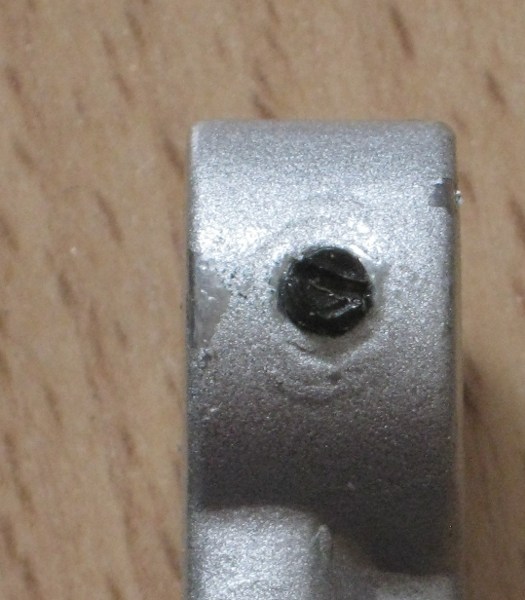 Ah ja, einfach umdrehen, auf der anderen Seite gibt es eine Schraube. Die löst man, nimmt den Teller raus und dann kann man den anderen Teller reinlegen und wieder zuziehen. Die Anweisung, dies vorsichtig und mit Gefühl zu tun, sollte man wohl besser berücksichtigen. Die Schraube sieht nämlich schon neu etwas „zerfranst“ und malträtiert aus…
Ah… turn the pliers and you see the screw. Open it, take out the black thingy, but in the other one and turn the srew closed. It is evident that you should do that carefully (as the instructions on the website state) because the screw looks already a bit „wonky“ and as if it had been badly treated, even when new out of the box…
 Auch bei den Bolzen von oben gibt es zwei Größen. Zum Glück muß man die nicht erst entfernen, um zu sehen welchen man hat. Und glücklicherweise ist auch schon der richtige vormontiert. Den auszutauschen sieht nämlich deutlich komplizierter aus…
The bolt comes also in two sizes. Luckily I can compater these without removing the one already installed and luckily it is alreday the right size. Because changing that looks a good deal more complicated…
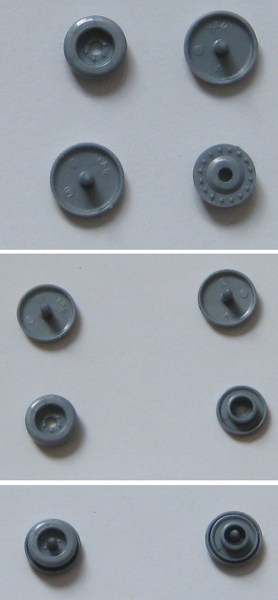 Also dann auf zu den Snaps… es gibt drei unterschiedliche Teile, also vermute ich mal, daß ich sie so brauche.
Now checking the snaps… there are three differently shaped pieces, so I guess that is how I am going to need them.
Na gut, fast… so sind sie richtig gedreht.
Okay, nearly correct… I have to turn them like this.
Ja, so passen sie aufeinander.
Yes, stacking like this.
 Bevor ich an die Jacke gehe, probiere ich das aber erst mal auf einem Stoffrest aus. Reindrücken lassen sie sich ja ganz gut, aber so richtig schließen tut das nicht. Und der „Gnöbbel“ meines Oberteils sieht nicht so ganz aus, wie auf dem Beispielbild der Webseite.
Before I am using it on my jacket I do a test one some fabric remnant. Pressing the snaps doesn’t feen difficult, they seem to be well installed, but somehow they do not really close. And my socket looks a bit different from the pics of the tutorial.
 Also zwicke ich ein zweites Oberteil hinein und drücke weniger fest zu. Das funktioniert gar nicht. Also noch mal fest zugedrückt… nein. Vielleicht mal das Unterteil nachdrücken? Ja, jetzt scheint es zu halten.
So I’m trying a second socket and press less firmely. No, doesn’t work. Again firmer… no… Repressing the stud. Yes, now it seems to close.
 Jetzt wird es aber ernst und ich nehme mir die Manschetten meiner Jacke vor.
Now it’s time to be serious and I am switiching to the cuffs of the jacket.
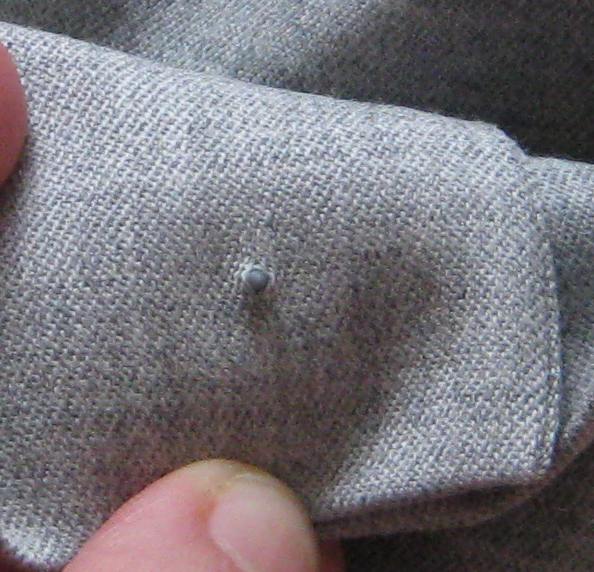
Am Probeteil habe ich schon gemerkt, daß die Dornen auch ohne Ahle durch den Stoff gehen. Und ich kann den Dorn sogar durch beide Teile der Manschette stecken.
I had already seen on my test scrap that I can push the cap through the fabric without using an awl. And I can even poke it through all layers of my cuff.
 Durch das so entstandene Loch stecke ich dann schnell den Dorn vom anderen Unterteil.
I do remove the cap from the lower layer of the cuff and poke the other cap through it before the hole closes.
Auf diese Weise kann ich schon mal sicher sein, daß der Knopf hinterher genau passen schließt. Das ist auf alle Fälle praktisch!
So I can be sure, that the position of the two parts of the snap will be correct. That’s for sure a useful feature!
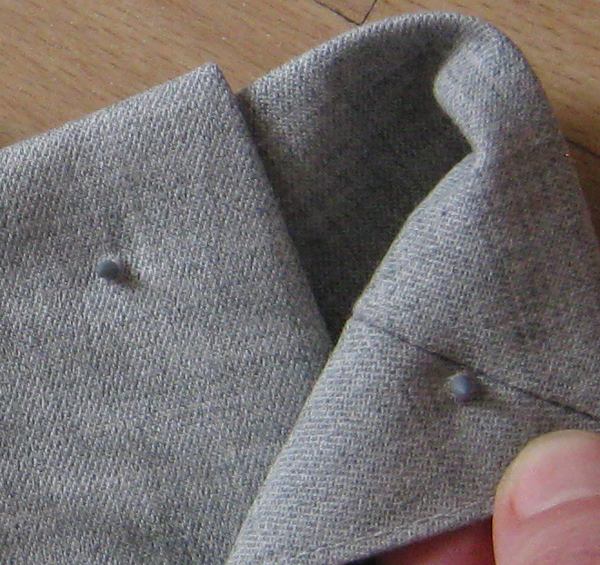
 Und zwei beherzte Zangedrücker später is der erste Knopf schon erfolgreich installiert. (Im Ganzen sind es nur zwei, auf jeder Manschette einer.)
Using the pliers twice the first button is successfully installed. (It’s only two snaps, one for each cuff.)
Und hier schließen sich auch besser, als auf meinem Probestück. Ich denke, das liegt daran, daß mit der Einlage und den diversen Nähten der Stoff hier dicker liegt. Falls ich mal noch andere Snaps kaufe, sollten das dann eher welche mit dem kürzeren Dorn sein, nicht die mit dem längeren.
 And here it also closes better than on my testing scrap. I think, the prongs were a bit too long for my sample. The cuff has some interfacing and there is also a seam under the snap that makes the material thicker, so that is probably why it works better. If I should buy snaps with anotherprong size I should take shorter ones, not longer one.
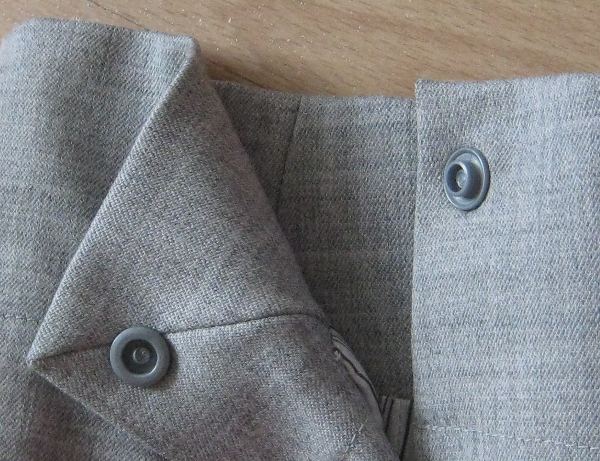
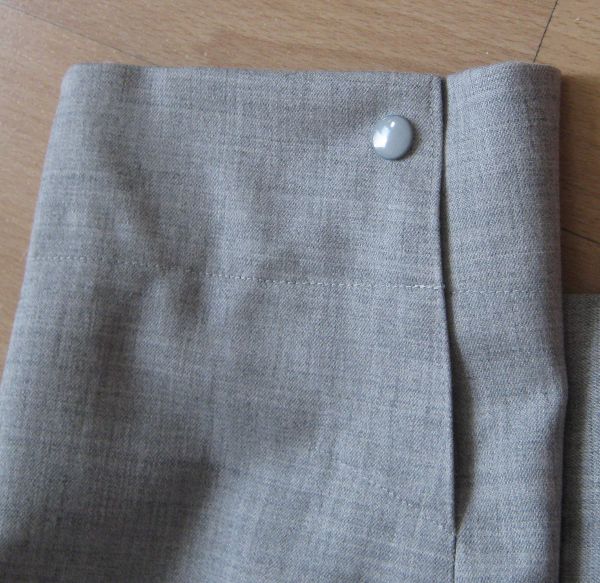
Im Ganzen bin ich jedenfalls zufrieden und werde mir im Laufe der Zeit noch ein paar andere Farben anschaffen. Genauer als bei der Prym Variozange fühlt sich die Passung der Teile für mich jedoch nicht an und generell macht die Zange einen etwas lumpigen Eindruck. Mal sehen, wie lange sie hält. Für Metall-Drücker werde ich wohl eher bei Prym bleiben.
All in all I am happy with the system and will buy more snaps in other colors over the time. I had read at some places in the internet that the pliers were more precises than the Prym Vario Pliers. Well… to me it doesn’t feel like that, on the contrary the pliers feel less stabile. Let’s see how long it lasts. For metal snaps I will probably remain with the Prym system.
Ne, oder? Was lese ich da? Frau Marion und Kam Snaps? 😉
Die Metalsnaps wirken deutlich stabiler wie die Plastikversion.
Solltest Du das ausprobieren wollen, benötigst Du aber die Hebelpresse von KamSnaps dazu. Die gehen nicht mit der kleinen Handzange.
Ich habe beides da und würde es zur Verfügung stellen.
Fröhliches snapen, Ina
Ich fürchte, wenn ich für einen Druckknopf zu dir fahren muß, dann habe ich schneller von Hand genäht. 😮
(Und wenn ich neues Zeug irl sehen kann, bevor ich es kaufe, bin ich ja nicht abgeneigt. Ich bestelle nur nicht alles wildwütig im Internet, nur weil es neu ist. 😉 )