Darts turned into Princess Seams
Erster Punkt bei meinem Kleid ist also der passende Schnitt. Da ich einen Kleidschnitt mit Abnähern habe, den ich schon mal (zumindest halbwegs) angepasst habe, ist es einfacher den in Teilungsnähte umzubauen als einen neuen anzupassen. (Hoffe ich zumindest.) Außerdem habe ich den Vogue Schnit mit den Abnähern schon, einen anderen müßte ich erst kaufen.
First thing I need for the dress project is the pattern. I already have the pattern of a dress with darts which I have altered to fit (more or less) some time ago. So it’s easier to modify the pattern I have instead of starting again with an new pattern. (At least this is the plan.) Another advantage is that the Vogue pattern is already here, another one I would have to buy.
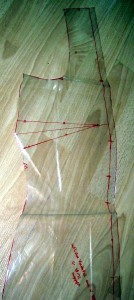
Hier ist der Vorderteilschnitt. Ich habe versucht, den Brustabnäher, den Taillenabnäher und den Brustpunkt einzuzeichnen.
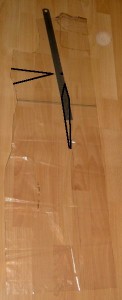
Meine Teilungsnaht soll in die Schulter verlaufen, also ziehe ich eine Linie von dem Taillenpunkt des Abnähers durch den Brustpunkt zur Schulter. Bei diesem Schnitt kann ich das gut durch eine gerade Linie machen, wie das aufgelegte Lineal zeigt.
This is half my front pattern. I tried to mark both darts and the breast point in black.
I want my seam to go from the shoulder to the waist, so I’m connecting the waistpoint of the dart and the breastpoint and make it go into the shoulderseam. For this pattern I can do this with a straight line as the ruler shows.
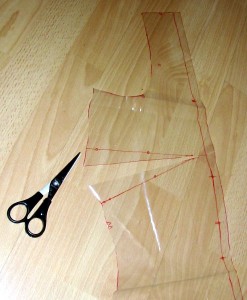
Dann lege ich eine neue Folie auf und zeichne die Seitennaht des Schnittes nach und dann die Linie von der Schulter, durch den Brustpunkt und entlang der linken Kante des Abnähers.
 An der Seitennaht habe ich die Markierungen übernommen, am ehemaligen Abnäher habe ich die Taille und die beiden Endpunkte markiert, sowie einen weiteren Punkt.
Schon habe ich ein seitliches Vorderteil. (Fast, der Abnäher muß ja noch weg.) Die Nahtzugabe an der neuen Teilungsnaht nicht vergessen…
I’m layering a new plastic sheet over my existing pattern. I’m copying the side- and a part of the soulderseam and I’m drawing a new line from shoulder through bust point and then along the left side of the vertical dart.
At the side seams I also copied the notches, on my new princess seam I make new marks on the line that was the vertical dart before.
The result is a front side pattern. (Nearly. there is still one dart to be removed.) And not forgetting to mark a seam allowance…
Das mittlere Vorderteil und die Teilungsnähte im Rücken werden analog gearbeitet. Die Längsabnäher dienen als Anhaltspunkt für die Teilnungsnaht.
The middle front and the seams in the back are constructed the same way. The vertical darts help to decide where to place the seams.
Jetzt muß der Brustabnäher aber noch raus, das ist auch nicht schwer.
Der Abnäher wird eingeschnitten, durch die Abnäherspitze durch bis auf die Teilungsnaht. (Wir erinnern uns, an dieser Stelle läuft die Naht genau durch den Brustpunkt, auf den kommt es an.)
Only there is still the dart to be removed, which is easy.
I do cut the dart through the point of the dart to the seam. (We remember, the seam goes through the bust point which is the important point.
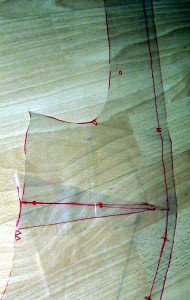
Schließlich wird der Abnäher einfach weggefaltet.
Die beiden roten Linien werden aufeinander gelegt und das ganze festgeklebt.
Dadurch ergibt sich auch automatisch eine Rundung der Teilungsnaht.
Finally the dart gets folded away.
Just overlap the dart, lining up the red lines. (Then tape it in place.)
So the seam gets the right curve automatically.
Bevor ich meinen Stoff zuschneide nähe ich natürlich ein Probemodell aus meinem bewährten Streifenstoff. 😮
Ein paar Änderungen sind danach noch nötig, aber letztlich ging es schneller als einen neuen Schnitt anzupassen.
Before I’m cutting my fabric I’m making a musslin of my ugly striped fabric, of course.
Some alterations were needed after that, but it was much quicker than fitting a new pattern.


Klasse Anleitung, danke!