
… ist mein Motto für diesen Motivationsmonat. (Zeit wirds, denn der Monat nähert sich seinem Ende…)
 Einen Stoff habe ich für mein Sommertop in meinem Lager gefunden.
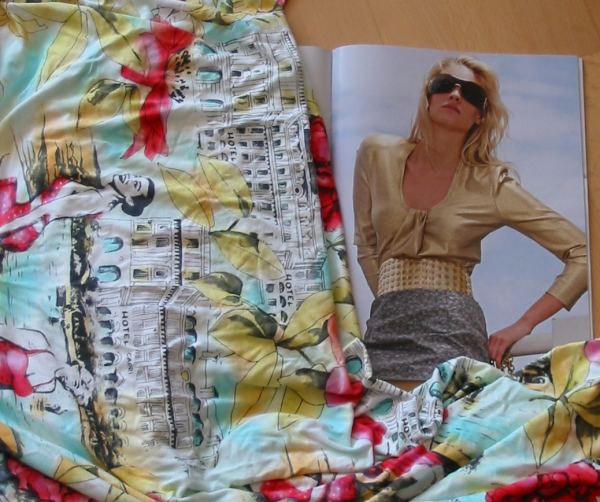
Vor einem (oder schon zwei?) Jahren habe ich ihn in Paris bei Sacre Coupons gekauft, ein schreiend bunter Baumwolljersey mit einem Retromuster.
Badenixen und Strandhotels erzeugen Capri-Feeling. (Beinahe wie in einem dieser 60er Jahre Filme…)
Zuerst wollte ich nur ein ganz schlichtes ärmelloses Top machen, der Stoff ist auffällig genug. Aber da war doch noch dieses Shirt mit dem interessanten Ausschnitt in der Burda vom letzten Oktober.
Nicht so tief, aber mit dieser gerafften Falte vorne. Nun habe ich keine Lust mich auf eine Runde Schnittanpassung mit Burda einzulassen, also muß ich dieses Detail „klauen“ und an meinen bewährten Schnitt für ärmellose Shirts „anflanschen“.
„Stealing from Burda“ is what I’m planning to do for this months sew along. (And it’s more than time… the month is closer to the end than to the beginning.)
This months the topic is „Summertops“ (which in German usually means something sleeveless) and the fabric comes from my stash.
I bought it last summer (or was it two years ago?) at Sacre Tissus in Paris, a very bright cotton jersey knit with quite a retro design.
Bathing Ladies, blue sea and hotels on a beach,no, not Hawai, Capri in Italy was very popular for holidays amongst Germans in the 1960th. (And even more popular for musical films, as most people couldn’t afford a holiday there at that time. . )
But back to sewing… originally (means when I bought the fabric) I had intended to make just a simple sleevless top, as the fabric is busy enough. But there was this top in the BWOF, october 2007. I really did like the neckline detail. Not as low as Burda puts it, but the flap itself I wanted to have. And as I do not feel like another round of fitting issues with Burda I do have to „steal“ this detail and attach it to my basic pattern for sleevless tops.
 Normalerweise ist das ja auch nicht so kompliziert. Wenn man mal verstanden hat, wie der Schnitt funktioniert.
Nur hatte der Burdaschnitt irgendwie mehr Markierungen im vorderen Bereich als erwartet. Und daß die „vordere Mitte“ nicht der „vorderen Mitte“ meines Basisschnittes entsprechen kann war irgendwie auch klar. Denn vorne muß ja wegen der Falte mehr Stoff hin.
Also ab ins Anleitungsheft, nachlesen, wie das verarbeitet wird.
Doch irgendwie… Knoten im Hirn. Ich verstehe nur Bahnhof. Was muß jetzt wohin gesteckt… genäht… ? Oder wie?
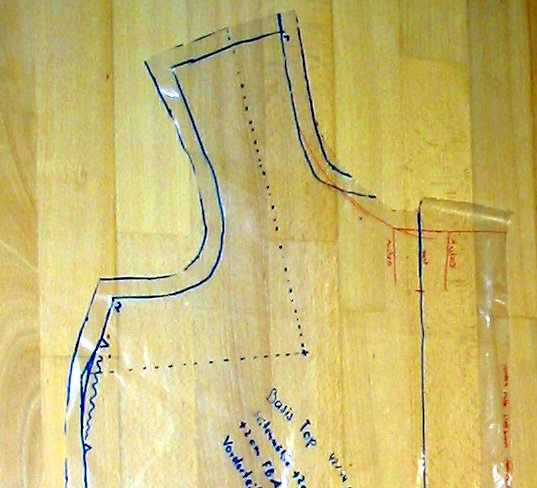
Kurzerhand kopiere ich mir den entscheidenden Teil des Schnittes auf ein Stück Folie und vollziehe die Verarbeitung nach. Denken mit den Fingern klappt besser, ich verstehe endlich, wie das gemeint ist.
Danach war der „Anbau“ kein Problem. Die blaue Linie zeigt meinen Schnitt wie er vorher war, rot sind die Änderungen aus dem Burdaschnitt. Ich habe den Ausschnitt etwas tiefer gezogen (mein Shirt hat einen recht kleinen Ausschnitt) und dann die Falte „angebaut“.
Das sollte so klappen.
Da ich die Falte so schwierig zu verstehen fand, werde ich alle Arbeitsschritte photographieren und ein Tutorial dazu hier einstellen. Falls noch jemand Probleme damit hat…
Attaching the pleat shouldn’T be very complicated. As soon as you have understood how the pattern works.
Only here the BWOF pattern had some more of those marks than expected. That the „middle front“ did not have to match the „front middle“ of my pattern was clear, it needs width for the pleat, but what the heck…?
I’m reading the instructions. Normally that helps. But not today… Understanding doesn’t come… what has to be pinned… sewn… where?
Finally I copy the front of the pattern to a scrap of plastic and start folding and pinning. Thinking with my hands works better and finally I understand what I have to do. Adding the pleat then to my pattern then was easy. Blue is my pattern, red are the Burda details. I should be working like that.
Because I found the pleat quite complicated and the instructions not super clear I’m taking pics of the process and will post a tutorial here. In case I’m not the only one who has a problem with that…