Höre auf den Stoff…

Listen what you fabric says…

… das ist eine Erkenntnis die ich eigentlich vor langer Zeit schon hatte. Der Stoff spricht, er sagt dir, wofür er verarbeitet werden will und wie. Und das Leben ist so viel einfacher, wenn man darauf hört.

.. that’s a lesson I learned a long time ago. Fabric talks, he tells you what it wants to become and how it wants to be treated. And life is so much easier, if you listen.

Schnitt

Deswegen habe ich das auch getan, meinem Stoff zugehört.

Und der sagt, daß er nur für einen der Schnitte wirklich geeignet ist. Alles andere wäre Murks.

Also habe ich den Schnitt heute kopiert. Und zumindest einen der beiden anderen werde ich im Kopf behalten und mir bei Gelegenheit einen passenden Stoff dafür kaufen.

So that’s what I did, listen to the fabric.

And the fabric told me, that it is only suitable for one of the patterns. Anything else would be… second best.

So I traced my pattern today. But I will keep one of the other patterns in my mind and one day buy a suitable fabric for that.

(In bin mir sicher, ihr erkennt, welcher von den Schnitten es ist?)

(I’m sure you easily recognize which pattern?)

Und weil Susanne es wissen wollte: Bei uns gab es heute zuerst ein Salat aus Eichblatt und Cherrytomaten mit Senfdressing, danach gekochten Weizen (so eine Art ebly, nur von Carrefour) mit gebratenen Zucchini mit Thymian und anschließen etwas Käse. Kein Nachtisch. (Bei uns wird abends gekocht.)

Soll ich eine Woche lang jeden Tag unseren Speiseplan posten, Susanne? 😉

Susanne wanted to know what we had for lunch today. In my case it’s dinner because I’m not cookinf for lunch, but I think this will be okay: We had salad from green salad (well… not typical green salad, but I do not know what it’s called in English) and cherry tomatoes with mustard dressing, main course was cooked wheatgrains (like “ebly”, only from anoter company) with baked zucchini with thyme, after that a bit of cheese. No dessert.

Bärenglücks supereinfaches Ärmelcape

Bärenglücks easy-peasy shawl with sleeves.

Pünktlich zum Ende des Motivationsmonats (so wie es aussieht wohl der letzte… es hat niemand mitgemacht und für September hat Anne keine Abstimmung mehr online gestellt und außer mir vermißt es wohl auch keiner) habe ich es auch geschafft dieses super einfache Projekt fertig zu stellen.

Erfunden habe ich den Schnitt nicht, sondern ihm im im Forum gefunden. Bärenglück hat ihn gezeigt und auch Bilder eingestellt, wie man das Teil näht. Eigentlich ist es ganz einfach, aber da ich mit reinen Bildanleitungen ohne Text immer etwas Probleme habe (ich sehe immer irgendwelche Details, die eigentlich gar nichts zu bedeuten haben und die mich von den wichtigen Sachen ablenken) gibt es hier jetzt eine Anleitung mit Text. Für diejenigen, die auch Worte brauchen. Und für totale Anfänger, denn in meiner Variante (war ja klar, daß ich was verändern muß…) ist es perfekt als erstes Stück.

August is nearly over and I managed to finish my “Motivationsmonat” project. And to put it online.

The pattern is not my invention. I*ve found it on the Hobbyschneiderin board. It was Bärenglück who showed it there and she had also put on some pics how to make it. I always have problems with “picture only” instructions, because I’m always distracted by irrelevant details and easily miss the important ones. So here is my tutorial, for those who prefere words. And also for people who are completely new to sewing, my version is perfect for a first item. (Of course I made some changes…)

Fleece

Die erste Veränderung ist der Stoff: Ich wollte etwas, um mich im Winter auf der Couch einzukuscheln, also habe ich Fleece genommen.

Und der erste Schritt ist der schwierigste, man braucht ein sauber geschnittenes Rechteck. die Nahtzugaben werden links und rechts abgeschnitten und der Stoff denn entsprechend oben und unten begradigt. (Es war damals das Endstück vom Ballen, das ist selten gerade.)

Ich habe den Stoff nicht gefaltet, sondern einlagig gearbeitet und Metallineal und Rollschneider hervorgeholt. Eine größere Schneidematte wäre gut gewesen… ein Lineal das länger ist als 50 cm wäre auch praktisch gewesen… oder ein größerer Tisch, statt auf dem Boden rumzukriechen… das gerade hinzubekommen war wirklich der schwierigste Schritt. Letztlich ging es aber.

Ergebnis ist ein Rechteck, 140 cm breit und 100 cm lang. (Noch eine Änderung zum Original, ich habe es gekürzt. Ich habe ein bißchen rumprobiert und festgestellt, daß es mir kürzer besser gefällt. Außerdem will ich es ja zum Lümmeln auf dem Sofa, da ist kürzer eh praktischer.)

My first change was, that I’ve used fleece fabric, as I wanted something to cover on winter nights on my sofa.

The first step is the most difficult one: cutting a precise rectangle. I’ve used my roller blade and a metall ruler and cut of the selvage. Then I straightened the cut edges. (It was the rest of the bolt I had bought so this was very far from beeing straight…)

I didn’t fold the fabric for cutting and things like a longer ruler, a bigger cutting mat and a bigger table instead of cutting on the floor would have made it easier, but in the end I succeeded. So I have a rectangle of fleece fabric, 140 cm wide and 100 cm long. (Another change, bärenglück had made hers longer, but I didn’t like that on me. Also I want it mainly to sit on the sofa with, so shorter is more comfortable.)

Kafka BorteDamit es nicht ganz so langweilig wird habe ich aus meiner Sammlung diese schöne graphische Borte von Kafka geholt. Die gabe es glaube ich mal als Geschenk auf einer Messe. Und das Grün der Ringe ist genau der gleiche Farbton wie das Grün des Stoffes.

Zwei Stücke, etwa 33 cm lang jedes. (Ich habe mich vor allem nach dem Musterrapport gerichtet.)

Then I searched in my “collection” and found a bit of that woven ribbon from Kafka, the green of the rings matches the green of the fabric. (I think I got it as a give-away on a trade fair.)

Two stripes, about 33 cm of length each. (Determined by the pattern, I counted then dots…)

Bandenden

Um nette Enden zu bekommen klappe ich erst mal die Ecken des Bandes als Dreiecke nach hinten um. Und einfach mit einem Streifen Wondertape festkleben.

Das ganze vier Mal, beide Enden an beiden Streifen.

The cut edges of the ribbon would fray, so I’m folding them to the left side as the pic shows. A bit of Wondertape keeps it in place.

Repeat this three times, both ends of both ribbons.

Band versäubernJetzt wird das Dreieck noch mal nach innen geklappt und mit Wondertape fixiert.

Dadurch sind die Ecken ganz sauber und es gibt gleichzeitig keine zu starke Verdickung am Ende des Bandes, man kann hinterher gut drübernähen.

Then again you fold the triangle to the left side and attach it with Wondertape.

So we create very neat ends and the edge will not be tu bulky to sew over it neatly.

Bänder annähen

Dann werden die Webbänder mittig auf die Längskanten des Stoffstückes gelegt und festgenäht. Mit Wondertape festkleben ist auch hier nützlich, es geht schneller und einfacher als Stecknadeln.

Die linke Seite des Bandes liegt auf der rechten Seite des Stoffes und ich lege das Band so an, daß es einen oder zwei Millimeter über die Kante übersteht.

Not I position the ribbon on the fabric. Left side of the ribbon on the right side of the farbric, on the length sides and in the middle. Also I let the edge of the ribbon overlap the fabric by one or two millimetres.

Again Wonder Tape is your friend, it’s quicker and easier than pins. Then sew it close to the edges of the ribbon.

Seitennähte

Dann wird das Stoffstück der Länge nach (was die kürzere Seite ist…) rechts auf rechts gefaltet und an den beiden Seiten genäht. Und zwar unterhalb der aufgenähten Borte.

Die oberen 15 cm ab dem Stoffbruch werden nicht genäht, 35 cm werden knappkantig zusammengenäht. Da Fleece nicht ausfranst reicht auch ein halber Zentimeter Nahtzugabe.

Then you fold the fabric lenghtwise (“length” is the shorter side here…) right sides together. Then you pin the short sides and sew them, leaving the part with the ribbon open.

On the pic the fold is on top and the 15 cm from top remain open, the lower 35 cm get sewn together. 0.5 cm seam allowance are enough because fleece doesn’t fray. (But you can make it a little larger if that is easier for you).

Ränder

Im Prinzip wäre der Umhang auch schon fertig, Fleece, wie gesagt, franst nicht, man muß sonst nichts mehr machen.

Ich habe mich entschlossen noch einmal an der Kante rundum mit Zickzackstich zu nähen, einfach um optisch noch etwas mehr Abschluss zu haben.

Ich hatte noch Stickgarn (Mettler) in dem Rotton der Borte, habe einfach zwei Fäden zusammen durch die Nadel (Stärke 90) gefädelt und bin mit einem Zickzackstich an der Kante entlang gegangen, Stichlänge 3, Stichbreite 4.

Then you are already finished. Fleece, as mentioned before, does not fray, so you needn’t do anything with the edge. I found some machine embroidery thread (from Mettler) matching the red of the ribbon so I decided to sew along the edge (After the seaming you have only one edge going all around.) with a zigzag stitch (length 3, width 4). To make it more visible on the thick fabric I threaded the machine treating both threads as one (needlesize 90).

Cape seite

Und so sieht das ganze dann fertig aus.

Leider mal wieder nur mit Selbstauslöser, unfrisiert und auf die Schnelle.

Cape fertig geschlossenUnd die Sonne war auch wieder weg, bis ich die Kamera geholt hatte.

Aber der Monat ist fast vorbei, also kann ich nicht mehr länger warten.

Einmal offen und einmal geschlossen. Es wird sicher gemütlich auf meinem Pariser Sofa diesen Winter.

And that’s what it looks when it’s finished.

Again I had to do the pic all alone, just quick shots, hair undone,.. but the month is nearly over, so it had to be now or never.

Needless to say, that the little bit of sun we had today vanished once I got the camera…

The picture on the right shows it open, the left one closed. I’ll have cozy days on my Paris sofa this winter…

Das Ei ist gelegt…

The egg is laid…

Nach vielem Brüten über den Motivationsmonat habe ich eine Entscheidung getroffen.

Und wie immer ist es weder ein Schnitt noch ein Stoff von den bisherigen Vorschlägen…

Ich hatte ja mein Projekt auch im Hobbyschneiderin-Forum vorgestellt. Und da wies mich Sieglinde alias haa1959 auf ein Projekt von bärenglück (alias Hannelore) hin.

After a lot of brooding over the Motivationsmonat I’ve taken a decision.

And as always… it’s neither one of my ideas nor one of the fabrics I had planned before.

I had also introduced my project in the Hobbyschneiderin-Forum. And there Sieglinde alias haa1959 pointed out a project from bärenglück (alias Hannelore) to me.

Und so ein Ärmelschal soll es auch werden. Allerdings nicht für elegant, sondern zum Rumlümmeln auf dem Sofa. Ich habe noch einen Rest Fleece, aus dem ich damals die Kuscheldecken für die Pariser Wohnung gemacht habe. Da habe ich nämlich gleich den ganzen Rest vom Ballen gekauft…

Jetzt muß ich nur noch verstehen, wie es gemacht wird. Es gibt zwar keine Anleitung, aber Bilder.

And that easy kind of shrug is what I want. But not as an elegant garment, I want something to hang around on my sofa. When I made the fleece blankets for our Paris appartment I had bought the whole rest of a bolt and there is some left. Not enough for a sweater… but perfect for that shrug.

I just have to figure out, how it is done. There are no explanations provided, but several pictures.

(Und falls ich es verstehe, mache ich auch eine Anleitung mit Text.)

Jetzt gucken wir mal, wie oft ich meine Meinung noch ändere. So lange weder zugeschnitten noch genäht ist, weiß man ja bei mir nie… 😮

(And if I figure out how it is done I can make a tutorial with explanations.)

Now let’s see whether I stick to that. As long as there is nothing cut or sewn I still can change my mind… 😮

Neues aus der Stofftruhe

Heute war der große Ausflug in meine Stofftruhe… da waren in der Tat einige Stöffchen die sich eignen könnten. Denn wenigstens will ich keinen neuen Stoff kaufen.

StoffeI’m back from my excursion into my fabric trunc.

Hier wären einmal Baumwollstoffe, die in ausreichender Menge für die Tunika vorhanden wären.

Here two cotton fabric, enough for the the tunic.

Schnitt Also dieser Schnitt… Ich glaube hier würde ich den afrikanisch bedruckten Stoff bevorzugen. Denn ich bin mir so gar nicht sicher, ob der Schnitt auch nur im entferntesten gut aussieht.

Und in dem Stoff wäre es auf alle Fälle ein bequemes Nachthemd. Und von dem Rosenstoff habe ich eine ganze Menge und ich liebe Rosen… da möchte ich doch lieber was tragbares draus machen.

Just to remember, that was the tunic pattern… I think I’d prefer the african print for that, because I have big doubts whether this pattern can look good.

And with that fabric it would definitely be a night shirt. From the print of roses I have more than needed. And I like the roses so much, that I’d prefere to make something more wearable out of it.

dicke StoffeAber auch dicke Stoffe habe ich gefunden.

But there are also some thicker fabrics in my “collection”.

Schnitt für CapeVon der Menge her würden sie alle für die kurze Variante genügen.

Am meisten Spaßt würde mir eigentlich der Dalmatiner Plüsch machen. Wenn schon verrückt, dann richtig.

Leider würde das maximal für Größe S reichen und ich kenne niemanden, der ein Minicape in getüpfeltem Plüsch haben wollte. (Wenn hier jemand ist, der so was gerne in Größe S hätte… ganz schnell hier schreien… bevor ich was anderes zugeschnitten habe. *g*)

Those are the fabrics that would be enough for the mini cape.

Most fun to sew would be the faka fur. If crazy.. then really weird.

But here the fabric would only be enough for a model in size “S” and I don’t know anyone in that size who’d like to wear that. (If you are size “S” and you’d like to have a small cape in dalmatian fur… raise yor hand quickl.., before I start cutting something else. *g*)

Der schwarz-weiße Stoff ist ein schwerer Wollstoff von dem ich etwa 2m habe. Ohnehin zu wenig für eine Jacke oder einen Mantel. Und man konnte ihn sicher irgendwie besticken, befilzen oder anderweitig dekorieren.

The black and white fabric is a rather heavy wool. I only have 2m of that, not enough for a jacket or a coat. And it would be a nice canvas for embroidery, felting or another decorative technique.

Schnitt PelerineDer rote Wollstoff ist hingegen recht leicht und weich. Der Rest eines Abendkleides. (Das kommt davon, wenn man nach eigenen Schnitten arbeitet… grob verkalkuliert.. :o) ) 1.30m sind zu wenig für irgenwas sinnvolles.

Allerdings würden sie für diese niedliche Pelerine reichen. Zumindest in Größe 42… Und über einer grau-melierten Strickjacke könnte das tatsächlich niedlich aussehen. Allerdings habe ich weder eine solche Strickjacke, noch bin ich mir sicher, ob es in MEINER Größe auch niedlich aussieht. Oder nur lächerlich?

The red woll on the contrary is light, soft and drapeble. The leftover of an evening gown. (The problem with selfdraftet patterms… miscalculation of fabric needed.) 1.30m had never been enough for something usefull.

But it would indeed be enough for that cute burda thing. At least in Size 42. And over a grey cardigan it could look cute. But I don’t have a grey cardigan. And I am far from sure whether it also looks cute in MY size?

Einstimmung

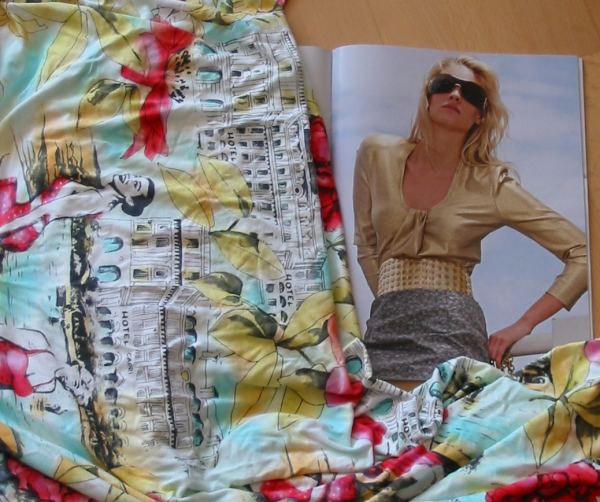
Ein neuer Motivationsmonat steht an. So wie es aussieht wird das Thema “Cape und wärmende Hüllen” sein.

Wir haben August, es ist (endlich) heiß hier, schwül dazu. Perfekt, um warme Stoffe um sich zu drapieren.

Wir erinnern uns… warum wollte ich dieses Jahr an den Motivationsmonaten teilnehmen? In erster Linie wollte ich meine Stofftruhe mal etwas entlasten. Dann wollte ich meinen Kleiderschrank auffüllen, denn bei meinem bisherigen Nähtempo entstanden doch immer wieder Lücken. Weiterhin hoffte ich auf die Gelegenheit, länger gehegte, aber immer zurückgestellte Projekte zu verwirklichen. Und ein bißchen Herausforderung durch Themen die mir nicht so liegen ist ja auch nicht schlecht…

Das mit dem Stoffabbau hat nur mäßig gut geklappt… Im Januar war es ein Schlafanzug, in großes Stück Stoff aus meinem Fundus, kein sehr dicker allerdings.(Dafür war der Pyjama dringend nötig und ein lange gehegtes Projekt.) Auch das Shirt im Februar entstammte meiner Kiste. Die Jeans im März war zwar dringend gebraucht, aber dafür mußte ich Stoff kaufen. Auch im April (Oberteile mit Kapuze) war Stoffkauf angesagt. Immerhin einer, den ich schon länger für genau diese Jacke im Auge gehabt hatte. (Aber ein dicker, die Restekiste quilt auch immer mehr über.) Der Mai war perfekt: ein abgelagertes Stöffchen UND ein Schnitt der dafür schon länger bereit lag. Allerdings ein sehr dünner Stoff. Und es ist noch was übrig. Auch im Juni wurde das Kleid aus einem vorhendenen Jersey genäht. Allerdings konnte ich mich für den Kontraststoff nicht entscheiden, daß ich davon so viele verschiedene gekauft habe, daß die Stoffkiste jetzt voller ist als zuvor und noch zwei Stoffe rumliegen (unauffällig bei der Bügelwäsche…), die auch beim besten Willen nicht mehr reinpassen. 🙁 Da hilft auch das Juli Sommertop nicht weiter.

A new “Motivationsmonat”… The theme will be “Capes and warming shells”.

It’s august, it’s (finally) hot plus humid. Perfect time to play around with warm fabrics…

So, what was it, why I wanted to take part in the sew along? First idea was to reduce my stash. Next goal was filling my wardrobe, because I was always sewing so slow, that I was always in the need of something. Then there was the hope it would make me realise project I was having in my mind for quite a long time, but came always second (and therefore never were executed). And a bit of challenge with topic that are beyond my comfort zone isn’t bad either.

Reducing my stash did not really work out. In january it was sleepwear, a big piece of cotton from my stash but not a thick one. (On the other hand it was something I really needed and also a project I had wanted to do for about two years.) Also the february top came from my stash. (Another thin fabric…) Jeans in March were something I had been needing urgently, but I had to by fabric. Same for April: new fabric. Not even needed. But a project I had wanted to do since I had seen the fabric in the shop. (Now my stash of remenants is overgrowing, it was a very thick knit.) May was perfect: Fabric I already had and a pattern I had planned to use for that fabric for quite a while. But a think silk and there is still something left. June-dress was sewn from stash also, but I couldn’t decide waht to take for tha contrast and bought therefore so many different fabrics for that, that my box now is fuller than in January. (And there are two more fabrics that do not fit in there, well hidden under the pile for ironing… *g*) So the bit of fabric the summer top in July used up didn’t help. (Plus again there is more left than I’ve used…)

Ein Element meiner Wunschliste ist allerdings noch nicht aufgetaucht: Die Herausforderung. Bisher passte alles gut in meine Pläne.

One element from my “why I want to take part” list didn’t show up so far: The challenge. So fareverything could be fitted in my plans easily.

Schnitt PatronesMit dem Thema Cape hingegen mußte ich mich jetzt erst mal intensiv befassen.

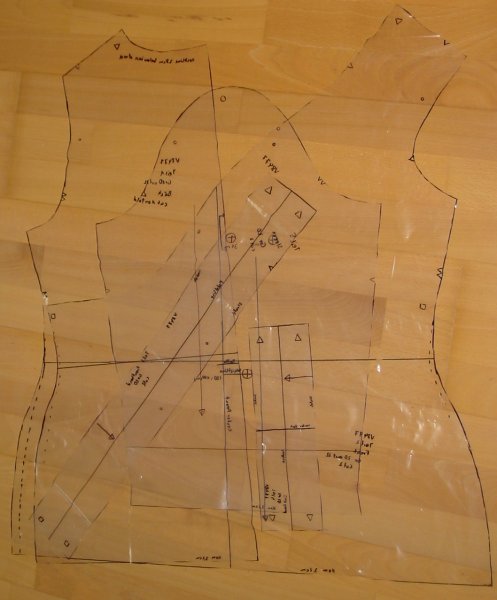
Ich habe mir also alle meine Hefte geschnappt und mal alles rausgezogen, was auch nur im entferntesten Ähnlichkeit mit einem Cape hat.

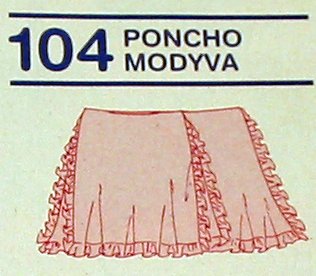
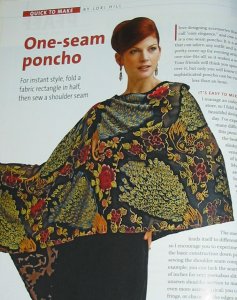
Das erste Modell kommt aus der Patrones 217 vom Februar 2004. Ein Cape aus Chiffon mit Rüschen. Also es ist eigentlich ein Poncho, aber ein Cape ist ja so was ähnliches wie ein Poncho…

Vorteil wäre, das ich nicht mit dickem, warmem Stoff hantieren muß.

Nachteil ist, daß ich vermutlich keinen passenden Stoff dafür habe und mir auch keine rechte Gelegenheit einfällt, zu der ich so was tragen könnte. Und bei genauer Betrachtung… ich fürchte das Ding gefällt mir nicht mal. Schon gar nicht mit den Rüschn.

“Cape” on the contrary is a topic I’ll take some time to accomodate… Especially in August, when it is hot.

So I started searching my collectin of pattern magazines, picking everything that is at least a bit cape-like.

My first model is from Patrones 217, Fabruary 2004. It’s a chiffon-cape with ruffles. Okay, it’s a poncho, but a pomcho is nearly a cape, isn’t it?

Advantage: No thick and warm fabric to handle in the heat.

Disadvantage: I don’t thick I hae a fabric for that in my stash. Also I cannot think of an occasion to wear it. And if a take a closer look.. I guess I don’t want to wear that. The ruffles are so much not for me…

Cape ThreadsDas nächste Modell wäre ein Bewährtes, der Poncho aus Threads 127 (November 2006).

Ich habe ihn schon zwei Mal genäht und da man dafür eine der Länge nach geteilte Stoffbahn braucht, hätte ich auch noch Stoff. Allerdings Stoff, der mir nicht steht, weil ich das Modell ja für andere genäht habe.

Der Vorteil wäre: es geht schnell zu nähen…

Next model is a poncho again, from Threads 127 (november 2006)

I’ve already made two versions of that and as you have to cut your fabric in half lenthwise I still do habe the second halves. But I made it as gifts and none of the fabrics is my colour.

But it would be a quick project, which would let my plenty of time for other (more usefull) prjects this months…

CapeIn der f.i.m.i. war im Winter 2006 diese Pelerine drin. Also ein Minicape, das nur die Schultern bedeckt.

Vorteile: es geht bis Größe XL, ich kann dicken Stoff verwenden, der meine Truhe etwas entlastet und es ist klein genug, um im Kleiderschrank hinterher nicht allzuviel Platz wegzunehmen. Dafür könnte ich mich vielleicht mit irgendeinem Embellishement austoben?

Allerdings sehe ich mich so etwas nicht wirklich tragen. Einmal mangels Gelegenheit (wenn ich die Schultern warm haben will, dann normalerweise auch den Rest) und zum anderen, weil ich keine Vorstellung habe, wie das an mir aussehen könnte…?

Th Dutch f.i.m.i. had this shoulder covering mini-cape in the winter 2006 issue.

It goes up to size XL and I could use one of my thick woolen fabrics from my stash which would unburden my fabric trunk a bit. And the result would be small enoght not to block too much space in my wardrobe. And I could use it to try some weird embellishment…?

On the other hand I don’t see me really wearing this. First because I son’t see an occation. If it is so cold, that I want to cover my shoulders, I usually want to cover other parts of my body as well. And I don’t have any idea, how that might look on me…?

Diese süße Pelerine war im September 2007 in Burda.

Allerdings nur bis Größe 42, was schon mal den halben Spaß verdirbt.

Ansonsten sind die Vor- und Nachteile ähnlich dem f.i.m.i. Modell. Er ist vielleicht ein bißchen länger und wärmt deswegen etwas mehr.

BWOF came up with this version of a tippet (is that the word?) int the september 2007 issue.

But only up to size 42, which would already make it quite tedious to change the pattern.

Apart from that the pros and cons are quite similar to the model above. The BWOF Version might be a bit longer, and therefore warming a bit more of the body.

Pelerine
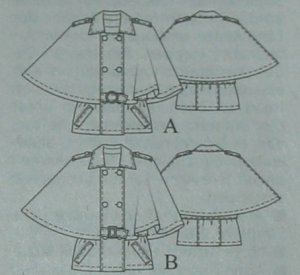
Wirklich gut gefallen hat mir schon beim Erscheinen dises Modell aus der Burda vom August 2007.

Das Problem ‘Wann tragen?’ bleibt auch hier, denn zur Arbeit trage ich meinen Laptop meist im Rucksack und da paßt nicht wirklich ein Cape drüber, wenn man nicht wie der Glöckner von Notre-Dame aussehen will. Das zweite Problem ist der Stoff, denn dafür kann ich mir nur eine Popeline (wie für einen Trenchcoat) vorstellen oder einen anderen Stoff für Wettermäntel. Und so etwas habe ich definitiv nicht in meinem Vorrat.

Zudem sieht es nach einem sehr aufwendigen Projekt aus, was nicht besser wird dadurch, daß auch dieser Schnitt in Größe 42 endet… (Der Arbeitsaufwand ist diesen Monat mal wieder ein Argument, denn zuerst kommt meine Mami eine knappe Woche, dann besuchen wir Freunde, die ein bißchen weiter weg wohnen und nach Paris geht es auch noch. Und irgendwo dazwischen muß ich ja auch noch Geld verdienen…)

What I really loved the moment it came out is this model from BWOF august 2007.

The “‘For what occasion can I wear that?’ problem remains. Because when I go out to work I carry my laptop in a backpack and a cape doesn’t fit over it. (Unless you plan to look like the hunchback of Notre-Dame. The second problem is that I see this model in a popeline or another raincoat like fabric. Which is something I definitely do not have in my stash.

Also it looks like a time consuming project, which doesn’t get better by the fact that Burda “allowes” this pattern again only up to size 42. (Time again is an issue this month. first my mother comes to see me for nearly a week, the we will visit friends who live a bit further away and also Paris is on this months schedule. And in between all that I have to earn some money,,,,)

Cape
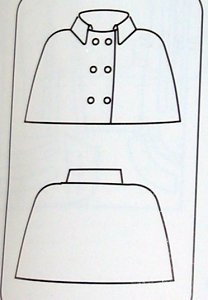
Und dann wäre da natürlich das Modell aus der aktuellen Burda. Es geht immerhin bis Größe 46 und hat auch eine vernünftige Länge.

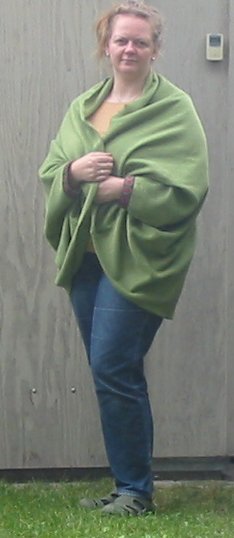
Allerdings… wie schon gesagt… Cape und Rucksack paßt nicht so gut. Und erwähnte ich es schon? Ich habe schon ein Wintercape, aus schöner Wolle. Das hält vermutlich noch ewig… Zumal ich es selten trage…

I did not forget the cape from this months BWOF. It is even up to size 46 and it has a good length to keep you warm.

If you do not wear backpacks, as I’ve mentionned above. And did I tell? I already have a cape. Made from a good, stabile woolen fabric. Which probabely never will wear out. Especially as I can only wear it rarely…

Ja und dann fiel mir noch diese Tunika auf, sie ist aus dem Maiheft 2006.

Wenn man den Schnitt genau anguckt… eigentlich ist es ein Poncho mit zusammengenähten Seiten. Und ein Poncho ist ja fast so was wie ein Cape…

Vorteil ist, es ist ein vermaßter Schnitt, also nicht sehr schwierg anzupasse. Außerdem aus dem Spektrum der Plus-Größern. Irgendeinen Baumwollstoff in passender Menge sollte noch vorhanden sein. Ich muß nicht bei Hitze mti dicker Wolle hantieren. Und wenn es als Tunika doof aussieht… dann kann ich gut noch ein Nachthemd brauchen… *g*

Allerdings frage ich mich, ob das nicht sehr am Thema vorbeigemogelt wäre?

Finally I noticed this tunic from BWOF May 2006.

If you look at the pattern… technically it’s a poncho with side seams. And a poncho is practically the same as a cape…

It would not be difficult to fit that pattern, as it does not seen to have a very precise fit. Also it is a plus pattern. I should have some cotton, big enough for this and I do not have to handle warm woolen fabric in a hot month. And if it looks stupid as a tunic…. I can do with some more nightwear…

But I’m not sure, whether that would not be a bit too far from the topic…?

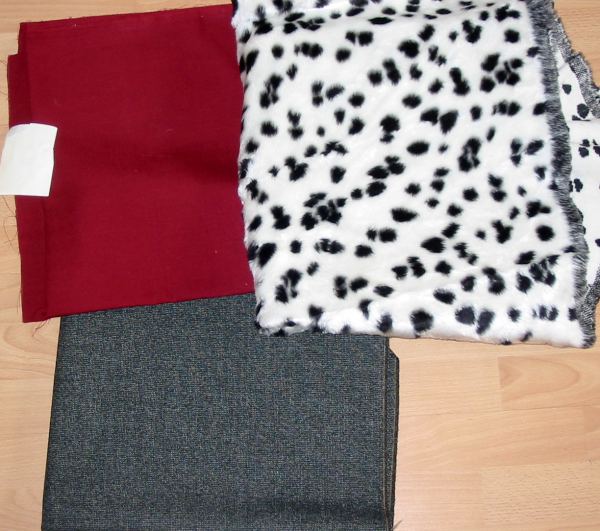
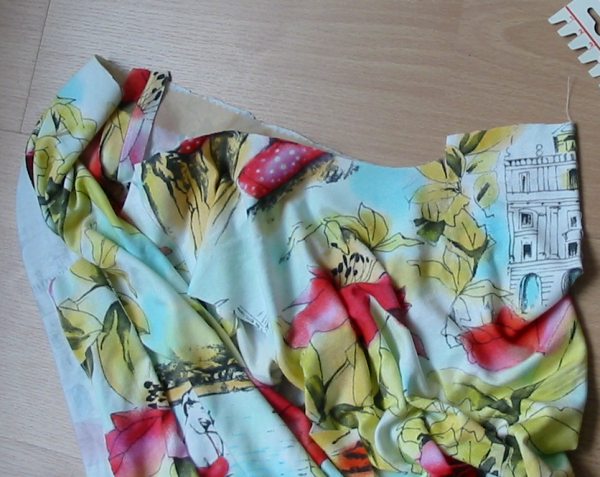
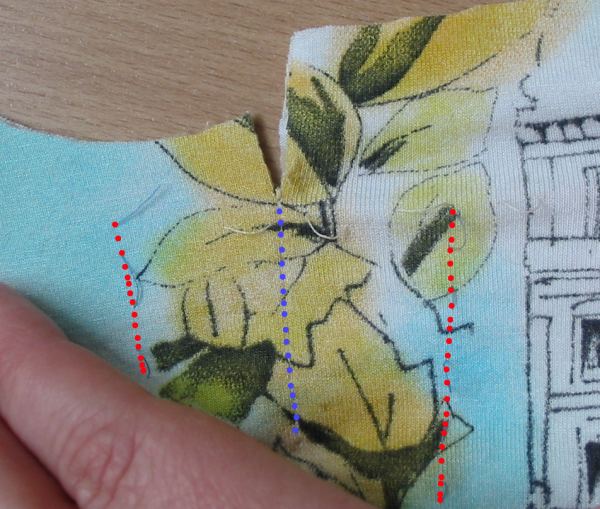
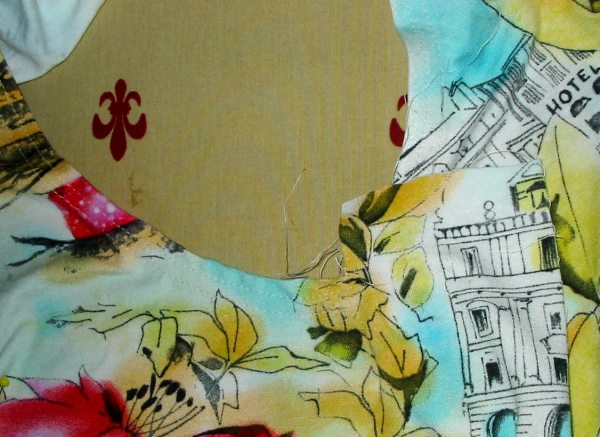
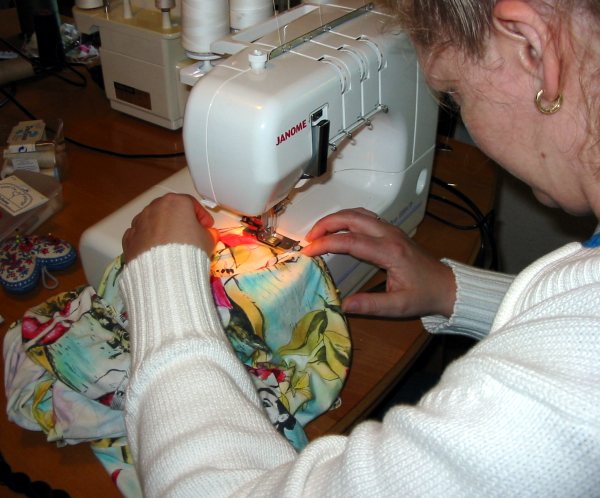
Nun ja, als nächstes muß ich mal meine Stofftruhe ausräumen und mal gucken, was so passen könnte… Kommentare und Vorschläge zu den Schnitten und dem Thema sind derweil höchstwillkommen…

Well, next thing will be diving into my fabric stash and see what might match any of the patterns. Meanwhile comments and suggestions are highly welcome…

Motiviertes Sommertop mit Raffung

Top mit RaffungSo, es ist fertig mein Juli-Top. Und es könnte doch noch Sommer kommen. Diesmal gibt es gleich mehrere Bilder, denn die hat Frau mhs gemacht, das ist doch einfacher als mit Stativ und Selbstauslöser…

I finished my Sew Along for July. This time I’ll post even several pictures, because Frau mhs took pictures which is much more comfortable than doing it myself with a timer and tripod.

Ich bin mit dem Ergebnis sehr zufrieden. Die Falte ist ein schönes Detail, sie geht selbst in diesem bunten Muster nicht unter unter. Und… das Shirt hängt schön locker über dem Bauch ohne formlos zu wirken.

Top mit RaffungI am very happy with the result. The gathers are a nice detail that remains visible, even in that busy pringt. And it falls gracefully over the tummy, without beeing shapeless.

Den Schnitt werde ich auf alle Fälle behalten, denn das Detail gefällt mir. Ich kann es mir auch an anderen Shirts gut vorstellen.

I will keep that pattern for sure. I like the gathered detail so much, that I can imagine using it for other shirts, too.

Ich weiß, daß die Farben nicht optimal für mich sind, aber manchmal muß es eben trotzdem sein. Der Sommer kann kommen!

(Dummerweise war ich schon im Urlaub und bin außerdem kein Strandgänger, denn dafür wäre das Top perfekt. Oder vielleicht etwas länger und als Strandkleid?)

Raffung

I know the colours aren’t best for me, but sometimes… it has to be anyway. I’m ready for the summer to (finally) come!

(A pity that my holiday is already over. But I rarely go to a beach anyhow, because for that the top would be perfect. Also a good deal longer as a dress to throw over a bikini. If I wore one…)

Und da Frau mhs auch noch eine Detailaufnahme gemacht hat, gibt es die Fältelung auch noch mal von ganz nahe…

And as Frau mhs took a close up, too, here it is. That’s what the gathers look like in a busy fabric.

Ausschnitt im Detail (Teil 2)

(Nachdem die Arbeit heute unerwartet etwas kürzer ausfiel, geht es doch schon mit dem Shirt weiter…)

Nachdem die blauen Schnittlinien jetzt ausführlich behandelt wurden sind die roten Markierungen dran.

Auf beiden Seiten der Mitte werden die rot markierten Linien rechts auf rechts aufeinandergelegt und festgesteckt.

Bei mir sind die Stecknadeln dabei im Stoffalz, die langen Patchworknadeln leisten gute Dienste.

After having talked about the blue lines from all angles it’s time for the red lines.

The red lines heve to be matched. There are two red lines on the left of the middle and two on the right of the middle line. You have to match them, right side of fabric facing, on each side. then you pin.

My pins are in the fold of the fabric. The long quilting pins are very usefull for that.

Von der Rückseite her ist es vielleicht besser zu erkennen.

Die beiden Nadeln sind zu sehen.

Die vordere Falte mit ihrem angeschnittenen Besatz ist deutlich länger als die umgesäumte Ausschnittkante.

Man erkennt auch gut, daß der Stofflappen vorne breiter ist, sozusagen Stoffüberschuß vorne dran hängt.

Here a view from the wrong side.

You can see the grey pins.

And the front flap with its cut on facing is longer than the neckline that is already hemmed.

You can also see well, that the flap on the front is larger, there is some surplus of fabric.

Fältchen fixieren

Und jetzt muß noch der Stoffüberschuß besetigt werden.

Der Stoff wird einfach weggefaltet. Wie genau, darüber läßt sich Burda nicht näher aus. Auf dem Photo scheinen eher breite Falten zu einer Seite gelegt zu sein.

Ich habe einfach ein bißchen herumprobiert und mich entschlossen, die Falten von der Mitte aus zur Seite zu legen und den Stoff in kleine Falten zu legen.

Die langen Quiltnadeln leisten mal wieder sehr gute Dienste….

Now I have to manage the surplus fabric of the front flap.

You habe to fold it, but how exactely Burda doesn’t tell. On the photo it looks as if they had made few deeper folds and all to the same side.

I played around a bit and finally decided to make small and (more or less) symmetrical folds from the middle to the sides.

And again the long quilting pins are very usefull….

Fältchen nähenBeim nächsten Schritt läßt einem die Anleitung viel Freiheit. Die Falten müssen fixiert werden und zwar etwa einen halben Zentimeter oberhalb der fertigen Ausschnittkante.

Da über so viele Stecknadeln nicht einmal ich drübernähen mag, wollte ich zuerst heften und dann mit der Maschine nähen.

Aber wenn ich es eh von Hand machen muß… kann ich genauso gut gleich einen passenden Faden nehmen und die Falten von Hand festnähen.

Dann werden die Stecknadeln herausgezogen und eine zweite Handnaht fixiert die Falten nahe an der Schnittkante.

Da man den Faden natürlich nicht gut sieht, habe ich beide Stelle mit einem Pfeil gekennzeichnet. (Außerdem habe ich gelernt, wie man mit gimp einfach gerade Linien ziehen kann… :o) )

Genäht habe ich einfach mit kleinen Vorstichen. Es muß keine Belastung aushalten, nur die Falten fixieren.

For the next step the instructions give you a lot of freedom of choice how to do it.

You have to staystitch the gathers somehow.

Well, even I wouldn’t sew with my machine over such a bunch of pins, so first I wanted to baste by hand and then stitch with the machine.

One second of consideration broght me to the decision to baste with a matching thread and small stitches. That is enough to keep the gathers in place.

As the stitches are not very well visible on the pic the two arrows show where to stitch: One line of stitching about 0.5cm above the height of the finished neckline and a second one close to the cut end of the facing.

Those are handstitches really anyone can do, because they do neither have to be regular (they will be inside) nor does the seam really have to “hold” anything, except a bit of fabric together.

FesthexenUnd dann sind wir schon fast fertig.

Der angeschnittene Besatz mit den fixierten Falten wird einfach auf die linke Stoffseite geklappt und mit ein paar Handstichen festgenäht.

Ich habe die Kante mit Hexenstich festgenäht und wie man sieht sind die Stiche nicht sehr gleichmäßig, aber sie halten. Und sie sind innen….

Fertig!

Then you are nearly done.

You just flip the gathered facing to the wrong side of the fabric (or garment) and stitch in place with some handstitches.

I did some catchstitch (if that’s it in English?) and as you can see the stitches are not very regular. But they hold everything in place. And they are inside…

Done!

Licht aus, Spot an, der Ausschnitt im Detail (Teil 1)

Ausschnitt bebügeln und Falten markierenSo, falls ich nicht die einzige Doofe bin, die den Ausschnitt nicht auf Anhieb verstanden hat, gibt es jetzt hier die ausführlich bebilderte Anleitung. Von meiner Interpretation der Anleitung. *g* (Und wir reden über Modell 115 aus der Burda 10/2007.)

Zuerst habe ich die Ausschnittkante bebügelt. Normales Nahtband auf die Schulternähte. Eigentlich wollte ich ja Formband von Vlieseline nehmen, aber entweder finde ich meinen kleinen Vorrat nicht mehr oder ich habe es aufgebraucht. Wer weiß das schon so genau… *hüstel*

Also mußte mal wieder mein “Alleskönner” G785 herhalten. In etwa 3cm schmale Streifen geschnitten und dann entlang der Ausschnittkante aufgebügelt. Da diese Vlieseline nicht so gut um die Kurve zu legen ist wie Formband, muß die gute alte Technik des Einschneidens und Überlappens herhalten.

Die gepunkteten Linien entsprechen den roten und blauen Linien in meinem Schnittmuster. Blau ist die ursprüngliche vordere Mitte, rot sind die neuen Markierungen. Ich bügle nur etwas über die vordere Mitte hinaus auf. (Am Rückenteil wird der Halsausschnitt normal verstärkt.)

In case I’m not the only one who had problems to understand the front pleat detail, here is what I did with a lot of pics. My interpretation of BWOF explanation. (I’m taking about BWOF 10/2007, shirt 115.) First I reinforced the front (and back) neckline. Vliseline (Freudenberg) has a great product for that, it’s called “Formband” in German. (It’s a fusible tape that curves easily.) Only I either dont’t have any of it any more or I can’t find it… who knows…

links auf links legenSo Vlieseline G785 had to do. 3cm large strips and as the Vlieseline does not bend as the tape does it was the good old slash and overlap technique that had to do the trick. The blue dotted line corresponds to the (blue) front middle on my pattern, the red dotted lines corresponds to the red lines in my pattern. You can see that I fused only a little beyond my front middle, not the whole neckine. (The back neckline gets completly interfaced according to the BWOF instructions.)

Dann kommt noch ein Schritt den ich auf Anhieb verstanden habe… das Top an der vorderen Mitte falten und zwar links auf links.

Dann wird auf der blauen Linie eine kleine Naht genäht, wie im Schnitt eingezeichnet. Also so etwa sechs Zentimter lang.

Nicht anleitungsgenmäß war, daß ich danach die Schulternähte geschlossen habe. Die Burdalösung zuerst den Ausschnitt säumen und danach die Schulternähte zu schließen war mir zu unsauber.

Next step was last one I did understand immediately.

Folding the front along the midlle, wrong sides together.

And then I’ve made a small seam on the blue line. Like about 6cm long, as indicated in the pattern.

Not according to the pattern was my next step: closing the shoulder seams. Burda sews the necklines first and then the shoulder seams. But that is a solution that doesn’t look neat to me.

vorsichtig EinschneidenHier eine Nahaufnahme vom nächsten Schritt. Die Linien sind wieder blau und rot nachgepunkted. Irgendwie ist das übersichtlicher als auf dem Stoff…. da waren meine Markierungen nicht so deutlich. Ich habe die Linien durchgeschlagen und zwar mit feinem Faden, denn wer will hinterher schon große Löcher im Stoff haben?

An der Naht wird die Nahtzugabe eingeschnitten. Ich habe beide Lagen einzeln geschnitten, aber da der Stoff gefaltet ist und offensichtlich recht sauber aufeinander liegt, liegen die Einschnitte natürlich auch aufeinander.

Here a close up of the next step. Again the lines are dotted according to the pattern. The blue line is the seam. Somewho that is much clearer on the pics than on the fabric… I had thread traced the lines with a fine thread, so it was not super visible while working on it. But who wants holes in the fabrich from thich thread…

Where the seam is you clip the seam allowance. I did clip each seam allowance in a single layer.

Ja und dann war es auch schon Zeit für eine kleine Odyssee zu Frau mhs. Denn diese hat eine Janome Cover Style und eine (neue) Babylock imagine, das will ja getestet werden….

(Das mit der Odyssee kann man ruhig wörtlich nehmen… wir hatten an dem Tag beide kein Auto. Von mir zum nächsen Bahnhof ist kein Problem, auch von dem Bahnhof zum ihrem Bahnhof ging das noch gut. Aber dann war ein Bus fällig… und natürlich kam mein Zug (pünktlich) zwei Minuten nach Abfahrt des Busses. Also 18 Minuten warten. Dafür hält der Bus direkt vor ihrer Tür.

Rückwärts nimmt der Bus hingegen eine andere Route, also erst mal eine kleine Wanderung zur Straßenbahn, die mir davon fährt, während ich den Ticketautomaten versuche davon zu überzeugen, mir eine Karte zu verkaufen. Frau mhs kennt noch ein paar Tricks, also erst mal eine Station zurück, dort fahren Busse… die pünktlich fahren, so daß ich von der noch geschlossenen Bustür aus dem verspäteten Zug beim Abfahren zugucken kann… :o) Also 30 Minuten auf den nächsten Zug warten. An einem extrem gemütlichen Bahnhof… nicht daß dort keine Züge führen, oh doch, ungefähr alle drei Minuten einer. Leider alles Güterzüge… :o)

Aber was tut man nicht alles für das Nähvergnügen… 😉 )

And then it was time for a little odyssee to Frau mhs who does not only own a Janome Cover Pro but also a (new) Babylock imagine. Had to be tested… 😉

(But if I say “odyssee” I mean it. We both didn’t have a car that day. From my house to the next train station is easy. Also to get to the train station next to her. But then it means bus. Which leaves in time therefore two minutes before my train arrives (also in tine). So 18 minutes waiting for the next bus. Which stops nicely in front of the Frau mhs house.

But not in the other direction. On it’s way back the bus does not go to the train station, so a walking tour to the next tramway, which leaves while I’m trying to get a ticket. But Frau mhs knows some more tricks… so we take the tramway in the other direction to catch a bus to the train station. Which arrives perfectly in time so I can see my not so in time train leave while the doors of the bus open… 😮 ) Again waiting, this time for 30 Minutes. And this train station is sooo cozy and nice… it’s not that it was deserted and without trains, oh no. About one train every three minutes… freight trains… :o)

But the pleasure of sewing with friends is worth a lot… :o) )

Dann kam die Cover auch schon zum Einsatz. Ich habe den Saum einfach umgebügelt und festgecovert. Vom der Naht in der vorderen Mitte einmal rum bis zur anderen Seite.

Die Falte vorne bleibt frei.

(Und ich stelle jedesmal fest, daß ich wirklich noch kein Coverspezialist bin, irgendwie reißen bei meinen Stoffen immer wieder die Greiferfäden. Dabei ist die Maschine frisch eingestellt. entweder muß ich das noch üben, oder meine Stoffe sind zu kompliziert….)

Then it was already time for the cover machine. I just pressed the seam of the neckline to the left side and covered from the right side. Starting at the seam in the front middle and ending on the other side of the same seam.

The front flap remains unstitched and free.

(And I learn again that i’m not a cover-specialist. The looperthread tends to break. Not on the testscrap. of course… The machine has just been serviced, so I probably need more training. Or less complicated fabrics… *g*)

Covern

Und da Frau mhs nichts zu tun hatte außer mich zu überwachen, hat sie ein Bild gemacht von meinem Kampf mit der Cover.

Aber von der rechten Seite sieht es gut aus… und auf der linken hilft Fraycheck. *g*

And as Frau mhs didn’t have anything to do but supervising me she hat time to take a pic from me and my fight with the machine.

But the right side looks good ond for the wrong side there is Fraycheck… *g*

Anschließend kommt denn noch ein bißchen stecken und viel falten, das kommt im nächsten Eintrag.

For the shirt there is a bit pinning and a lot of folding left. That will be for the next entry.

Burda beklauen…

… ist mein Motto für diesen Motivationsmonat. (Zeit wirds, denn der Monat nähert sich seinem Ende…)

Stoff und SchnittEinen Stoff habe ich für mein Sommertop in meinem Lager gefunden.

Vor einem (oder schon zwei?) Jahren habe ich ihn in Paris bei Sacre Coupons gekauft, ein schreiend bunter Baumwolljersey mit einem Retromuster.

Badenixen und Strandhotels erzeugen Capri-Feeling. (Beinahe wie in einem dieser 60er Jahre Filme…)

Zuerst wollte ich nur ein ganz schlichtes ärmelloses Top machen, der Stoff ist auffällig genug. Aber da war doch noch dieses Shirt mit dem interessanten Ausschnitt in der Burda vom letzten Oktober.

Nicht so tief, aber mit dieser gerafften Falte vorne. Nun habe ich keine Lust mich auf eine Runde Schnittanpassung mit Burda einzulassen, also muß ich dieses Detail “klauen” und an meinen bewährten Schnitt für ärmellose Shirts “anflanschen”.

“Stealing from Burda” is what I’m planning to do for this months sew along. (And it’s more than time… the month is closer to the end than to the beginning.)

This months the topic is “Summertops” (which in German usually means something sleeveless) and the fabric comes from my stash.

I bought it last summer (or was it two years ago?) at Sacre Tissus in Paris, a very bright cotton jersey knit with quite a retro design.

Bathing Ladies, blue sea and hotels on a beach,no, not Hawai, Capri in Italy was very popular for holidays amongst Germans in the 1960th. (And even more popular for musical films, as most people couldn’t afford a holiday there at that time. . )

But back to sewing… originally (means when I bought the fabric) I had intended to make just a simple sleevless top, as the fabric is busy enough. But there was this top in the BWOF, october 2007. I really did like the neckline detail. Not as low as Burda puts it, but the flap itself I wanted to have. And as I do not feel like another round of fitting issues with Burda I do have to “steal” this detail and attach it to my basic pattern for sleevless tops.

Schnitt erstellenNormalerweise ist das ja auch nicht so kompliziert. Wenn man mal verstanden hat, wie der Schnitt funktioniert.

Nur hatte der Burdaschnitt irgendwie mehr Markierungen im vorderen Bereich als erwartet. Und daß die “vordere Mitte” nicht der “vorderen Mitte” meines Basisschnittes entsprechen kann war irgendwie auch klar. Denn vorne muß ja wegen der Falte mehr Stoff hin.

Also ab ins Anleitungsheft, nachlesen, wie das verarbeitet wird.

Doch irgendwie… Knoten im Hirn. Ich verstehe nur Bahnhof. Was muß jetzt wohin gesteckt… genäht… ? Oder wie?

Kurzerhand kopiere ich mir den entscheidenden Teil des Schnittes auf ein Stück Folie und vollziehe die Verarbeitung nach. Denken mit den Fingern klappt besser, ich verstehe endlich, wie das gemeint ist.

Danach war der “Anbau” kein Problem. Die blaue Linie zeigt meinen Schnitt wie er vorher war, rot sind die Änderungen aus dem Burdaschnitt. Ich habe den Ausschnitt etwas tiefer gezogen (mein Shirt hat einen recht kleinen Ausschnitt) und dann die Falte “angebaut”.

Das sollte so klappen.

Da ich die Falte so schwierig zu verstehen fand, werde ich alle Arbeitsschritte photographieren und ein Tutorial dazu hier einstellen. Falls noch jemand Probleme damit hat…

Attaching the pleat shouldn’T be very complicated. As soon as you have understood how the pattern works.

Only here the BWOF pattern had some more of those marks than expected. That the “middle front” did not have to match the “front middle” of my pattern was clear, it needs width for the pleat, but what the heck…?

I’m reading the instructions. Normally that helps. But not today… Understanding doesn’t come… what has to be pinned… sewn… where?

Finally I copy the front of the pattern to a scrap of plastic and start folding and pinning. Thinking with my hands works better and finally I understand what I have to do. Adding the pleat then to my pattern then was easy. Blue is my pattern, red are the Burda details. I should be working like that.

Because I found the pleat quite complicated and the instructions not super clear I’m taking pics of the process and will post a tutorial here. In case I’m not the only one who has a problem with that…

Das große Ganze…

… habe ich auch noch nicht gezeigt. Vom Mai wohlgemerkt. *hüstel*

Schnitteile JackeAlso kommen hier erst einmal die Schnitteile der Jacke.

Unten auf dem Bild sind die beiden Rückenteile, darüber der Sattel. Oben liegen die beiden Vorderteile. Und rechts der Ärmel.

Auf dem Bild fehlt noch der Kragen und die Schulterklappen. (Von letzteren habe ich leider kein Bild gemacht. Für die Knopfblende und den Bund gibt es kein Schnitteil, die sind rechteckig und ich habe sie einfach vermaßt und direkt auf den Stoff gezeichnet.

I’ve never shown the “big whole”… from may. neither the whole outfit nor the pattern of the jacket.

So here are the finished pattern pieces of the jacket: on the bottom of the pic the side and middle back pattern, above them the yoke and an top the side and middle front pattern. On the right side the sleeve.

Not on the picture ist the collar and also the epualets. (I forgot to take pictures of the latter one.) For the buttonstand and the “waist”band (which is not on waiste level) I made no patterns. They are rectangular and I marked them directely on the fabric.

Mai Outfit

Und hier endlich…. ein Bild vom Gesamtoutfit.

Ich war mir relativ unsicher, ob die Proportionen mit dem kurzen Jäckchen bei meiner Figur eine gute Idee ist.

Aber ich muß sagen, zu meiner eigenen Überraschung gefällt es mir tatsächlich. Und wenn ich genau hinsehe… Ich glaube mein Indienurlaub hat Spuren hinterlassen. Ein Kameez wäre länger, aber mit Churridar und einer Jacke (die auch länger wäre) würde es ähnlich aussehen.

Statt schwarzer Schuhe habe ich auch türkise und seit dem Schlußverkauf in Paris sogar weiße. (Na gut, off white…)

Eine Frage bleibt allerdings: Was für eine Handtasche paßt dazu? Ich könnte mir ja so ein oversized Riesenteil vorstellen (ein Vorteil wenn man dick ist, man kann beliebig große Handtaschen verwenden ohne auszusehen wie der sprichwörtliche Schwanz, der mit dem Hund wedelt…), aber wie genau sollte sie aussehen? Und welche Farbe?

Vorschläge? Ich bin offen für alles…

And here is finally the picture of the complete May outfit. I was not sure at all whether the cropped jacket was a good idea for my figure.

But to my own surprise… I like it! And if I give it a closer look… I think the holiday in India still shows. Sure, a kameeze would be longer, but with churridar and a typical jacket (which would be longer also)… it’s not so far of. I think.

Instead of black shoes I also could wear turquoise ones and since the summer sale in Paris I also own white (okay, off-white) ballerinas.

Remains one question: What kind of a bag/tote/purse/… do I wear with that? I could imagine one of those huge oversized ones (an advantage when you are oversized you can wear big bags without looking like the tail that wags the dog….), but what exactely should it look like? And what colour would be good?

Any ideas? I’d appreciate to hear of them…

Jacke RückansichtZu guter letzt auch noch ein Bild von der Rückansicht der Jacke.

Aufgenommen NACH einem Tag tragen und einem Abend herumsitzen, deswegen ist sie so zerknittert und die Rückenfalte ist aufgedehnt.

Aber ich denke die Details wie die Rückenfalte und der Sattel sind wenigstens gut erkennbar.

And finally I managed to take a picture of the back of the jacket.

It was taken after a day of wearing the jacket and a long evening sitting around, so it is wrinkled and the box pleat on the center back is opened up.

But I think you can at least see the details like the pleat and the yoke.

So, dann ist hiermit der Montivationsmonat Mai auch abgeschlossen… Ist ja erst Juli… (und zu kalt um das Outfit anzuziehen…. :-/ )

So finally the May sew along is done. It’s only July now… (and to cold to wear that outfit…:-/ )