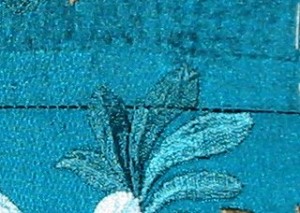
Matching the embroidery
Gestern habe ich immer noch viel „Kleingestichel gemacht, also Sachen die viel Arbeit machen, aber ein wenig sichtbares Resultat ergeben. Wobei das mit dem „wenig sichtbar“ hier durchaus Absicht ist. Denn die Stickerei soll an der hinteren Mittelnaht ja möglichst ohne Versatz ineinander übergehen. Und wie man das macht, zeige ich heute.
Yesterday I did more „little stitchy steps“, things that are time consuming, but don’t give a lot of visible results. On the other hand „not visible“ is sometimes what is intended, like on the back middle seam where I want the embroidery to match. Hot that can be done I’m going to show today.
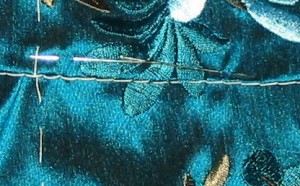 Der Trick dabei ist, daß man von der rechten Stoffseite her heftet. Man nennt die Technik auch „hohl heften“.
Dazu wird an einem Teil die Nahtzugabe weggefaltet. (Ich habe mit der Maschine eine Heftnaht entlang der Nahtzugabe gemacht um mir die Nahtlinie zu markieren.) Und dann wird das Teil mit der gefalteten Nahtzugabe auf das andere Teil gelegt und die Musterstellen werden passend festgesteckt.
The clue is to baste from the right side.
You fold the seam allowance of one of your fabric pieces to the left side and then you lay it on the other piece, matching the fold to the seamline of the other cut piece. You match the pattern (in my case the flower of the embroidery, but this works equally to match stripes or check or whatever.)
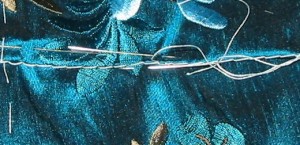 Dann wird geheftet. Weil ich einen feinen Stoff habe benutze ich Nähgarn und eine sehr feine Nadel.
Ich steche abwechselnd genau auf der Nahtlinie des unteren Teils ein…
Then it’s already time for basting. Since I have a fine fabric I am using sewing thread and a very fine needle.
I make one stitch exactely on the seamline….
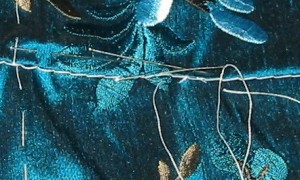 … und dann einen Stich genau in den Bruch des gefalteten Teils.
… and another stitch exactely in the fold of the other piece.
Und dann wieder in die Nahtlinie, und wieder in den Bruch… und so weiter.
(Wenn man farblich passenden Nähfaden nimmt und ganz kleine Stiche macht, dann kann man im übrigen auch so nähen. Das hilft auch, wenn man mal wieder nach dem Rückschneiden der Nahtzugabe auffällt, daß man die Ärmel falsch eingenäht hat…)
And so you go on, one stitch on the seamline, one stitch in the fold…
(If you take matching thread and then make tiny stitches you can also sew instead of baste. That is very usefull when you find out that you did sew the sleeves on the wrong side after you cut back the seam allowance…)
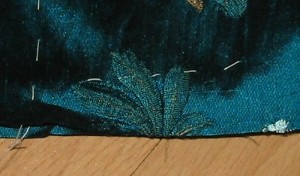 So sieht die Heftnaht dann von der linken Seite aus.
Da ich nur an wenigen Stellen die Stickerei auf der Nahtlinie habe, habe ich auch nur diese Stellen geheftet. Der Rest wurde nur gesteckt.
That’s what the basting looks from the wrong side of the fabric.
Since there are only few motives that cross the seamline I only basted those parts of the seam. For the rest pinbasting had to do.
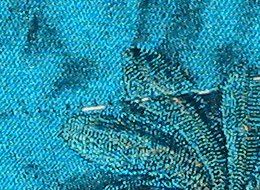 Anschließend wird genau auf der Heftnaht genäht.
Den Heftfaden hinterher wieder herauszuziehen macht nicht wirklich viel Spaß, aber das ist unvermeidlich…
Sewing has to happen exactly on the basting stitches.
Getting out the basting thread is no fun, but that cannot be helped.
Dann bügeln, non links, von rechts…
Then pressing, wrong side, right side…
*hüstel*
And it worked out… nearly….
Ich habe die Technik zwar schon ein paar Mal angewandt, aber nocht nie auf Stickerei. Das muß ich wohl noch mal üben, dadurch daß der Stickereistoff etwas steif ist, war es schwierig zu heften.
Aber dadurch daß die Stickerei an dieser Stelle Ton in Ton ist, sieht man es aus der Entfernung nicht mehr. Denn wie ich schon sagte… richtiges Auflegen ist die halbe Miete… 🙂
It’s not the first time I used this technique, but never on embroidered fabric. Some more practice will be good… The embroidery is a bit stiff so basting wasn’t that easy.
But since the embroidery has the same color as the fabric this little mistake is only visible from very close. As I said, placement while cutting is important. 🙂

