Low tech flatlock seam
Überraschung! Es gibt noch Nähtätigkeit! 😉
Eine Flatlocknaht ist eine Naht, die besonders flach ist, weil weniger Stoffschichten aufeinander liegen. Bei sehr dicken Materialien (wie Neopren) stoßen die Schnittkanten direkt aneinander, bei dünneren Materialien wie Wäschestoffen liegen die Stofflagen aufeinander wie bei einer offenkantigen Verarbeitung. Nur überdeckt ein Nähfaden die Schnittkanten.
Surprise, there is still sewing going on! 😉
A flatlock seam is a seam that is flat, because there are fewer fabric layers. For very thick material (like neopren) the cut edge will touch and not overlap, for thinner material like lingerie fabric you have the overlap like when sewing with open edges. Only in a flatlock seam the sewing thread will overcast the fabric edges.
Nun habe ich gelernt, daß nur eine echte Flatlockmaschine solche Nähte machen könnte. Allerdings konnte mir die Fachfrau zwar demonstrieren, wie anders eine Flatlockmaschine näht, sie konnte mir nur nicht erklären, wodurch sich die fertige Naht dann von einer anderweitig auf Stoß oder eben einfach überlappenden Naht unterscheidet. Also scheint es im Ergebnis doch nicht so anders zu sein, als die „hausgemachte“ Variante, die viele Overlockmaschinen beherrschen.
Nun habe ich keine Overlock, aber ich dachte, so was ähnliches müßte mit der normalen Nähmaschine auch hinzubekommen sein. Und habe mit ein paar Dessoustoffen Testläufe gestartet.
Now a specialist explained to me, that a „true“ flatlock seam can only be made with a „real“ flatlock machine. She could show me how a differently a flatlock machine works, but she couldn’t explain me the difference to the good old overlapping seam. So my guess is that the result isn’t that different from the „homemade“ version how many sergers can do.
Now not everyone has a serger, like me for example. And I wondered, it a similar effect might be possible with the normal sewing machine. I picked some lingerie fabrics and started testing.
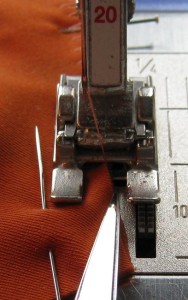
 Wichtig ist es zunächst, daß man die Stoffkanten wirklich gerade und sauber schneidet und auch die Nahtzugabe anpasst. Ich verwende einen sehr breiten Zickzackstich meiner Maschine und so breit muß die Nahtzugabe auch werden.
The first thing that is important is that the fabric edges are cut with precision and are not wobbly. You have to adapt your seam allowance. I have been using a very wide zigzag stitch and the seam allowance has to be the width of the stitch.
Dann wird die Oberfadenspannung gelockert. Die Stichlänge ist Geschmackssache, einfach mal testen. An meiner Bernina virtuosa 160 haben sich folgende Einstellungen bewährt: Zickzackstich mit Stichbreite 5 und Stichlänge 2, die Oberfadenspannung wird auf 2 reduziert. Allerdings verhält sich jeder Stoff anders, also erst mal testen.
My settings of the machine (virtuosa 160 from Bernina) is a zigzag stitch with length 2 and width 5, the thread tension of the spool thread reduced to 2. But test, it’s a matter of taste and also varies from fabric to fabric.
Als Garn habe ich AlterfilS 150 genommen. Wichtig ist, daß das Garn eine gewisse Elastizität hat. AlterfilS erfüllt diese Anforderung sehr gut. Es sollte auf auf alle Fälle ein gutes Polyesterumspinngarn sein.
Die Stofflagen werden normal aufeinandergelegt und dann wird exakt an der Kante entlang genäht, so daß der rechte Stich neben dem Stoff einsticht.
 As thread I choose the very fine AlterfilS 150. It is important that the thread has a certain elasticity. Not one you can feel with your hands, but it has to be there. AlterfilS is perfect for that. But whatever you take, choose a high quality polyester corespun thread.
Then you lay your fabric as normal and zigzag along the edge. The needle swings over the fabric and does sew next to the edge when it swings to the right. It does not sew into the fabric then.
Je nach Stoff und Nähfuß kann es sein, daß diese schmale Nahtzugabe sich beim Nähen etwas hochwölbt. Man kann sie dann einfach mit einem Gegenstand wie einer Stickschere vor der Nadel wieder nach unten leiten. Nicht aufdrücken, der Stoff muß ja noch transportiert werden können, nur unten halten.
(Den Standardnähfuß zu nehmen, der vorne geschlossen ist hätte es auch getan…)
Depending on the fabric and the pressure foot you use it can happen that the tiny seam allowance wants to stand up. That is not a problem, you can hold a small item (I used my embroidery scissors) in front of the needle to hold the fabric down. Don’t press, just hold it down. If you give to much pressure the fabric would stretch while sewing.
 (Taking the standard pressure foot would have been also an improvement in that case…)
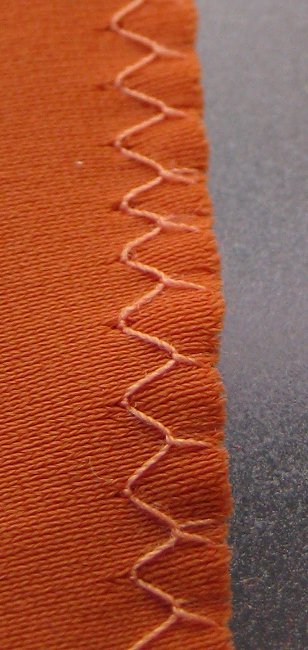
Von der oben betrachtet sieht das jetzt wie eine ganz normale Zickzack Naht aus.
Form the top it looks just like any ordinary zigzag seam.
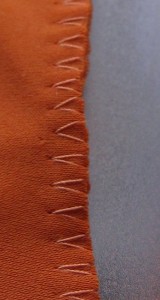
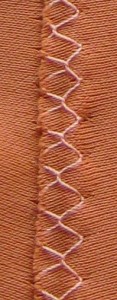
 Von Unten hingegen sieht es anders aus.
Denn dadurch daß die Oberfadespannung herabgesetzt wird, wird der Oberfaden natürlich auf die Rückseite gezogen.
If you turn it around it looks differently.
Since the upper thread tension was loosened the upper thread wraps around the edge and is visible on the other side.
 Diese lockere Fadenspannung ist für den nächsten Schritt nötig: Die beiden Stoffteile werden kräftig auseinandergezogen. (Deswegen ist es auch wichtig, daß der Faden selber eine gewisse Elastizität hat. Fehlt die, dann reißt der Faden.)
Dadurch klappen sich die Nahtzugaben um und liegen übereinander.
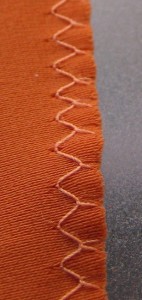
Auf der ehemaligen Unterseite (also die Seite, die beim Nähen unten war) sieht das auch schon sehr gut aus.
The loose thread tension is necessary for the next step: you pull on the fabric as if you wanted to pull the seam apart. (This is also why you need a certain elasticity in the thread. If it’s to rigid it will break.)
Now the seam allowances will turn and lay flat on each other.
 On the side of the bobbin thread it looks already fine.
Die andere Seite noch nicht ganz. Hier ist der Stoff noch ein wenig eingerollt. (Wem das so gefällt und flach genug ist, der kann das im Prinzip auch so lassen. Aber ich wollte es flacher.)
Ob das passiert hängt vom Stoff ab und wohl auch davon, ob die Schnittkante in Maschenrichtung oder quer dazu verläuft. Bei manchen Stoffen genügt es, die Naht abwechselnd längs und quer zu dehnen und die Kante rollt sich noch raus.
The other side is not as perfect. You see that the edge is still a bit rolled to the inside. (If you like it like that and think it is flat enough for your purpose you can leave it like that. But I wanted really flat.)
 If that happens or not depends on the fabric and also if you cut with the grain or crossgrain. Sometimes it’s enough to stretch the seam alternatively lenghtwise and crosswise to make the edge come out.
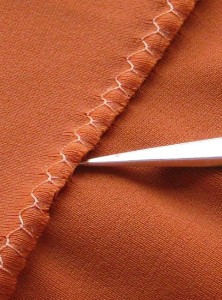
Bei dem Stoff aber nicht. Also hieß es nachhelfen.
Das ist mühsam, man kann entweder mit einem nicht zu spitzen Gegenstand die Stoffkante rausschieben oder sie von der anderen Seite mit einer ganz feinen Häkelnadel rausziehen.
Aber gut… dafür braucht man keine neue Maschine dafür.
On this fabric this was not enough, so I had to push/pull the edge out.
That takes some work, you can either push it out with a not to sharp tool or you can pull the edge out from the other side with a very fine crochet hook. Not really fun.
But you don’t have to buy another machine…
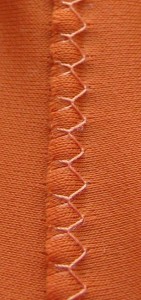
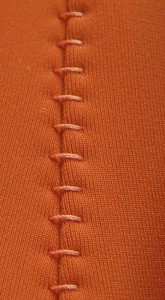
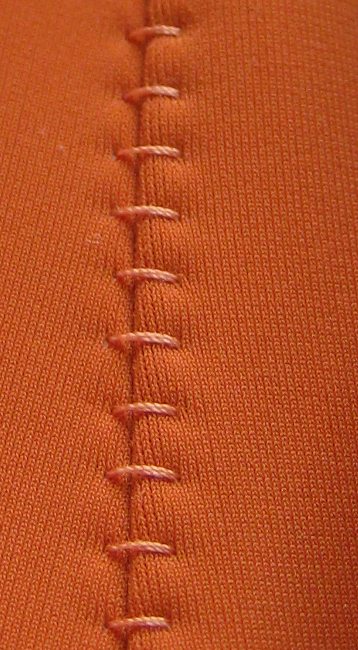
 Und die Mühe wird belohnt, der Stoff liegt flach. (Das Bild war vor dem Büglen.)
And you are rewarded in the end, the fabric lays flat. (The pic was taken before the final press.)
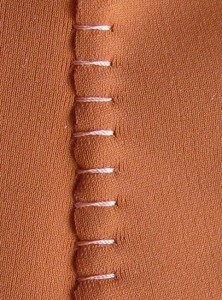
 Und so sieht es von der anderen Seite aus.
And that is what it looks from the other side.
Ich habe mich entschieden, die auf dem linken Bild sichtbare Seite nach außen zu nehmen, denn zum einen wollte ich den Faden als Verzierung, zum anderen ist die andere Seite flacher und weicher auf der Haut.
Das kann man aber machen wie man will.
I took the side you see on the left pic as „right“ side because I liked the decorative effect. The other reason is that the other side is flatter and softer on the skin.
But it’s up to you to choose.
Die Bilder zeigen auch die Grenzen der Technik: Die Stoffkanten sind nicht wirklich dicht eingeschlossen, es ist also nur für Stoffe geeignet, die nicht ausfransen.
Und durch die längeren Stiche gegenüber einer Overlock ist es vermutlich auch nicht ganz so elastisch. Ich habe es für ein Hemdchen und ein Panty verwendet, das funktioniert prima. Ob es für Sportkleidung auch geht müßte man erst mal testen.
Aber… die Technik erfordert keine teure neue Maschine und geht mit fast jeder simplen Maschine die Zickzack kann und die Fadenspannung verstellen läßt. 🙂
The pics also show the limits of that technique. The edges are not as well enclosed as with a serger so you can only use it for fabrics that do not ravel to much.
And since the stitches are longer as on a serger the resulting seam will not be as stretchy. I used it for a cami and for some undies and it does fine there. If you want to make sports gear you should test first if it can hold.
But it’s a simple technique you can make on nearly any machine that is able to sew zigzag and allows you to change the thread tension. No need to buy an expensive and new machine. 🙂

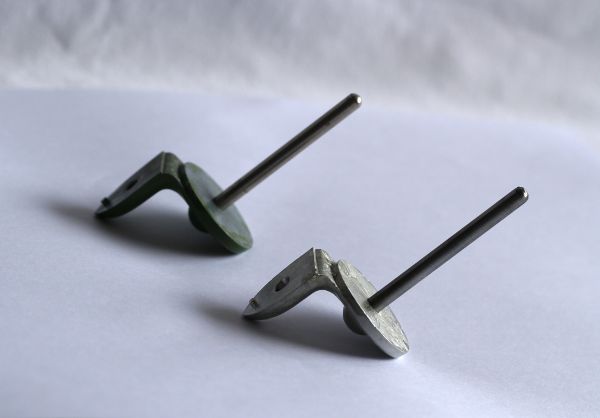 Hier jemanden zu finden, der einen neuen gießen kann war relativ einfach. Da kenne ich nämlich jemanden… hat zwar nach wie vor keine Webseite, aber falls jemand auch dieses Teil braucht, gebe ich die Kontaktdaten gerne weiter.
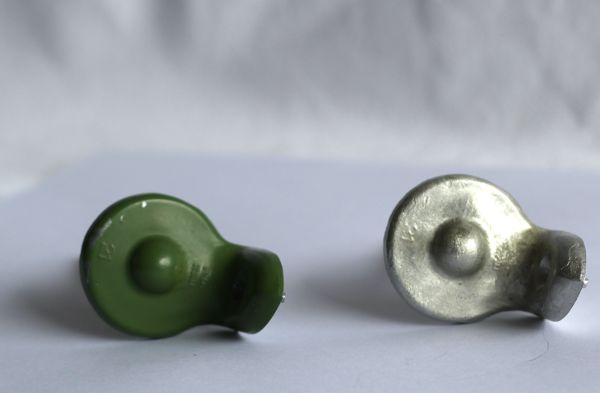 No, the really difficult part was, to find somebody who owns and old Elna 1 where this part is not broken yet. And who is willing to part with this piece for some days. That took several years.
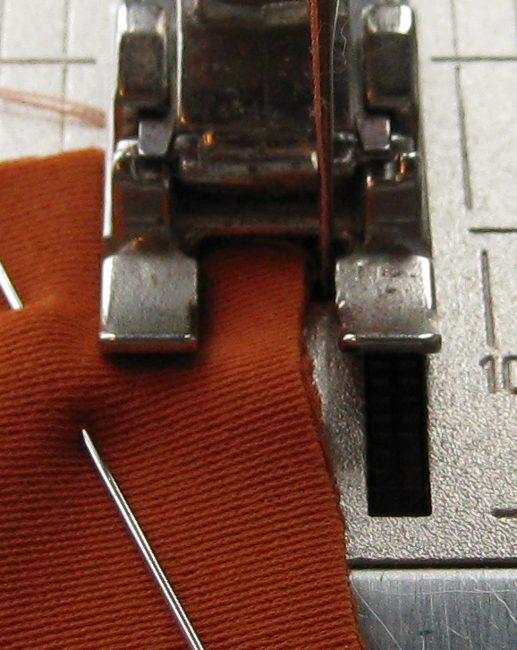


 Unglaublich… wer macht denn aus einer Nähmaschine eine Säge???