Of course I did not pull the fabric…
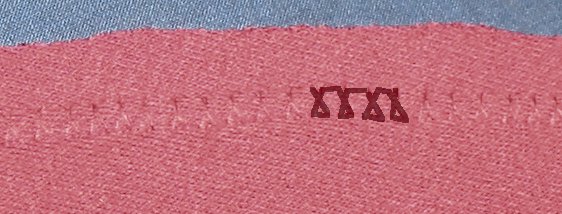
Den meisten von uns sind bei Jersey ja schon mal verdehnte Nähte begegnet. Bei uns selber und natürlich bei anderen, die wissen wollen, was sie den falsch gemacht haben.
Most of us have seen puckering seams in knits. Either on our own stuff, but then also with otheres who want to know what they did wrong.
 Dann werden diverse Fehlerquellen (z.B. falscher Nähfußdruck) ausgeschlossen und am Ende kommt dann natürlich die Frage, ob vielleicht beim Nähen am Stoff gezogen wurde. Worauf man die obige empörte Antwort bekommt… da zieht doch nichts am Stoff!
Then you exclude step by step the different problems (e.g. wrong foot pressure) and at the very end you ask if the sewer might have pulled on the fabric… which will give you the answer from above. See, the fabric is relaxed, nothing pulls it.
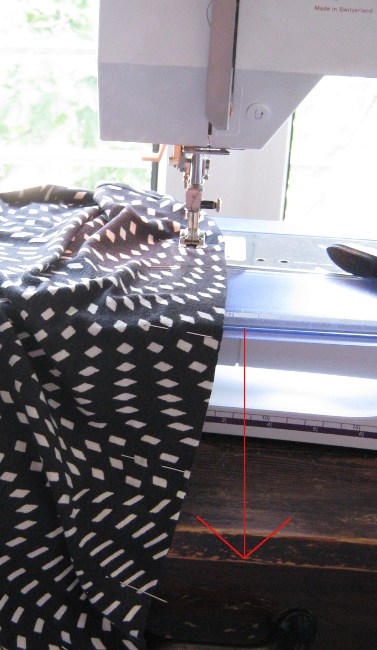 Doch dann treten wir mal einen Schritt zurück und sehen uns den ganzen Nähplatz an…. Meist steht unsere Maschine auf einem Tisch. Und das Kleidungsstück an dem wir nähen…. hängt dann teilweise vor der Maschine herunter Damit es gerade in die Maschine hineinlaufen kann. Und dann zieht eben doch jemand am Stoff. Beziehungsweise etwas… die Schwerkraft!
Then we stap back and take a look at the whole sewing place… Most of us have to put our sewing machine on a table. And the garment we are sewing is hanging down in front of the machine, because we want the fabric to run straight into the machine. But that means there is something pulling the fabric… it’s gravity!
Generell kann man sagen, je mehr Gewicht dran hängt und je weicher der Stoff ist, desto stärker der Effekt. Bei einem festen Baumwolljersey für ein Babyshirt wird er weniger spürbar sein, bei einer Damentunika aus weichem Viscosejersey hingegen stärker. Denn zum einen ist Viscosejersey ohnehin schwerer als Baumwolle, zum anderen aber ist auch das Stoffstück größer.
General rule is: The more weight the fabric has, the stronger gravity pulls. A firm cotton knit for a baby shirt will produce less of a problem than a long woman’s tunic or dress of soft rayon knit. Rayon is heavier than cotton anyhow and then the pieces of fabric are also larger and therefor weight more.
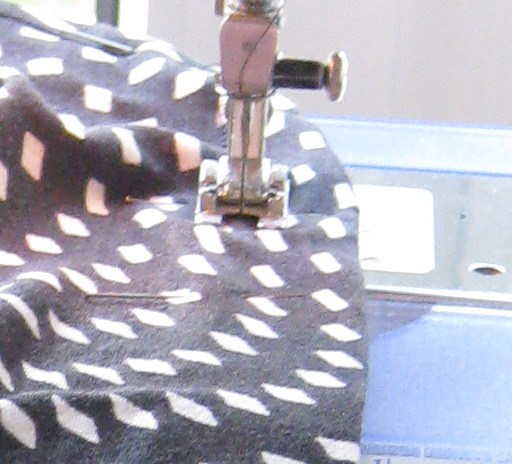
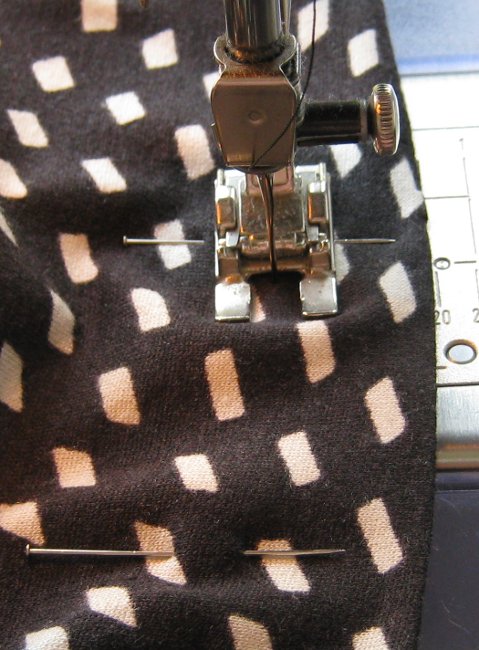 Wenn man es mit sehr weichen Stoffen zu tun hat, dann kann man den Stoff so führen, daß er vor dem Nähfuß in leichten Wellen liegt.
Especially if you have very soft fabric you can guide it in a way, that there are slight waves in front of the foot.
So ist sicher gestellt, daß an der Stelle, wo der Transport zugreift, tatsächlich kein Eigengewicht des Stoffes dran zieht.
So you can be sure that the moment when the feed dogs grab the fabric, the weight of the fabric does nott pull it down.
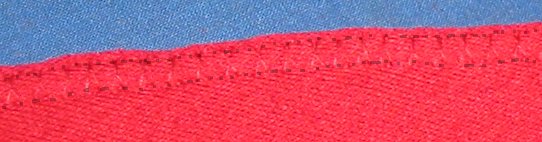
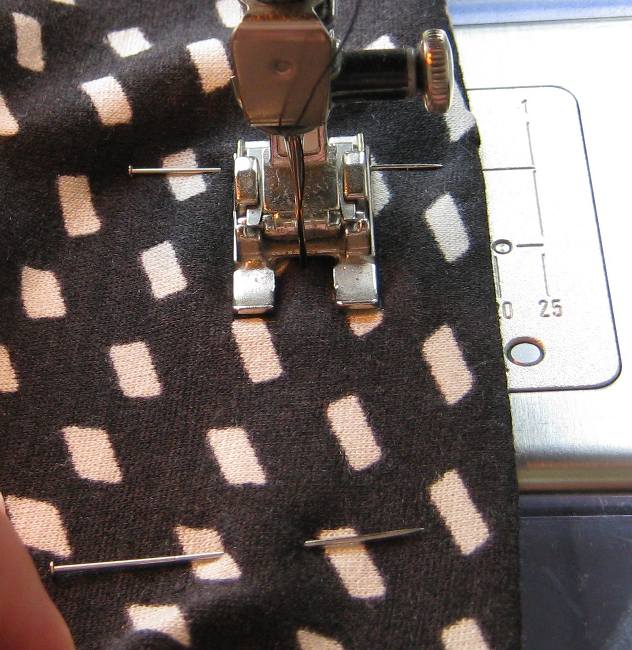 Hier habe ich einige Stiche weiter genäht und man erkennt, daß der Stofftransport seine Arbeit verrichtet hat und den Stoff glatt gezogen. (Weil ich keinen “nachgefüttert habe.) Aber nur genau glatt, der Saum (hier war es ein Saum, keine Naht) ist hinterher glatt.
Here the same situation some stitches later. The feed dogs did their job and pulled both layers of fabric under the needle. So both layers of the hem (in the pic it was a hem, not a seam, but seams are even easier than hems) remain smooth and flat. The machine could do its job and pull exactely so much fabric as needed for a flat and nun puckering hem. Or seam.
Man kann diese Wellen vor der Nadel übrigens auch benutzen, um zu testen, ob Nähfußdruck und Fadenspannung richtig eingestellt sind. Wenn die Maschine in dieser Konstellation beide Stofflagen gleichmäßig einzieht, dann paßt es. 🙂
Those waves in front of the needle you can also use to test the set up of your machine (foot pressure and thread tension). If the machine feeds two layers of fabric smooth into the needle without making them shift against each other the set up is right. 🙂