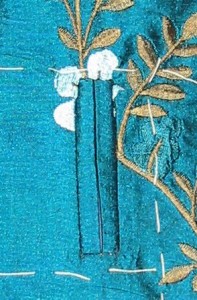
Fundsachen… h&h 2010

Findings on the h&h trade fair 2010

Die Vernunft hätte ja am Freitag geboten, mein Kleid fertig zu nähen. Aber da ich die Karte für die h&h hatte, konnte ich der Versuchung doch nicht widerstehen. (Und wollte auch nicht, ich gestehe.) Aber ich habe Vormittags noch gestichelt, sechs Stunden bis 18.00 Uhr reichten auch für platte Füße. Kaufen konnte ich ja glücklicherweise nichts, es ist eine Händlermesse. Trotzdem habe ich eine Menge mitbegracht, Eindrücke vor allem. Und noch ein paar Kleinigkeiten als Gedächtnisstütze für selbige. 🙂

Reason had told me to finish my dress on friday, but since I had a ticket for the h&h (trade show for professionals) so I couldn’t (and wouldn’t) resist the temptation. But I had done some sewing in the morning and six hours were still a lot of time to get aching feet. The trade show is for professionals only, so if you are not a show owner and want to order bigger amounts of everything, you cannot buy. So I couldn’t buy anything, but I got a lot of impressions. And also some things to help me remember those impressions. 🙂
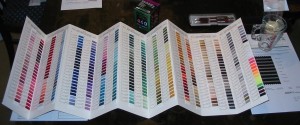
Farbkarte Stickgarn AlterfilDaß ich bei Alterfil vorbeischauen würde um mich noch mal für die Challengepreise und mein Weihnachtsgeschenk zu bedanken war natürlich Ehrensache. Und dann klebte ich schon wieder an den schönen Farben… für den Handel gibt es jetzt übrigens ein schickes und modulares Plexiglas-Display… aber diesmal nicht am Nähgarn, sondern am Stickgarn!

Das Super-Bright Polyester ist jetzt nämlich in 453 Farben erhältlich! Die Garne sind übrigens auch schon im Webshop erhältlich. (Und haben eine Pantone-Nummer, sind also sozusagen standardisiert, was gerade wenn man viel bestellt praktisch ist.)

Das nachtleuchtende Moonglow war mir hingegen nicht neu, das habe ich schon hier, nur noch nicht ausprobiert…

That I would visit the Alterfil booth to say thank you for the Challenge prizes and for my christmas gift was clear. And then I was again thrilled not only by the new chic looking and modular acrylic glass displays for shop owners, but also by the choice of colors. This time not only of the sewing thread but of the Super Bright embroidery thread! What started with some colours last year has arrived at a choice of 453 colors! (All available at the web shop also.) And I got a color chart. 🙂 Moonglow is not completely new in the show, because I already purchased some with my last order….
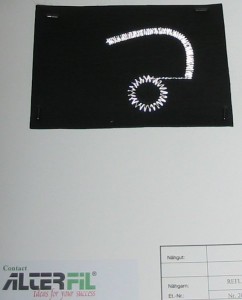
Reflexgarn AlterfilEin starkes “haben will” erzeugte auch das Reflexgarn. Mit Blitz sieht man wirklich gut, wie stark es reflektiert. Ganz feine Glassplitter sorgen dafür, wenn ich das richtig verstanden habe.

Was mir besonders gut gefällt ist auch, daß es ohne Licht relativ wenig glitzert, sondern eher neutral grau aussieht. So kann man es auch an Kleidung, Taschen oder Accessoires für Erwachsene verwenden, ohne daß man sich wie eine Barbie fühlt.

Weniger schön ist, daß es technisch noch nicht möglich ist, diesen Faden auf kleine Rollen zu spulen, so daß er im Moment nur auf großen Konen zu haben ist und mit 70 EUR dann doch eine ziemliche Investition darstellt. *schluck*

Another “wanna have” is this reflective thread. Flashlight shows how well it reflects the light! (Due to extremely fine glass particles if I got that right.)

What I like a lot is that the thread is not very “glitzy” in its “normal” state, but more a neutral grey. So it’s not only great for more security on kids gear, but also good for clothes or bags for adults that do not want to feel like Barbie.

Not so good is the fact that they have not found a technical solution to bring it on smaller spools so you can only have big cones which cost around 70 EUR each which is quite an investment. *ouch*

Der kleine Karton mit neun 200m Röllchen war auf der Messe ein Give-Away, aber es ist angedacht, solche kleinen Sortimenter auch im Webshop anzubieten, etwa passend zu aktuellen Modetrends. Auch neu und demnächst im Shop sind Schrägbänder. In Zusammenarbeit mit Topp, einem Hersteller für Bänder aller Art, der sonst im großen Rahmen für die Industrie herstellt (eine Rolle sind 140m) werden zwei Qualitäten in verschiedenen Breiten und Farben angeboten werden. Passend zum Faden (oder umgekehrt) und in handhabbareren Rollen von 20m.

The small box with 9 spools of 200m was just the give away but there are plans to offer boxes like that in the shop, for example variations according to fashion trends. Another new idea that will arrive in the shop soon are bias tapes. In cooperations with Topp, a producer that normally cuts for industry (so one spool means 140m) they will offer bias tapes in two qualities and in many colors. Fitting the threads (or vice versa) and in more convenient spools of 20m.

Na und nachdem ich dann auch schon die Pralinen, die Kugelschreiber und die Tasse von Gritzner in die Hand bekommen habe, habe ich auch mal einen Blick auf die Maschinen geworfen und mir das mal alles erklären lassen. Den Gritzner war doch mal die von Pfaff als Billiglable verwendete schon lange nicht mehr existente Marke?

Aber zum Anfang… Pfaff wurde ja auch vor einigen Jahren aufgekauft und stellt auch seit einigen Jahren in Deutschland keine Haushaltsmaschinen mehr her. Die Produktionsstraßen der alten Maschinen wurden in den Iran verkauft und produzieren dort weiter. Und diese Maschinen werden schon seit einiger Zeit auch nach Deutschland importiert. Jetzt hat der Importeur zu den Maschinen (praktischerweise der Sohn von Herrn Seitz von Alterfil…) inzwischen auch die Rechte an den Marken “Gritzner” und “Kayser” für Deutschland erworben. Also laufen die “neuen alten” Pfaffmodelle künftig unter dem Namen Gritzner in Deutschland. Wer also die gewohnte Technik der 80er nicht aufgeben will, kann sie auch frisch gefertigt im Fachhandel erwerben. Und… drei der Modelle werden seit ganz kurzer Zeit auch wieder in Deutschland zusammengesetzt. Mal sehen, ob da wieder Kultmaschinen draus werden.

Alterfil was not alone in the booth, they shared with Gritzner (where the son of Mr Seitz form Alterfil is the owner). So Gritzner was a german brand before they were bought by Pfaff very long ago and used as a cheap label. And… now? But information is why those shows are so valuable. Pfaff has new owners for years already and they stopped production of home sewing machines in Germany some years ago. The machinery was sold to Iran and went on making sewing machines. Those were imported back to Germany. Now the importer also got the rights to use the brand names “Gritzner” and “Kayser”. So in Germany the “new old” Pfaff models are sold now under the traditional name “Gritzner” in Germany. So for those who need a new machine but do not want to give up their 1980th technique those machines might be an alternative. Let’s see whether they will also become cult…

Die neue 3er Serie bei Bernina habe ich mir natürlich auch mal angeguckt. Das silbrige Design der 330er und 350er spricht mich ja nicht so an, denn der “gebürstetes Edelstahl”-Look ist inzwischen so oft aus Plastik nachgemacht, daß er nicht mehr wirklich wertig wirkt. Das Display mit heller Schrift auf schwarz ist auch nicht ganz mein Geschmack, aber an der Bernina 380 wird das Design dann rund. Und auch die Funktionen gefallen mir. Neben dem Kniehebel und einer großen Stichauswahl gibt es sogar einen Geschwindigkeitsregler und die Möglichkeit, ohne Fußpedal zu nähen. Nur bei einem angestrebten Preis von knapp 1400 EUR dürfte meiner Meinung nach auch ein verstellbarer Nähfußdruck noch drin sein. Das ist eine verschenkte Möglichkeit. (Aber vermutlich “dürfen” die Nachfolger der activa-Serie diese Funktion nicht haben…?)

Of course I checked also the new machines from Bernina. The design of the 330 and 350 I did not like to much and why the display is white on black… who knows? But on the Bernina 380 the elements fit together. And the machine has nearly all you need, from knee lever to a good choice of stitches, the possibility to sew without a pedal and a speed control on the machine. Only I miss the adjustable pressure foot, for nearly 1400 EUR retail price that should have been possible. (But since the 3 series will replace the activas this function is not “allowed”…?)
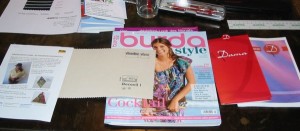
Mitbringsel von der h&h 2010Überraschenderweise hat sich Frau Mitsch von Vlieseline auch an mich erinnert. Und mir das neue Decovil I gezeigt. Es ist aufbügelbar und mit der wildlederartigen Oberfläche kann man es direkt als Sohle für Puschen verwenden. Oder als Einlage, wobei ich natürlich gleich an Taschen denke. Es ist nämlich nicht so steif und knickanfällig wie Schabrackeneinlage aber deutlich fester als Volumenvlies. Sollte die perfekte Taschenverstärkung ergeben, aber auch für Gürtel o.ä. prima.

At the Vlieseline booth I detected the new Decovil I. It is a fusible non woven with a suede like surface and you can use it directely as sole for sewn slippers. Or as interlining for bags, because it is stable and does not get permanent creases as easily as other stiff and stable interfacings. Of course also suitable to make belts or hats.

Da mir die Entwicklung der Burdastyle über das letzte Jahr im Großen und Ganzen gut gefallen hat bin ich zum Loben zu Burda gegangen. Und wurde mit einem aktuellen Heft belohnt, was mir sehr zu pass kam, denn ich war tatsächlich noch nicht bis zum Kiosk gekommen. (Ein paar Anregungen konnte ich mir dann auch nicht verkneifen, etwa bei Braut- oder Abendkleidern nicht eine einfache, sondern eine adäquate Verarbeitung zu erklären. Und generell auch mal “schwierigere” Techniken zu erklären. Muß ja nicht jeden Monat sein, aber so ein oder zwei mal im Jahr an einem besonderen Modell… Wobei ich so zwischen den Zeilen verstanden habe, daß solche Techniken wohl in viel Mehrarbeit für die Redaktion resultieren. Weniger beim Erstellen der Anleitung, sondern hinterher, wenn Leserinnen anrufen, die es nicht verstanden haben und dann telefonisch Support brauchen. Aber als Buch könnten sie sich sowas vielleicht eher vorstellen. Auch das fände ich gut, denn Couture- und Schneidertechniken findet man momentan vor allem in Englischen Büchern und die kann hier halt nicht jeder lesen.)

Since I liked the over all developement of the Burdastyle magazine I went to their booth to tell them. And got the april issue which is perfect, because I hadn’t had time to buy one until then.

Über den Stand von Dama aus Spanien bin ich gestolpert, weil sie Klöppel hatten. (Wollte ich ja schon immer mal lernen, ein Buch habe ich auch dazu…) Um dann festzustellen daß sie eine metallverarbeitende Fabrik sind, die neben Fingerhüten vor allem Nadeln aller Art herstellt. (Und lustigerweise ihren Ursprung in Aachen haben.) Wirklich schön waren übrigens auch die Klöppel aus Glas und die nette Dame sagte, man könnte die wirklich verwenden…?

Dama from Spain attracted me because they had bobbins for lacemaking. Then I found out that they are a metallurgic fabric and produce all kinds of needles and pins. (And funily the company has the origins in Germany…) Very beautiful the crystal bobbins they had. They nice lady said they can actually be used…?

Liest noch jemand? Oder aufgegeben? Ich glaube, über die “Wollfindungen” erzähle ich ein andermal… 😉

Anyone still there? Everyone gave up? I think about my “wooly findings” I’ll write another day… 😉

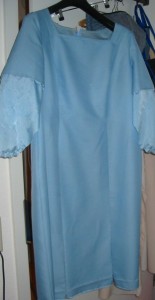
Fertig?

Finished?

Inzwischen habe ich ja die Rückmeldung bekommen, daß einige doch gerne wüßten, ob ich fertig wurde…

Nein, natürlich nicht. Aber ich hatte es trotzdem an. 🙂 (Bilder gibt es noch keine.)

I know, the question is whether dress and jacket were finished or not… well, the dress was not finished, but wearable. 🙂 (No pics yet, sorry.)

Und es war fast fertig… die Jacke hat es geschafft, den Kleidsaum und einen Teil der Belege hatte ich am Freitag noch angenäht, bevor ich auf die h&h losgezogen bin. Und dann stichelte ich im Hotelzimmer Samstag Abend. Mein Plan, den Rest mit Sicherheitsnadeln zu befestigen scheiterte daran, daß die mitgenommenen Sicherheitsnadeln derart stumpf waren, daß sie nicht wirklich durch den Stoff kamen. Um das Futter am Reißverschlußschlitz zu befestigen (je einmal auf Taillenhöhe) reichte es gerade noch, aber das war es auch.

And it was mostly finished. The jacket was done, the dress got some “hotel room sewing” and Saturday hight only the opening for the zip in the lining was not attached yet (here two safety pins made what was necessary) and one of the vents didn’t have the lining sewn to the facing.

The idea was to fix that also with safety pins but those I had taken with me were so dull that the would not go through the fabric. So I just made one big stitch at two locations and a knot to secure it. That was enough for one day. And will be easy to remove.

Aber da ich an drei Schlitzen das Futter auch noch angenäht bekam, blieb nur ein Schlitz übrig und da habe ich einmal unten und einmal auf halber Höhe einen Faden durch Beleg und Futter gezogen und verknotet. Das reichte für einen Tag.

Und läßt sich schnell wieder aufmachen.

Jedenfalls will ich das Kleid jetzt diszipliniert ganz fertig machen, nicht erst in Hektik vor dem nächsten Einsatz. Wobei ein neues Problem dazugekommen ist. Ich habe den Futtersaum so eifrig begradigt, daß er doch fast überall wieder zu kurz ist. Da wird aber einfach oberhalb der Saumzugabe ein Streifen Futterstoff von Hand angenäht, das genügt. Man sieht es ohnehin am angezogenen Kleid kaum.

But I intend to finish the dress now and not wait for the next occasion. Plus I produced a new problem: When shortening the lining I did to much, so partially the lining now is shorter than the hem allowance. I’ll just sew a stripe of fabric lining there, that will be enough, the mistake is hardly visible anyhow when the dress is worn.

Countdown Tag 2 – Zeit für Panik

Countdown J-2 – Time for Panic

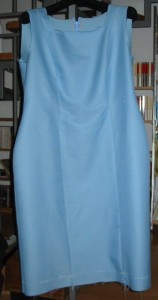
KleidDas Bild entstand, während ich vorhin darauf wartete, daß meine Bügelstation nach dem Nachfüllen wieder aufheizte. Inzwischen sind auch die Belege mit dem Futter dran und warten vor dem Wenden darauf, daß ein Tröpfchen Fraycheck trocknet.

I made the pic some time ago while I was waiting for my iron to reheat after refilling. Meanwhile the facings and the lining is sewn to the neckline. But not turned, since I’m waiting for some drops of Fraycheck to dry.

Eigentlich sollte es ja einfach sein, das Futter zusammenzunähen.

Wenn man den Schnitt richtig gemacht hätte… nachdem ich Frau mhs noch letzten Donnerstag erklärte, worauf man achten muß, wenn man Schnitteile zusammensteckt, die die Nahtzugabe schon drin haben, habe ich es prompt selber beim Erstellen des Futterschnittes falsch gemacht. Zu wenig Stoff… Ich hoffe, daß ich das jetzt über meine Nahtzugaben ausgleichen kann, sonst muß ich innen Flicken aufsetzen.

Sewing a lining should be easy enough.

If I’d not made a mistake while drawing the pattern…. Last Thursday I explained to Frau mhs how not to make mistakes when working with patterns that include the seam allowance. And then I messed it up myself. Not enough fabric… I reduced the seam allowances and hope it’ll fix it. If not there will be patches on the lining.

Trotzdem ist mein noch verbleibendes Programm an Handarbeit für nur einen Tag mehr als knackig. (Schlitzverstärkung an vier Schlitzen = acht Kanten und Saumverstärkung,beides von Hand unsichtbar aufzunähen; Kleid säumen, Futter am Armausschnitt befestigen und Ärmelfutter dran nähen, Futter säumen und an den Schlitzen annähen. UND die Jacke…) Zum Glück bleibt mir auch der Freitag Abend nach der h&h für weiteres Gestichle. Trotzdem werde ich wohl besser eine Handvoll Sicherheitsnadeln mitnehmen…

Still what is left for one workday is quite a lot handstitching. (Sewing the organza interlining to four vents = two each and sewing the interfacing to the hem, hemming the dress, attaching the lining to the armscye and attaching the sleeve lining, hemming the lining and sewing it to the vents. PLUS what is left on the jacket.) Luckily I’ll be able to do some more stitches on friday night after the trade show. Still I think I better take some safety pins with me…

Countdown, Tag 3

Countdown, J-3

Mir ist heute bewußt geworden, wie wenig Zeit ich noch habe… drei Nähtage, den heutigen mitgerechnet. Denn Mittwoch werde ich wohl nicht dazu kommen und Freitag ist h&h…

Die Jacke wurde leider am Wochenende nicht ganz fertig, am Saum muß das Futter noch angenäht werden. Und die Knöpfe müssen noch dran. Auch am Gürtel müssen die letzten Zentimeter noch von Hand geschlossen werden.

There are only three sewing days left. Including today… because there will be no sewing time on Wednesday and Friday it’s h&h…

I couldn’t finish the jacket completely on the weekend. A part of the lining is still loose at the hem and the snaps are missing. Also there are some stitches to do at the tie.

KleidDas Kleid hat am Donnerstag schon den Saum angezeichnet bekommen, aber da ist noch viel zu tun.

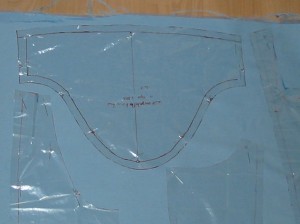
Heute habe ich den Futterschnitt erstellt, das Futter und die Belege zugeschnitten und angefangen, das Futter zusammenzunähen.

Da müssen also noch die Ärmel rein, Belege und Futter und dann von Hand die Verstärkung für die Schlitze und den Saum. Und natürlich säumen und das Futter rundum alle vier Schlitze annähen…

Morgen sollte ich alles schaffen, was mit der Nähmaschine zu tun ist, dann bleibt der Donnerstag für Handarbeit satt. Ich bin trotzdem nicht sicher, ob das nicht auf Nachtnähen im Hotel hinausläuft…

The dress got the hemline marked last Thursday, but there is still a lot of work to do.

Today I made a pattern for the lining, cut lining and facings and started sewing the lining.

So there are still the sleeves to sew, the lining and the facing. I have to sew the silk organza interfacing to hem and openings and of course to attach the lining to all four slits…

I should manage to finish all machine sewn seams tomorrow th have time on Thursday for the handstitching. Still I am not sure, whether the result will not be some night sewing in a hotel room…

Wenn der Stoff teuer genug ist….

If the fabric is expensive enough…

Auflage… dann werde sogar ich beim Zuschnitt geizig.

(Direkt aneinanderstoßen lasse ich Schnitteile nur im absoluten Notfall, denn dann kann man nicht mehr so exakt und sauber schneiden. Und das wäre gerade bei einem teueren Stoff auch nicht schön.)

… then even I get avaricious cutting the fabric.

(Still I try not to place the pattern parts adjacent, if I can avoid it. This makes cutting less neat and precise and that also would be bad with expensive fabric.)

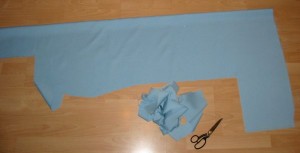
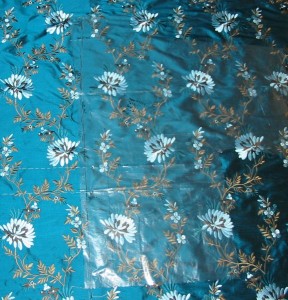
ZuschnittrestAllerdings frage ich mich dann auch jedesmal warum ich das tue.

Denn was mache ich mit einem Stoffrest, der ungefähr 70cm breit und einen Meter lang ist? Die Zeit als man aus Wollstoffen noch Sonntagskleidung für kleine Kinder herstellte ist seit den 60ern vorbei.

Naja, die Belege für den Ausschnitt muß ich auch noch zuschneiden..

And then I’m asking myself why I am doing this.

Because there is nothing useful I could do with a piece of fabric about 70cm large and 1m long? The sixties are over and I think that was the last time when you made cute little sunday outfits for little boys out of not washable woolen fabrics.

Well, I won’t have any problem cutting the facings…

In einer perfekten Welt…

In a perfect world…

… hätte ich am Sonntag die Jacke fertig bekommen, hätte gestern das Futter zugeschnitten und es heute genäht, damit ich morgen das Kleid zuschneiden könnte und es bis Donnerstag so weit genäht hätte, daß Frau mhs mit ihrem Rockabrunder die Länge festlegen könnte.

… I’d finished the outer jacket on Sunday, had cut the lining yesterday and had sewn it today. So I could cut the dress tomorrow and sew the basic shape of it until Thursday so Frau mhs could come with her magic machine and helping me to determine the length of the dress.

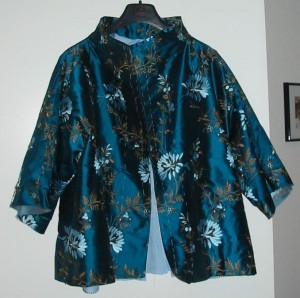
JackeIn einer weniger perfekten Welt habe ich die Jacke gestern fertig genäht, habe heute das Futter zugeschnitten und genäht, so daß ich eine Chance habe, morgen das Kleid zuzuschneiden und es bis Donnerstag so weit genäht zu bekommen, daß der Rockabrunder tatsächlich zum Einsatz kommen kann. (Frau mhs, bitte den “Pftpft” mitbringen. 😉 )

In a less perfect world I finished the jacket yesterday and cut and sew the lining today so I can cut the dress and still have a chance to have the basic construction done until thursday.

Futter und Jacke sind jetzt so weit, daß nur noch Handarbeit übrig ist. Säume und Belege festnähen und das Futter einnähen. Da ich das Wochenende mit meiner Mutter verbringen werde, hoffe ich auf genug Zeit zum Handnähen bei gemütlichen Gesprächen auf dem Sofa.

Construction of jacket and lining are finished, there are only handstitches to do. Stitching the hems and the facing and attaching the lining is what is left to do. I’m spending the weekend with my mother and I hope I’ll be able to do the handsewing while we sit around and chat.

Eine sensationelle neue Rundstricktechnik…

A sensational new technique for knitting in the round…

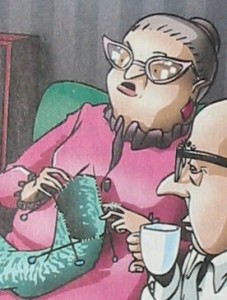
comic… zeigt die Zeitschrift c’t in ihrer aktuellen Ausgabe.

Keine Rundstricknadel, kein Nadelspiel mit den fünf beidseitig offenen Nadeln… nein, vier herkömmliche Jackennadeln gehen auch.

Ich hoffe, daß es in einer der nächsten Ausgaben dann auch das Tutorial dazu gibt… 😉

… unveils c’t mag in this weeks issue.

No circs, no complicated fiddling around with five dpns, no, just four ordinary knitting needles.

So I’m just waiting for the tutorial how to do this in the next issue… 😉

Muster passend nähen

Matching the embroidery

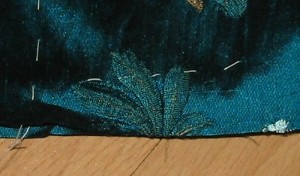
Gestern habe ich immer noch viel “Kleingestichel gemacht, also Sachen die viel Arbeit machen, aber ein wenig sichtbares Resultat ergeben. Wobei das mit dem “wenig sichtbar” hier durchaus Absicht ist. Denn die Stickerei soll an der hinteren Mittelnaht ja möglichst ohne Versatz ineinander übergehen. Und wie man das macht, zeige ich heute.

Yesterday I did more “little stitchy steps”, things that are time consuming, but don’t give a lot of visible results. On the other hand “not visible” is sometimes what is intended, like on the back middle seam where I want the embroidery to match. Hot that can be done I’m going to show today.

AufsteckenDer Trick dabei ist, daß man von der rechten Stoffseite her heftet. Man nennt die Technik auch “hohl heften”.

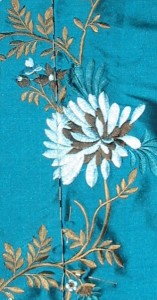
Dazu wird an einem Teil die Nahtzugabe weggefaltet. (Ich habe mit der Maschine eine Heftnaht entlang der Nahtzugabe gemacht um mir die Nahtlinie zu markieren.) Und dann wird das Teil mit der gefalteten Nahtzugabe auf das andere Teil gelegt und die Musterstellen werden passend festgesteckt.

The clue is to baste from the right side.

You fold the seam allowance of one of your fabric pieces to the left side and then you lay it on the other piece, matching the fold to the seamline of the other cut piece. You match the pattern (in my case the flower of the embroidery, but this works equally to match stripes or check or whatever.)

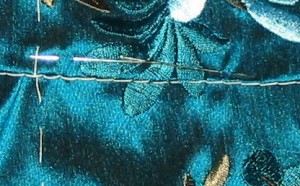
HeftenDann wird geheftet. Weil ich einen feinen Stoff habe benutze ich Nähgarn und eine sehr feine Nadel.

Ich steche abwechselnd genau auf der Nahtlinie des unteren Teils ein…

Then it’s already time for basting. Since I have a fine fabric I am using sewing thread and a very fine needle.

I make one stitch exactely on the seamline….

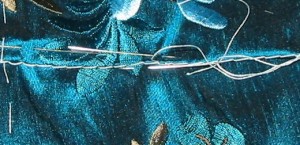
Heften… und dann einen Stich genau in den Bruch des gefalteten Teils.

… and another stitch exactely in the fold of the other piece.

Und dann wieder in die Nahtlinie, und wieder in den Bruch… und so weiter.

(Wenn man farblich passenden Nähfaden nimmt und ganz kleine Stiche macht, dann kann man im übrigen auch so nähen. Das hilft auch, wenn man mal wieder nach dem Rückschneiden der Nahtzugabe auffällt, daß man die Ärmel falsch eingenäht hat…)

And so you go on, one stitch on the seamline, one stitch in the fold…

(If you take matching thread and then make tiny stitches you can also sew instead of baste. That is very usefull when you find out that you did sew the sleeves on the wrong side after you cut back the seam allowance…)

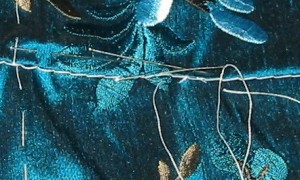
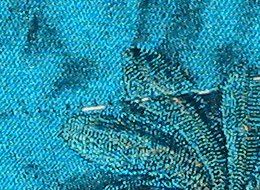
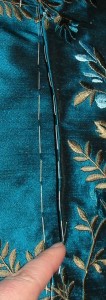
Heftnaht von linksSo sieht die Heftnaht dann von der linken Seite aus.

Da ich nur an wenigen Stellen die Stickerei auf der Nahtlinie habe, habe ich auch nur diese Stellen geheftet. Der Rest wurde nur gesteckt.

That’s what the basting looks from the wrong side of the fabric.

Since there are only few motives that cross the seamline I only basted those parts of the seam. For the rest pinbasting had to do.

NahtAnschließend wird genau auf der Heftnaht genäht.

Den Heftfaden hinterher wieder herauszuziehen macht nicht wirklich viel Spaß, aber das ist unvermeidlich…

Sewing has to happen exactly on the basting stitches.

Getting out the basting thread is no fun, but that cannot be helped.

Dann bügeln, non links, von rechts…

Then pressing, wrong side, right side…

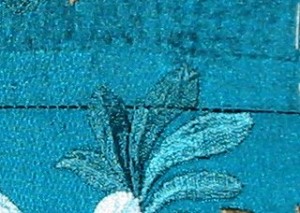
fertig genähtJa und es hat fast geklappt…

*hüstel*

And it worked out… nearly….

Ich habe die Technik zwar schon ein paar Mal angewandt, aber nocht nie auf Stickerei. Das muß ich wohl noch mal üben, dadurch daß der Stickereistoff etwas steif ist, war es schwierig zu heften.

Aber dadurch daß die Stickerei an dieser Stelle Ton in Ton ist, sieht man es aus der Entfernung nicht mehr. Denn wie ich schon sagte… richtiges Auflegen ist die halbe Miete… 🙂

It’s not the first time I used this technique, but never on embroidered fabric. Some more practice will be good… The embroidery is a bit stiff so basting wasn’t that easy.

But since the embroidery has the same color as the fabric this little mistake is only visible from very close. As I said, placement while cutting is important. 🙂

Was keiner mehr sehen wird

What will not be seen later

EinlageViel Zeit war die letzten Tage nicht, aber ich habe immerhin die Einlage aufgebracht.

Vogue sieht in der Anleitung ja gar keine Einlage vor, aber der Kragen steht ohne Hilfe sicher nicht. Und die Knöpfe kann man auch besser annähen, wenn alles etwas stabiler ist.

Deswegen habe ich den Kragen und die vordere Kante mit Seidenorganza verstärkt, der einfach aufgeheftet ist. Später wird er in den Nähten mitgefasst, bei der kurzen Jacke sollte das reichen.

Jedenfalls gibt es so heute mal einen Blick auf die linke Stoffseite.

There was not much sewing time the last days, but I managed at least to do the interfacing.

The Vogue instruction do not show any interfacing, but the collar cannot stand as on the pic of the envelope without that. And for the sew on snaps it will also be better if there is a bit more stability.

So I stabilized the collar and the front with silk organza that I just basted within the seamline. When closing the seams the organza will be attached also. Since the jacket is rather shirt this should be enough.

So you get to see the wrong side of the fabric today.

Die Lage ist alles

Placement is everything, and that is not only true for real estate

Und das gilt nicht nur für Immobilien.

Mein Stoff hat ja eine flächendeckende Stickerei, also muß ich den Schnitt so auflegen, daß es zumindest in der hinteren und vorderen Mitte paßt. Wie man das macht, zeige ich heute. Es ist nicht wirklich schwierig, aber zeitaufwendig. Der Zuschnitt nur des Oberstoffs dauerte vier Stunden.

My fabric has an all over embroidery so I have to choose well where to cut, because I want the pattern to match at the middle front and back. How to do this I’m going to show now. It is not really difficult, but time consuming. Cutting the outer fabric only took me four hours.

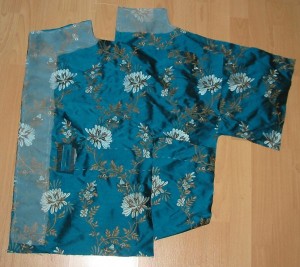
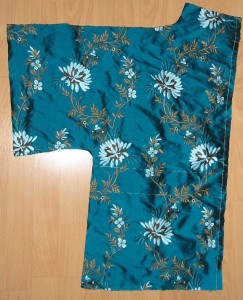
RückenteilZuerst habe ich den Stoff mal ausgebreitet und die Schnitteile ein wenig hin und her geschoben. Einlagigs Zuschneiden ist hier ohnehin Pflicht, das Muster ist nicht gespiegelt oder so. Dabei habe ich festgestellt, daß ich das Rückenteil so zuschneiden kann, daß die Naht (oder zumindest der gerade Teil der Naht, in der Krümmung kann man das Muster nicht passend machen) fast ganz zwischen den Motiven verläuft. Das spart schon mal viel Mühe. Auch beim Vorderteil habe ich mir eine Stelle gesucht, wo ein “Bruch” etwas weniger auffällig ist.

Anschließend habe ich ein Vorderteil und ein Rückenteil zugeschnitten. Am Vorderteil habe ich die vordere Mitte (sowie den Tunnel für die Schleife) mit einem Heftfaden markiert, diese benutze ich auch als “Paßstelle”. Alternativ kann man auch die Nahtzugabe der vorderen Kante markieren und an der vorderen Kante anpassen,

Am Rückenteil, das hier im Bild zu sehen ist, habe ich den Taillentunnel markiert und dann die Nahtzugabe der hinteren Mitte.

If you want to match a pattern like that you have to cut single layer. I took my two pattern pieces (back and front) and decided how to arrange them on the fabric. I found that it was possible to cut the back in a way that most of the center back seam is between the embroidery and will only have to be matched on a few places. For the front also I found a placement with not to much going on where the fronts will overlap.

Then I cut one front and one back, single layer. On the front I thread traced the casing for the belt and the front middle which I use for the matching. At the back (see pic above) the casing it thread traced and the back middle seam is also marked.

passend aufgelegtAnschließend wir der Stoff an der Markierung nach links gefaltet, also am Rückenteil die Nahtzugabe weggefaltet und am Vorderteil alles jenseits der Mittellinie.

Danach heißt es puzzlen. Nämlich das zugeschnittene Teil so auf den Stoff legen, daß kein Musterversatz da ist. Dabei lohnt es sich, auch die Reihenfolge der Teile zu ändern. Ich konnte ein Vorder- und ein Rückenteil nebeneinander zuschneiden, bei den beiden anderen Teilen ging das nicht. Hätte ich das zweite Rückenteil darüber plaziert und dann das zweite Vorderteil noch mal darüber hätte mir der Stoff (immerhin 3m für einen Schnitt, der 1,80m bei ungemusterten Stoffen braucht) nicht gereicht. Andersherum, also erst das zweite Vorderteil und dann das zweite Rückenteil ging es problemlos und ich hatte mehr als genug für die Schleife übrig. (Das Bild zeigt jetzt übrigens das Vorderteil.) Und natürlich feststecken, wenn man die richtige Plazierung gefunden hat.

Next thing is to fold the cut pieces at the chosen placement line to the wrong side of fabric. On the back you fold back the seam allowance, on the front you fold along the middle line.

Not just match the cut pieces to the fabric. It’s worth checking different option. I my case I could cut the first front and the first back from one width of fabric. Not so the second ones. I tried to layer first the second back piece and then the second front above that… my fabric wouldn’t have been enough. But starting with the second front and placing the second back above saved me largely enough for the tie. When you have found a position on the fabric where the pattern matches pin the already cut piece to the fabric.

FadenmarkierungWichtig ist an der Stelle noch ein Gegencheck mit dem Papier(oder in meinem Fall Folien)schnitt, ob das Schnitteil auch zur Seite genug Platz hat um noch drauf zu passen.

Dann markiere ich wieder mit einem Nähfaden (dicker Heftfaden auf Seide ist nicht so gut, ich will ja keine großen Löcher, feine Nadel und gutes Nähmaschinengarn sind gerade richtig) die Faltlinie meines Schnitteils auf dem noch ungeschnittenen Stoff.

Don’t forget to check with your paper pattern piece that you have enough width to place the pattern you want to cut next.

Then you take sewing thread and a fine needle (basting thread wouldn’t be good on silk, who wants big holes?) an threadtrace the foldline of your cut piece to the uncut fabric.

Schnitteil auflegenDas zugeschnittene Teil kommt weg und entlang der gehefteten Linie lege ich jetzt wieder meinen Folienschnitt auf. Dabei verläuft beim Rückenteil (im Bild) die Nahtlinie der hinteren Mitte auf der markierten Linie, beim Vorderteil die vordere Mitte.

Schnitteil feststecken und das bereits dzugeschnittene Teil noch mal daneben legen. Einmal um an Querlinien (hier die Markierungen für den Tunnel) zu kontrollieren, ob die Höhe auch stimmt, zum anderen um sicher zu gehen, daß man nicht hinterher zwei linke oder zwei rechte Teile hat…

Now you remove the cut piece and put the pattern on the fabric. (Plastic sheet here is better than paper because you can easily see through.) For the back the seamline of the pattern has to match the threadtraced line on the fabric, for the front the middle front.

Pin the pattern to the fabric and before you cut place the already cut front or back against the fabric again. Once to check horizontal lines (in my case the casing for the tie) to match also and second to be sure that you do not end up with two left fronts or two right backs…

Dann nur noch zuschneiden. Das Zuschneiden der beiden Teile für den Gürtel war übrigens reine Erholung…

Then cut the rest. After that cutting the tie was real fun!

Das war es, womit ich den gestrigen Tag verbracht habe. Heute hingegen standen die Paspelöffnungen für den Gürtel auf dem Plan.

PaspelöffnungCapricorna hatte mir den Tip mit einer Technik aus Threads gegeben. Das Heft hatte ich nicht, aber ich konnte mich erinnern, daß Summerset mal ein kleines Tutorial gemacht hatte (danke dafür!) und das versorgte mich mit den Informationen, die ich brauchte.

Und so sieht die Öffnung auch passabel aus. (Wenngleich ich sie als gemogelt empfinde, weil die Schnittkanten nicht eingefasst werden, sondern die Paspeln nur druntergeschoben… aber optisch ist das Ergebnis gut.)

Cutting was what I did yesterday, today I worked on the welt openings for the tie.

Capricorna had suggested to use a technique from Threads. Only I didn’t have that issue, but I remembered that Summerset once made a little tutorial about it (thanks for that!) and that provided me with all the information I needed.

So the opening for the tie looks good. (Though I still feel this technique is kind of “cheating”, because the edges are not really bound… but the result looks good.)

Außerdem habe ich den Gürtel genäht (bis auf die letzten Handstiche, aber die können warten) und die Schnitteile für die Belege gezeichnet. Aber das ist ja nicht so schwierig. Morgen ist dann erst mal wieder ein langer Tag Geldverdienen angesagt, da wird es wohl nichts mit Nähen.

Also I made the tie today (except the last slipstitches, but that can be done later) and I drew the pattern for the facings. But that’s not difficult at all. Tomorrow there will be a long day making money, so probably no time for sewing.