 Gut, dann also auf zum Gummi.
Ich benutze einen etwa 1,7cm breiten schwarzen Gummi, der relativ weich ist, den gibt es bei uns auf dem Wochenmarkt an einem Kurzwarenstand sehr billig und ich habe bislang keine schlechten Erfahrungen damit gemacht. (Beim ersten Mal habe ich ihn aus der Not gekauft, weil ich dringend welchen brauchte und keine Gelegenheit hatte, ins Fachgeschäft zu gehen.)
Die Länge bestimmte ich, indem ich mir den Gummi um die Taille ziehe, bis er stramm aber nicht zu eng sitzt und dann abschneide.
The elastic I’m normally using in my skirts and trowsers ist about 1,7cm large, black and soft. But still strong enough. I get it on the weekly grocery market… :o) There is someone selling all kind of household supply, from soap-holders to needles. Mosty cheap and poor quality, but this elastic is cheap and okay.
To determine the right length of the elastic I’m simpliy pulling it around my waist until I think it feels right. Every elastic is different in how strong it stretches, how soft it is etc. so this is the most reliable method.
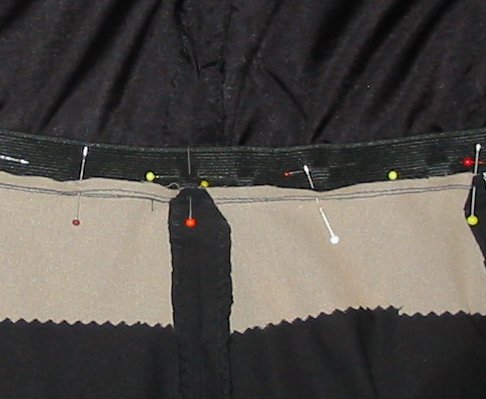
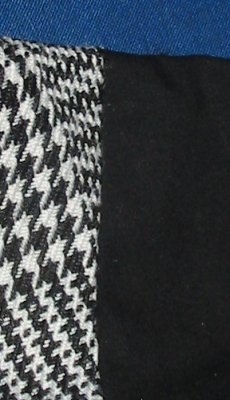
I’m folding the elastic in half, again in half and mark four parts of equal length with pins. On the skirt I’m marking the sides (the darts in this case) and the front and back middle of the skirt also with pins.
Then I’m pinning the elastic on the lining matching the pins. Next thing is to stretch the elastic to the length of the skirt waist and secure it with a lot of pins as the picture shows.
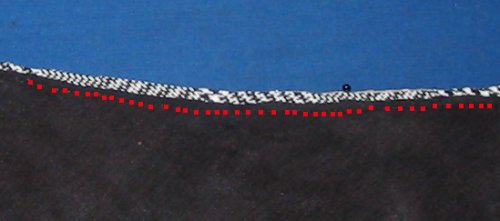
The elastic is on the lining, under the seam allowances. What is important is, that the elastic does not touch the stitchline, but is about 2mm or 3mm away on the lining. If the elastic is to close to the stitchline the lining will show from the right side… (guess how I found out… :o) )
Danach werden am Gummiband Viertel mit Stecknadeln markiert (zwei Mal zur Hälfte falten). Am Rock markiere ich die Seiten (in diesem Fall die Abnäher) sowie die vordere und rückwärtige Mitte.
Der Gummi wird anschließend passend (also Stecknadel zu Stecknadel) auf den Futterrock gelegt und dann abschnittsweise so weit gedehnt, daß er genau die gleiche Länge wie der Stoff darunter hat. Das ganze mit vielen Stecknadeln befestigen, wie das Bild zeigt.
 Der Gummi liegt also auf dem Futterrock aber unter der Nahtzugabe.
Wichtig ist dabei, daß er nicht direkt an der Naht positioniert wird, sondern etwa 2mm-3mm daneben. Das ist nötig, damit man den Bund letztlich wenden kann und der Futterrock wirklich innen ist, ohne hervorzuspitzen. (Drei Mal dürft ihr raten, wie ich das herausgefunden habe… :o) )
Anschließend wird der Gummi aufgenäht. Ichbenutze dazu den genähten Zickzackstich (manchmal auch Wellenstich genannt, glaube ich), mit einer Stichbreite von 5,5mm und einer Stichlänge von 1. (Das ist etwas mehr als die Maschine voreingestellt hat.)
Beim Nähen muß man den Gummi dehnen, aber nur so weit, daß der Stoff nicht mitgedehnt wird. Und langsam genug nähen, daß der Stoff unten keine Falten bekommt.
Die Nahtzugabe wird dabei, wie man sieht, gleich mit versäubert.
To sew the elastic I use an elastic stitch. Would „sewn zigzag“ be the appropriate term in English? Stitch widht is 5.5, stitch length about 1. (Normal zigzag is also okay.)
I’m sewing on the seam allowances and thorugh the elastic, of course. So the seam allowances are secured, too.
 Don’t forgent to stretch the elastic to the length of the fabric while you sew. And better sewing slowly, to be sure not to have any ugly folds in the lining.
Well… nearly done. Just turn the lining to the inside of the skirt.
To make sure it remains there and doesn’t show I secure it with „stitch in the ditch“ of the seams and darts I have. This skirt has enough seams an darts to keep elastic and lining in place. If this is not the case (for example on a trowser without darts, four points to attach all layers is not always enough) I attach with hand stitches where neccessary.
The picture here from the right side shows… right, nothing. The stitches are invincible. Using a very fine 150 Alterfil thread did help…
So, jetzt muß der Futterrock eigentlich nur noch in den Rock hinein gestülpt werden. Und, damit er dort bleibt und nicht hervorlugt, etwas befestigt.
Letzteres geht sehr einfach, indem man in den Nähten exakt auf der Nahtlinie steppt. (Quilter kennen die Technik meist.) Die Naht dazu etwas auseinanderziehen und durch alle Lagen durch etwa 2cm (also Gummibreite) steppen.
Das Bild zeigt… nichts. Die Naht ist unsichtbar. Der feine 150er Alterfilfaden war da natürlich kein Schaden.
Bei diesem Rock habe ich auch ausreichend Nähte und Abnäher, um den Bund zu befestigen. Vier Nähte (etwa eine Hose ohne Abnäher) sind meist nicht ausreichend. In diesem Fall helfe ich mir mit ein paar Handstichen von der Futterseite her an strategisch geeigneten Postionen.
Hängt der Rock auf dem Bügel, sieht der Bund etwas gekräuselt aus. Aber am Körper liegt er dann flach an, gibt aber nach, so daß er über den Tag nicht unbequem wird und auch ein paar Kilo Gewichtsschwankung mitmacht. *g*
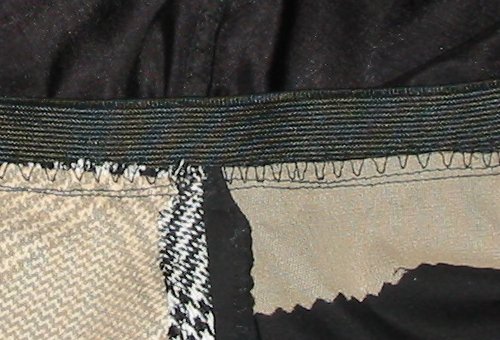
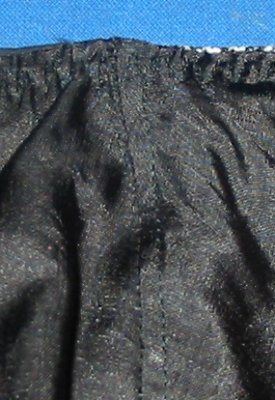 Auf der Innenseite des Rockes sieht man die gewellte Naht, mit der der Gummi angenäht wurde und man sieht, wenn man ganz genau hinsieht, die Längsnaht, die den Gummi stabilisiert.
The last picture is the skirt from inside. You see the zigzaged seam and if you look very, very closely you see the short seam that keeps elastic and lining in place.
To finish the skirt I attached the lining to the zipperband whit some handstitches.
And I added a hook and eye to the waist. Here it is important to sew through the elastic, but not through the outer fabric. So the zipper can not open itsself and its the elastic that will „carry“ the skirt.
The result is a skirt that looks a bit odd on the dresshanger, but has no bulk in wearing while offering all the comfort of a „normal“ elasticezed waistband.
Only the hem has to be done. Here a little help from sewing friends will be welcome…
Um den Bund fertig auszuarbeiten nähe ich noch das Futter mit einigen Handstichen am Reißverschlußband an.
Damit der Gummi auch gut um den Körper gespannt ist und tatsächlich den Rock „trägt“ nähe ich an der Futterseite noch einen kleinen Haken und eine Garnschlinge. Von außen ist das unsichtbar.
Tja… und jetzt fehlt nur noch der Saum. Bei dem mir Frau mhs und ihr Rockabrunder am Donnerstag hoffentlich helfen werden.
Ich werde also schon mal nicht nackt in Aachen antregen müssen.
Hoffe ich. :o)