Heute zur Abwechslung mal ein völlig nicht-textiles Bastelprojekt.
Neulich gab, nach über 30 Jahren, meine treue Krups Kaffeemaschine aus Studententagen endgültig den Geist auf. (Wer jetzt wieder von „so was machen sie heute nicht mehr“ anfängt… die Maschine hat damals 300DM gekostet, was ungefähr einer Monatsmiete für mein WG-Zimmer entsprach. Und das war kein Vollautomat, sondern eine Filtermaschine, kombiniert mit einer Espressomaschine. Was damals recht cool war. Ich vermute, wer heute die Monatsmiete für eine Studentenzimmer in einer Unistadt für eine Filterkaffeemaschine ausgibt, bekommt auch was langlebiges. So einer um den Preis eine Filterkaffeemaschine findet.) Sie heizte das Wasser nicht mehr und da der Kunststoff (inbesondere da, wo auch Metallschrauben im Spiel waren) an einigen Stellen schon spröde war, durfte die Maschine gehen. Und wurde durch eine deutlich kleinere ersetzt, die meinen aktuellen Bedürfnissen auch besser entspricht.
Die Maschine hat jemand mitgenommen, der gerne Kleinelektro ausschlachtet und den dabei getrennten Schrott verkauft, die beiden Kannen waren übrig.
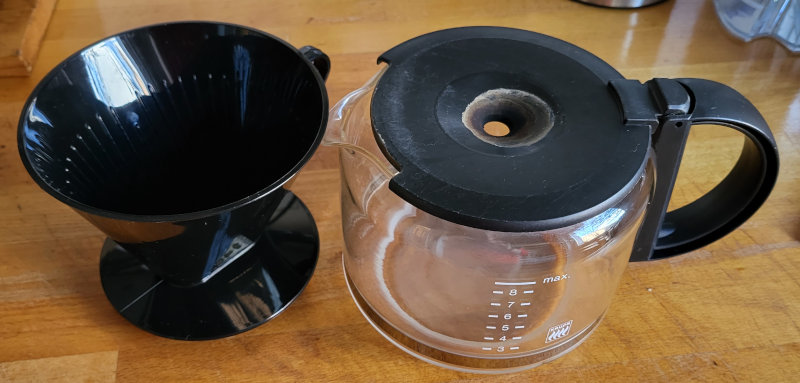
Da meine neue Kaffeemaschine nur noch fünf Tassen auf einmal kocht, ich aber etwa zwei bis drei Mal im Jahr Bedarf nach größeren Mengen habe, war es naheliegend, die vorhandene Kanne genau dafür zu benutzen. Da die Maschine aber schon mit dem damals noch luxuriösen Tropfstopp ausgestattet war, bei dem der Filter nicht auf die Kanne gesetzt wird, sondern in der Maschine hängt, konnte ich nicht einfach den alten Filter behalten. Also habe ich im Supermarkt einen einfachen 1×4 Filter aus Kunststoff gekauft. (Das war der, der erhältlich war… Ich hatte auch nach Porzellan geguckt, gab es aber nicht.)
Den Filter einfach auf die Kanne mit Deckel stellen wäre naheliegend.
Allerdings sind die Löcher im Filter nicht da, wo das Loch im Kannendeckel ist.
Der Kaffee würde also nicht in der Kanne, sondern (zumindest teilweise) auf der Küchenablage landen. Nicht praktisch.
Den Filter einfach auf die Kanne ohne Deckel zu stellen scheitert am Durchmesser des Kannendeckels.
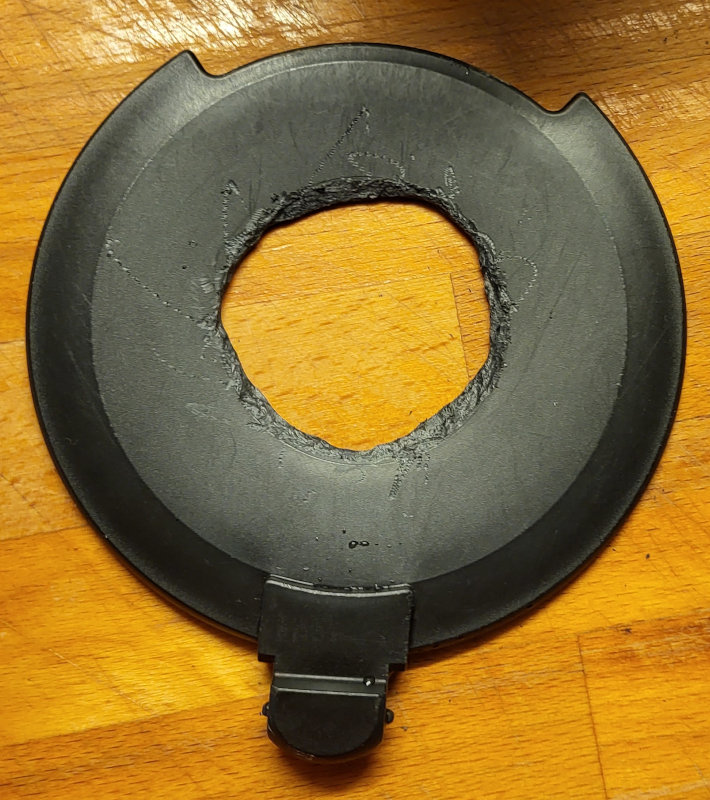
Die Lösung ist klar, der Deckel braucht ein passendes Loch.
Da traf es sich doch gut, dass ich beim Discounter vor längerer Zeit schon mal so einen Komplett-Satz Elektrofeinwerkzeug mitgenommen hatte, weil ich gedacht hatte, das wäre ein schönes Spielzeug.
Aber natürlich noch nie Zeit gehabt hatte, damit zu spielen….
Bevor ich loslegen konnte, wollte das Teil allerdings erst mal ein paar Stunden laden.
Okay… hat ein Akku… ist aber zugegebenermaßen praktischer als ein Kabel.
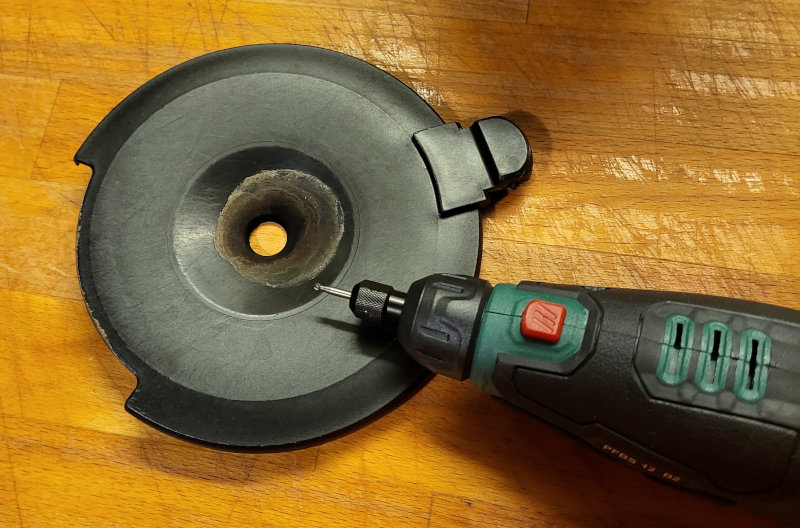
Mittels Anleitung gelang es mir auch, rauszufinden, was das Fräswerkzeug ist und ich habe (über der Küchenspüle) losgelegt.
Das war jetzt deutlich mühsamer, als ich mir das vorgestellt hatte und vermutlich hätte ich das gröbere Fräswerkzeug nehmen können.
Einen Schönheitspreis gewinnt es auch nicht, aber irgendwann war ich durch. Und ich würde mal sagen, Plastik war zum Üben gar nicht schlecht…
Glücklicherweise sind bei dem Werkzeugsatz auch Schleifwerkzeuge dabei…
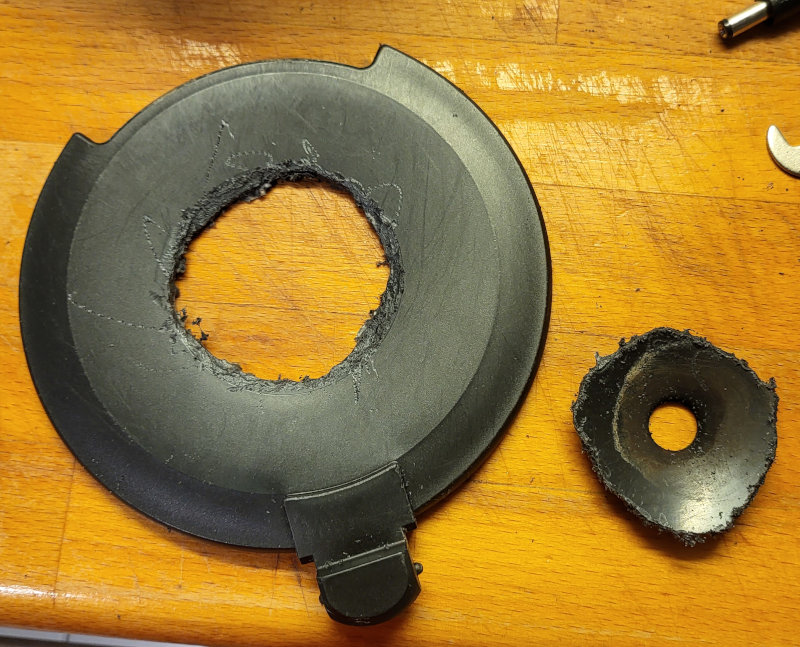
Danach sieht es doch deutlich besser aus.
Es hängen auch keine Krümel mehr dran (die man sonst im nächsten Kaffee hätte). Was irgendwie wichtiger ist, als die Optik.
Und ich konnte die Öffnung noch etwas an den Filter anpassen, an einigen Stellen war es doch noch zu eng gewesen.
(Meine Fräsung war auch nicht wirklich rund gewesen, sondern recht eckig…)
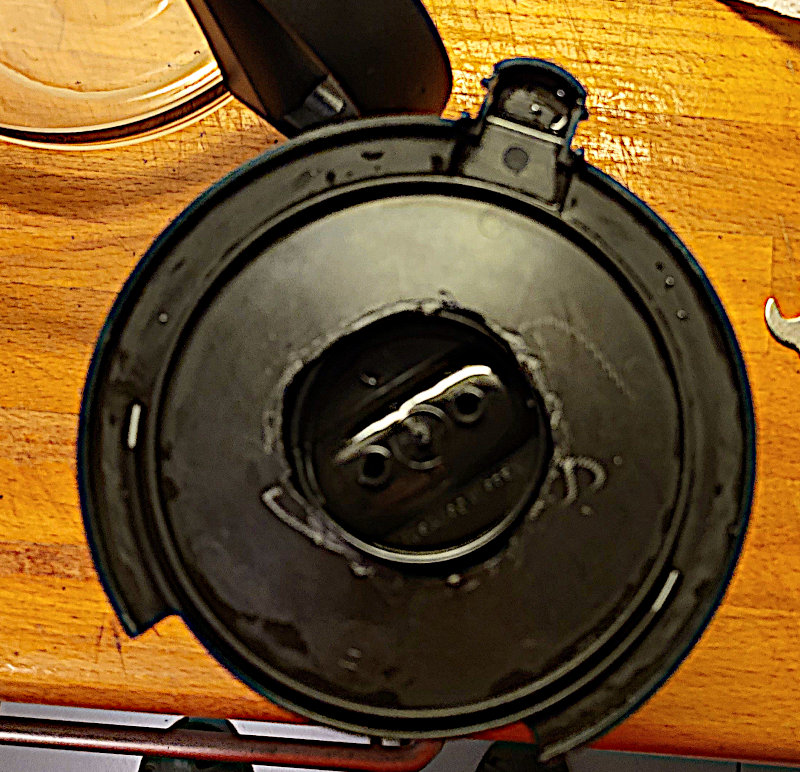
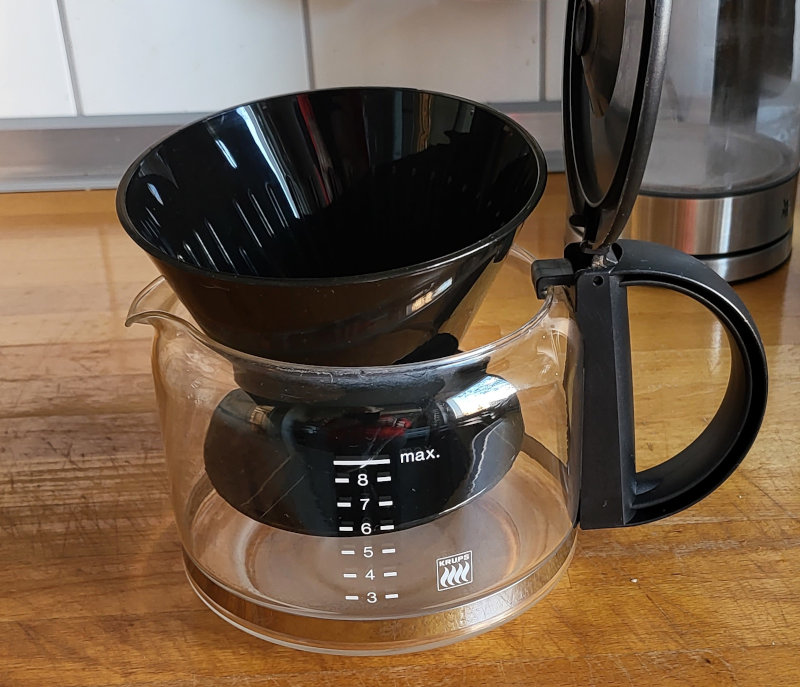
Noch mal testen… ja, der Filter passt genau in den Deckel.
Da kippelt auch nichts mehr.
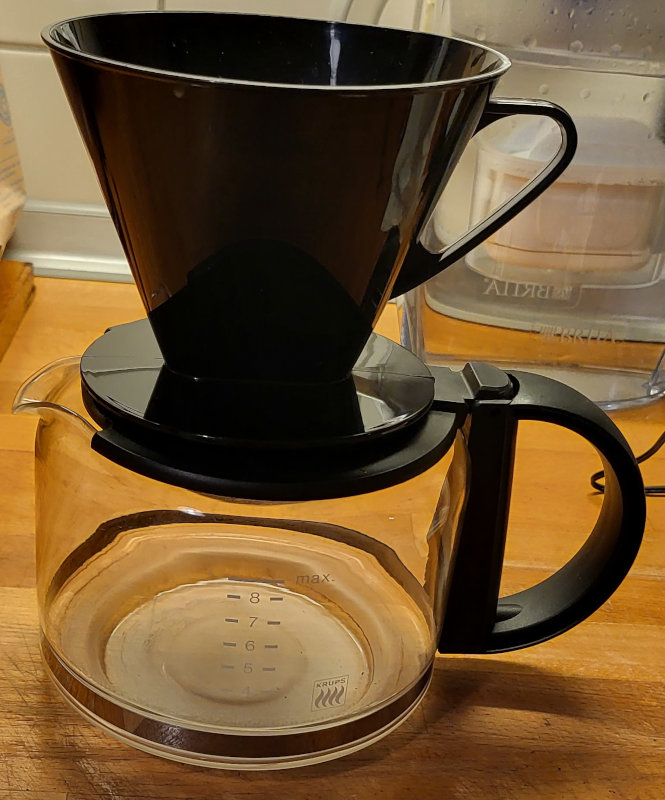
Und schon habe ich eine hübsche Handfilterstation, die beinahe so aussieht, als hätte sie nie was anderes gemacht.
(Zumindest solange man den Filter nicht abnimmt und sieht, die die Öffnung drunter wirklich aussieht….)
Anderer praktischer Effekt:
Die Kanne mit Filter passt gut in den Karton, in dem meine neue, kleine Kaffeemaschine (ja, auch wieder eine Krups) steckte.
Die Packung mit dem 1×4 Filtern passt auch noch rein.
So kann ich das ganze auch staubgeschützt und sicher in den Keller stellen. Denn für zwei oder drei Mal im Jahr, muss es wirklich nicht die ganze Zeit in der Küche stehen.
Ein Use-what-you-have- Projekt aus der Küche. 😉