Geldgeschenktasche

Pouch for money gift

Der Kalender ist schon auf dem Weg zu Sara nach Österreich. Mein Dank an alle für die netten Kommentare!

TäschchenUnd jetzt geht es endlich mit den selber gemachten Weihnachts-geschenken los.

Von Frau mhs habe ich mich zu diesem runden Täschlein inspirieren lassen. Geldgeschenke sind ja immer schwierig, aber da ist es gut drin aufbewahrt und weitere Geschenke für den speziellen Zweck können da auch gesammelt werden.

Finally I’ll start to show my self made Christmas gifts.

Frau mhs had inspired my to make a round pouch to give some money. I am not to fond of giving money, but this will be collected for a bigger project over the next years and so the self sewn pouch will keep the money safe over the years.

Genäht ist sie dreilagig, Baumwollstoff mit Weihnachtsdruck, Vlies und Futerstoff. Auf die Oberseite habe ich dann noch fraihand gequiltete bzw. gestickt. Richtig begeistert war ich von dem Stickgarn. Metallicgarne fand ich bislang immer etwas “zickig” (ich habe Madeira und Mettler) aber dieses hier von Robison-Anton über Alterfil ist absolut genial! Es ist weicher als andere die ich bisher hatte, es läuft problemlos in die Maschine, auch wenn man nicht extra langsam näht, keine Fadenrisse,… ich brauchte nicht mal eine Metallicnadel, Titan Nadel von Organ in Stärke 75 machte den Job einwandfrei. 🙂

Tasche RückseiteUnd auf der Rückseite dann der Reißverschluß.

Nur wie man so eine Tasche richtig rund bekommt bleibt mir ein Rätsel. Da ich die Nahtzugaben nicht einschneiden konnte, sondern versäubern mußte, hat das nicht so gut funktioniert.

The back holds a simple zip.

What remained a mystery is how to make it really round. Since I had to zigzag the seam allowances I could not clip them. So it couldn’t work out well…

That might also be due to the construction, I made a sandwich from cotton print, batting and lining fabric. On the front side I added a bit of free motion quilting and embroidery, nothing special, just quickly done. But what helped me a lot was the thread. So far I’ve found metallic thread (I’ve had Madeira and Mettler) a bit difficult, you had to sew slowly, it tended to break… but this time I used the Robison-Anton Metallic thread by Alterfil and it made such a difference! It is softer than what I am used to, it didn’t break, I could sew fast and I didn’t even need a special needle for metallic thread, my usual Titan Embroidery Needle by Organ in Size 75 did it perfectly fine. 🙂

Figurfreundlich…

Figure friendly…

Marmelade… ist die diesjährige Marmeladeproduktion.

… is this years jam production.

Mehr ist es nämlich nicht.

Da es im Frühjahr einige Wochen so trocken war sind die Brombeeren auf dem Brachgelände komplett am Strauch vertrocknet. Und unsere Himbeeren im Garten haben wir zwar gegossen, aber der Rest des Sommers war ja so kalt und sonnenarm, daß die auch keine rechte Lust hatten zu wachsen.

Because that is all.

The wild blackberries we normally pick are all dried on the bush since it was very dry for several weeks in spring. And the raspberries in our garden were watered, but the missed warmth and sun the rest of the summer so they did not feel like growing to much.

Die “Deckelchenschoner” sind natürlich wieder selber bestickt, immerhin verbraucht das wieder ein paar Stoffreste. (Und nein, meine Handschrift wird nicht schöner.)

At least the “lid protectors” were embroidered by me, used up some scraps. (No, my handwriting hasn’t improved since last year…)

Marmelade, die zweite

Jam, second part

BrombeermarmeladeUnd noch so ein Kleinkramprojekt…

Aber auch die Brombeermarmelade kann jetzt im Keller verstaut werden. Wir haben noch zwei Gläser vom letzten Jahr, die sind vorher dran.

(Da ich eine Sauklaue habe, wird die Schrift gestickt auch nicht schöner… 😉 )

Another tiny project.

But now the blackberry jam is also ready to be stored in the cellar. We have two jars left from last year that will be eaten first.

(I have a terrible handwriting, so embroidering it doesn’t make it nicer… 😉 )

Isabelles Pariser Lieblingsläden

Isabelles favorite shopping in Paris

Isabelle von Kitty Couture hat Paris zwar verlassen, aber sie hat ihre Lieblingsadressen in ihr Blog gestellt. Für Stoffe, für Wolle aber auch fürs Handsticken, ein Hobby das mir ja recht fern steht. Wer genug Englisch versteht kann sich hier auch gute Tips holen:

Tips on shopping for fabric, yarn and embroidery notions in Paris

Isabelle of Kitty Couture left Paris some time ago but she shares her favorite shopping addresses in her blog. For fabric, yarn but also for embroidery, something that is quite far from my world. So check her blog for good advice:

Tips on shopping for fabric, yarn and embroidery notions in Paris

Na endlich, der Shop ist Online!

Finally the shop is online!

Auf der h&h hat Alterfil es ja schon angekündigt, aber es hat noch etwas gedauert. Aber jetzt ist es so weit:

Der Online-Shop von Alterfil ist im Netz!

Alterfil had announced it on the h&h trade fair, but it took some time. But now they are finally ready:

The Alterfil Shop is online!

Es gibt alle Näh- und alle Stickgarne zu bestellen. Auch das feine AlterfilS 150, das ich so gerne zum Dessous Nähen nehme. Und gab es bislang nur die großen 1000m Spulen in allen Farben, kann man jetzt auch alle Farben in den kleineren 200m Röllchen bekommen. (Ich bleibe bei den großen, sonst rentiert sich das ja nicht.) Oder auch 5000m Konen für die Großverbraucher…

Und natürlich die diversen Jeansgarne, Ziergarne, Overlockgarne, Bauschgarne,… Alles erhältlich in allen Stärken. Keine Mindestmenge (zumindest habe ich keine gefunden), aber wer 10 gleiche Röllchen bestellt bekommt es günstiger. Und wer vielleicht noch für die Nachbarin mitbestellt kann noch zusätzlichen Mengenrabatt bekommen.

Die Farbkarte habe ich ja schon, also kann ich meine Bestände mal wieder auffüllen… 🙂 (Die 1000m AlterfilS 120 gibt es gerade zum Sonderpreis, ebenso wie die Garnbox mit den 48 verschiedenen 200m Wickeln.)

You can order all of their sewing and embroidery threads. Now I can get my favourite thread for sewing underwear, the fine AlterfilS 150, in all colours without any problem. And for those who do not need 120 strength thread in 1000m spools they now offer the smaller 200m spools in all colours, too. If you need a really big amount you can also get 5000m cones… (I’ll remain with 1000m, just right for me.)

And of course you get all decorative thread, strong jeans thread, thread for sergers,… several hundreds of colours, different strengths. And if you order a little more you get a discount, so ask your sewing friend next door… 🙂

I already have the colour chart, so I can do a refill on my threads…

Passende Borte zum Nulltarif!

Fitting braid for free!

Nach der Strickerei und Häklerei geht es auch mal wieder ums Nähen…

Dekorative Elemente sind schön, aber eine genau passende Borte zu finden ist nicht immer einfach. Und wenn man endlich eine gefunden hat, dann ist sie meist teuer.

Neulich stand ich auch vor dem Problem, daß ich für ein Babykleid absolut nichts passendes in meinen Vorräten fand, aber unbedingt am Wochenende fertig werden wollte. Also habe ich mir aus den Stoffresten und etwas Stickgarn selber eine Borte gemacht.

After all that knitting and crocheting a bit of sewing again…

Decorative elements on garments are great, but finding the right braid can be complicated. And once you’ve found it, it’s expensive.

Some time ago I had that problem that I wanted to make a dress as a baby gift and didn’t find anything appropriate in my stash. Of course it was weekend and the shops were closed. So I made my own braid from fabric scraps an some embroidery thread.

Und so geht’s:

And that’s how I did it:

Stoffstreifen
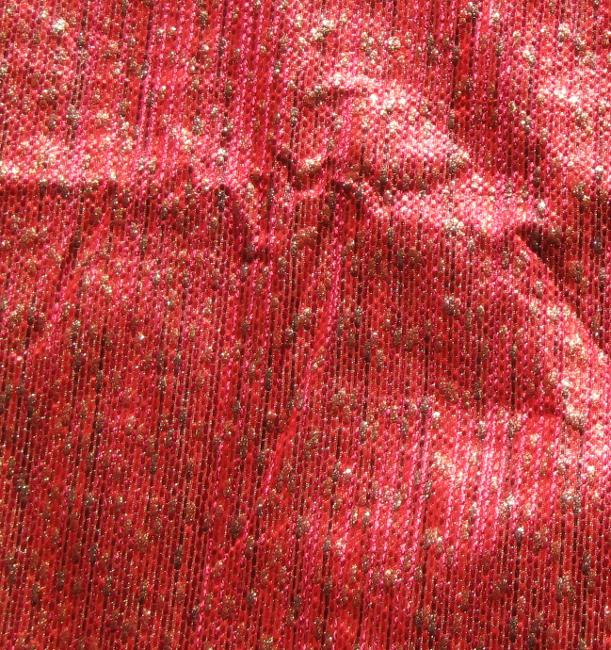
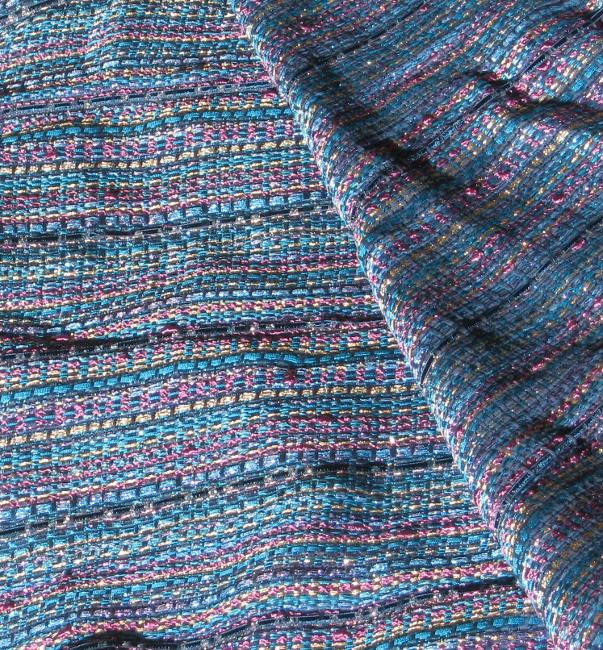
Zuerst habe ich zwei Streifen Stoff geschnitten, einem aus dem Stoff des Kleides, einem Baumwoll-Leinen von BBG, im geraden Fadenlauf, den anderen aus einem Rest BBG Spinnaker im schrägen Fadenlauf. Bei dessen Breite habe ich mich nach dem Karomuster gerichtet und das einmal schräg durchgeschnitten. Er ist etwa 5mm breit.

Die Borte wird auf Vorder- und Rückteil aufgenäht, bevor die Seitennähte geschlossen werden, daher macht es nichts, wenn die Streifen unterschiedlich lang sind. Sie dürfen nur nicht zu kurz sein.

First I cut two stripes of fabric. The wider one is about 1.7 cm wide and cut on the straight grain. It’s a cotton-linen blend from the Dutch company BBG, the fabric I also made the dress from. The other one is BBG Spinnaker, a rather stiff fabric with a woven plaid. Here I cut on the bias, according to the plaid, which made it approximately 5 mm large.

I’ll be sewing on the braid on front and back before the side seams are closed, so I do not have to make the stripes the right length now. Only they shouldn’t be too short.

Streifen aufgeheftet
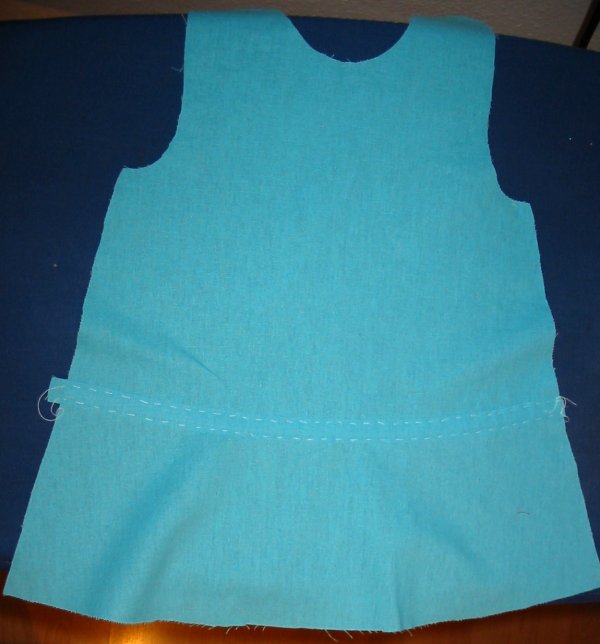
Der breitere Streifen wird jetzt von Hand aufgeheftet. Er dient dazu, eine Ansatznaht zu verdecken. Da die Naht abgerundet verläuft muß der gerade Streifen dazu schon beim Heften etwas in Form gedehnt und gestaucht werden.

Mit meinem Stoff geht das auch ganz gut, danach wird der Forumung noch mit Dampf und Hitze (spricht dem Bügeleisen) nachgeholfen, so daß der Streifen glatt aufliegt.

(Für eine größere Version des Photos einfach draufklicken.)

The larger band of fabric now gets handbasted to the front and the back of the dress. (The pic shows the back.) I want it to cover a rounded seam, so I have to shape it. Stretching it a bit on the botton an holding in a bit on the top of the band.

With my fabric that is not to complicated, it is soft enough to be formed. Then steam and heat (that is pressing) help it to lay flat over the seam.

(For a larger version of the pic just click.)

aufkleben
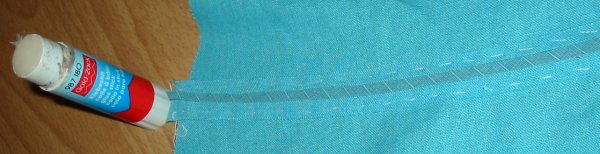
Der zweite, dünnere Stoffstreifen wird jetzt genauf auf die Mitte des breiten gelegt. Um ihn zu fixieren benutze ich den Stoffklebestift von Gütermann. Der wäscht sich hinterher raus.

Da der Streifen schräg geschnitten ist, ist es nicht schwer, ihn der Kurve anzupassen.

Now I’m attaching the second stripe of fabric on the middle of the first one. To baste it I’m using a non permanent glue stick from “Goldzack” (at least in Germany, probabely it exist under other brand names in other countries, too). This glue will wash out later.

As the second stripe was cut on the bias it is no problem to have it follow the curve.

Zierstich
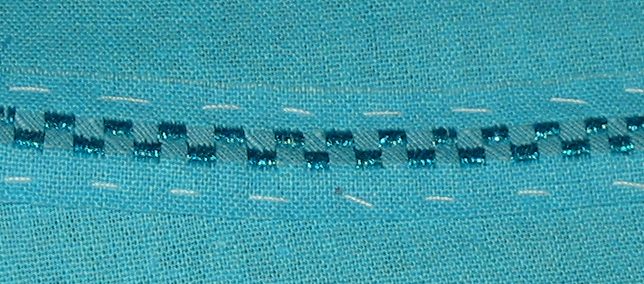
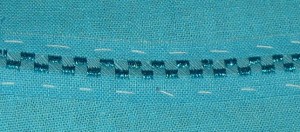
Jetzt kommt der lustige Teil: Einmal mit einem einfachen Zierstich über den schmalen Streifen nähen. Dadurch werden beide Stoffstreifen befestigt.

Ich habe ein Metallic Stickgarn von Mettler benutzt und natürlich eine 90er Maschinensticknadel. Eine spezielle Metallicnadel war nicht nötig, das Mettlergarn neigt zumindest bei mir nicht zu Fadenrissen.

Now comes the fun part: Setting the machine to a simple decorative stitch and stitching over the small fabric band. So both stripes are well attached.

I used a metallic machine embroidery thread from Mettler an a machine embroidery needle size 90. As (at least on my machine) Mettler threads are not prone to break I didn’t need the special needle for metallic thread.

ausfransenVielleicht hat sich beim Lesen der eine oder andere gefragt, warum ich nicht beide Stoffstreifen im schrägen Fadenlauf zugeschnitten habe. Schließlich ist das bei einer Rundung doch einfacher. Aber hier kommt die Auflösung des Rätsels:

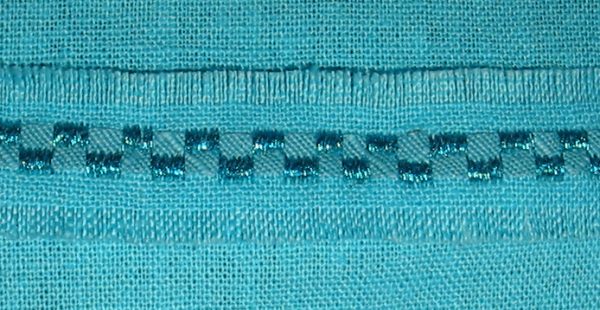
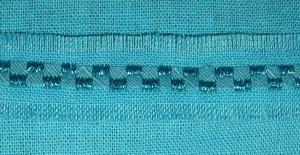
Die Borte bekommt einen fransigen Rand, ich ziehe also noch Gewebefäden aus dem breiteren Stoffstreifen heraus. Und das geht natürlich nur, wenn ich vorher gerade geschnitten habe…

Maybe some of you did ask themselves, why I did not cut both fabrics on the bias, because that makes following a curve much easier. Well… here’s the reason:

I wanted a braid with a frilly edge, so I pulled some threads from the larger fabric band. And this is only possible if it’s cut straight on the grain…

Babykleid
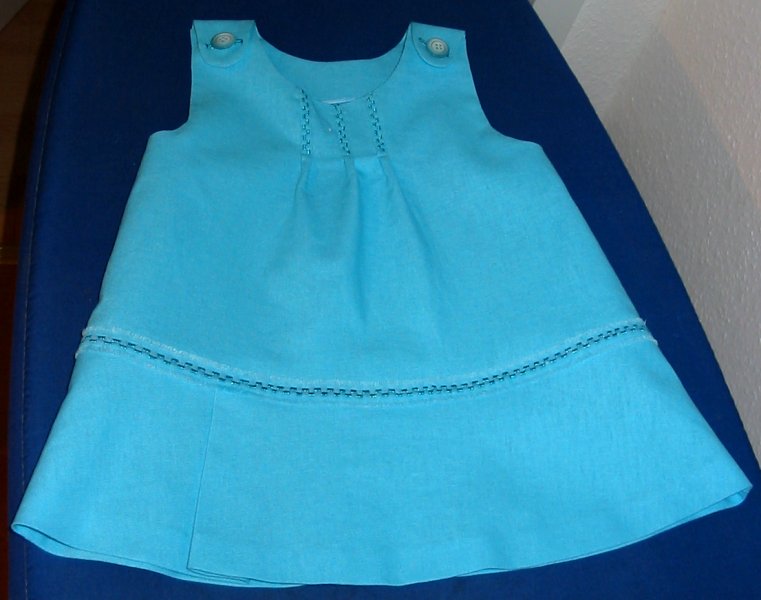
Natürlich gibt es auch ein Bild von dem fertigen Kleid.

Der Schnitt ist übrigens ein alter Bekannter, aus der Oktoberburda 2005: Hier habe ich es schon einmal genäht.

Of course there is also a pic of the finished dress.

The pattern is from BWOF, october 2005, Here I did it for another baby.

Ausschnitt
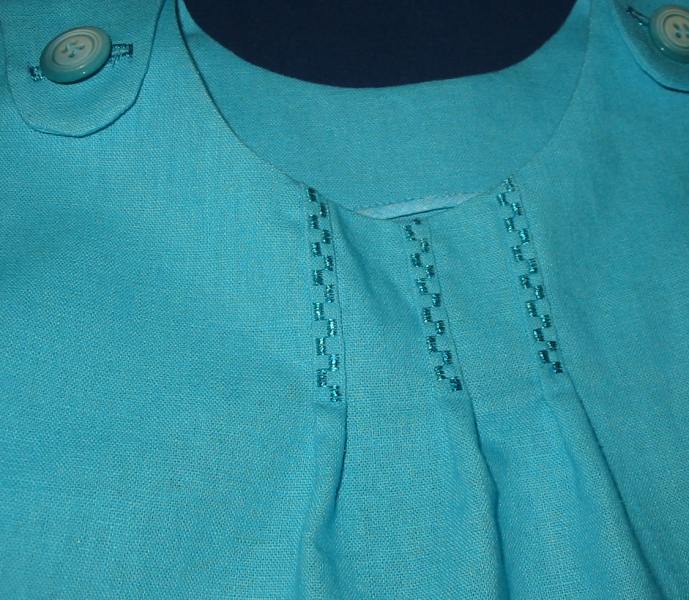
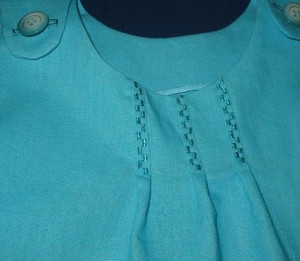
Und zu guter letzt auch noch ein Detailbild vom Ausschnitt.

Das Kleid hat vorne schmale Falten gelegt und diese habe ich mit dem gleichen Zierstich festgenäht.

Ganz einfach, aber ein chicer Effekt. Finde ich.

My last shot is a detail from the neckline.

The dress has inverted pleats on the front and instead of normal topstitching I used the same metallic thread an the same decorative stitch from my sewing machine to stitch them down.

Again easy and simple, but a chic effect. I think…
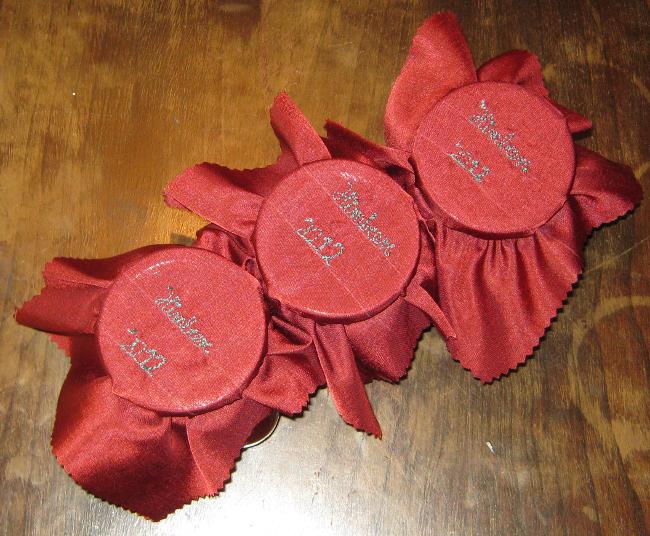
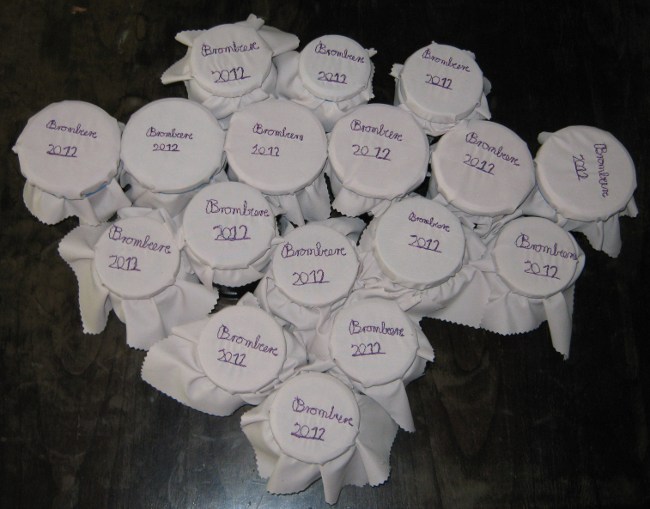
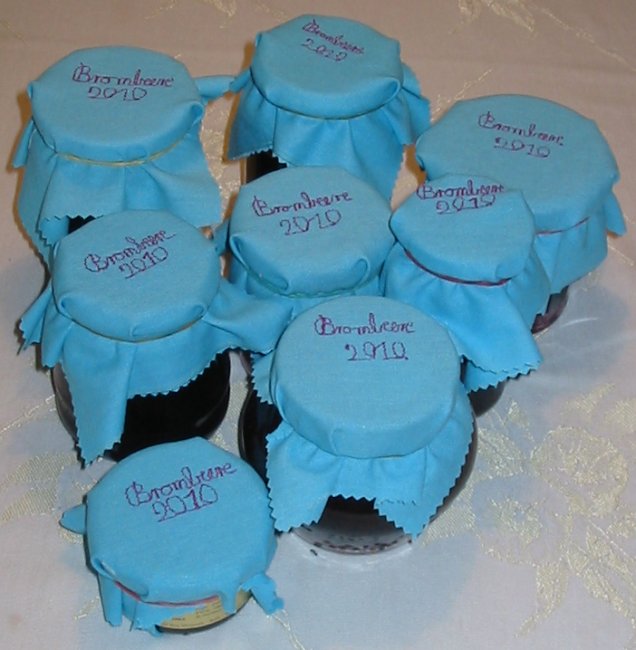
Aus dem Blogarchiv

Crafty posts from long ago

Dezember 2005:

Dezember 2006:


Aus dem Blogarchiv

September 2006… Wingnadel und Batist

Pimp den Stoff!

Babyanzug“Wo hast du denn den Stoff her?” fragte Silvia, als ich bei ihr aufschlug, um passende Knöpfe für die Babykombi zu bekommen.

“Na von dir.”

“Ne, den hätte ich mir…… Moment… also… doch… mir kommt da was bekannt vor…”

“Where did you get that fabric?” Silvia asked, when I went to her, looking for buttons, matching this baby combination.

“Well… from your shop.”

“Never, that I would remember… wait… well… there is something familiar…”

Genau, der grau-braune Stoff wanderte vor Jahren schon über die Theke des Scherzkeks Ladens. Ich hatte nur zwei schmale Streifen für Belege gebraucht, dann war eine Menge übrig.

Nicht mehr genug für mich, aber perfekt für eine Baby-Kombi.

Nur der dunkel Stoff wollte mir auch für einen Jungen nicht gefallen.

Aber halt… da war auch noch die Rolle mit dem mehrfarbigen bunten Sulky Stickgarn, das ich mir damals in den USA gekauft hatte… Und so entstand in meinem Kopf schnell ein Bild von einem Karomuster.

The brownish-grey fabric I have bought many years ago at the “Scherzeks” shop. I had only used two long but slim stripes for facings and then there was a lot of fabric left.

Not enough, of course, to sew something for me.

But the perfect amount for a baby combination.

Just I wasn’t too happy with this dark fabric for a small child, even not for a small boy.

BabyanzugBut then I remembered a spool of multi-coloured Sulky embroidery thread I had picket at Jo Ann on my one and only stay in the US. And quickly the idea of checks formed itself in my brain.

Ich habe also zugeschnitten und danach einfach gerade Linien genäht. Teilweise im Raupenstich/Satinstich, teilweise mit dem dreifach Geradstich. (Eine einfache Steppreihe wäre nicht gut genug sichtbar gewesen.)

Damit es weniger streng wirkt, habe ich die Karos unsymmetrisch gemacht und außerdem an einigen Stellen kleine Karos genäht.

Ein leuchtend gelber Baumwollstoff (ein Rest aus einem Quiltprojekt) durfte als Futter herhalten.

Und bei Silvia gab es dann doch tatsächlich Multicolor-Knöpfe! Wie cool ist das?!

Ein Stoffrest, eine Rolle Stickgarn… und eine ganz außergewöhnliche Kombi darf sich auf den Weg nach Frankreich machen. Ich gebe zu, ein Geschenk, auf das ich stolz bin. :o)

After cutting the fabric I’ve marked the lines and then sewn them. Some in satin stitch, others in a triple straight stitch. (A simple straight stitch wouldn’t have been visible enough.)

I’ve choosen to make the checkered pattern non symmetrical. Also I made smaller checks at some places to avoid a too “serious” look.

Jacket and trowser ar fully lined with some yellow cotton fabric, a leftover from a quilt project very long ago.

And then I found those multicoloured buttons at Silvias shop! How cool is that?!

So, some scraps, a spool of thread,.. and a very special gift will make its way to France. I have to admit, I am very pleased with the result and quite proud. :o)

Marions knitting finally finished

Hi Ric, still there?

yes, I finished my strange knitting and it became… a toilet bag. (“Kulturbeutel”, you know… don’t know why it’s called like that in German… The pics are below in this entry.

So… now you know… 😉

And now as promised, the English text, that belongs to the pics of the entry below.

(Wer kein Englisch spricht: Keine Sorge, ihr verpaßt nichts, es ist die Übersetzung von dem, was ihr schon gelesen habt.)

Quite a long time ago I did some dyeing experiments with wool and colours for easter eggs.

Some time later I did knit it up and felt it in my washing machine.

I wanted to make something of it, preferably even something usefull… I looked on my felted cloth and went looking for all kinds of embroidery floss, galons, rickrack, beads, buttons,… crocket hooks, needles… I could find and I liked the colour with my cloth.

And I just let it happen. “Heavy embellishing” is probably the word… I never really learned to embroider. I mean, at school, very, very long ago, we did some simple cross stitch, but I was never good on that and I do not really know anything about it. But I have books… Well, es I said, I just let it happen… I did something, then I added something else… and finally a sea(shore) scene happend. (There wasn’t much of a plan…)

Finally it’s Summersets “fault”;-) Her great wearable art encouraged me, just to try and mix techniques. Apart from the inspiration, of course, I don’t compare to her. She is doing great artistic things, mine is… maybe “art brut”, but then more the “brut” side, than “art”. But I enjoyed doing it.

After some layers of stuff, bands, beads, stitches,… on the cloth I decided it was enough and sewed it up as a small bag.

I bought a pretty patchwork fabric in blue-green-gold as a lining, braided handles from simple cord… and remembered that this bag (more purse?) wouldn’t match any of my clothes. Neither my style in clothing. So would I ever use it?

But what I was needing for years was a new toilet bag. (I’m travelling quite a lot and I was mostly using plastic bags the last years. No style in that…) Only that should be kind of waterproof on the inside. My cotton lining was far trom that, of course.

But Freudenberg (Vliseline) has a great thing, a plastic foil you can iron on and therefor laminate the fabric. Never tried… And I was quite reluctant to use it, afraid it would stick to my iron…

Well, it did not, it worked!  (Lucky me…) It got stiff, but still managable and I could sew a second bag (long stitches on the sewing machine) as a lining and attach it by hand to the zipperband. That was the not so funny part… as I said, the laminated fabric is stiff….

And voila, my new toilet bag!

And has succesfully travelled with me to India and when my cleansing milk leaked inside, I could wipe it away with a tissue.

So it’s a strange bag, but I like it. 🙂