Vogue 2273, Vogue American Designers (Jacke)

English Review is on Pattern Review.

Es ist nicht so, daß ich in den letzten Monaten gar nichts genäht hätte, aber es waren wenige, dafür zeitaufwendige Projekte. Hier ist eines. Von Bernina gab es ein Projekt Seidenträume bei dem ich mitmachen durfte und das mir eine festen Seide beschert hat. Die Suche nach einem geeigneten Schnitt ließ mich in meiner Sammlung graben und diesen zu Tage fördern.

Schnitt Vogue 2273
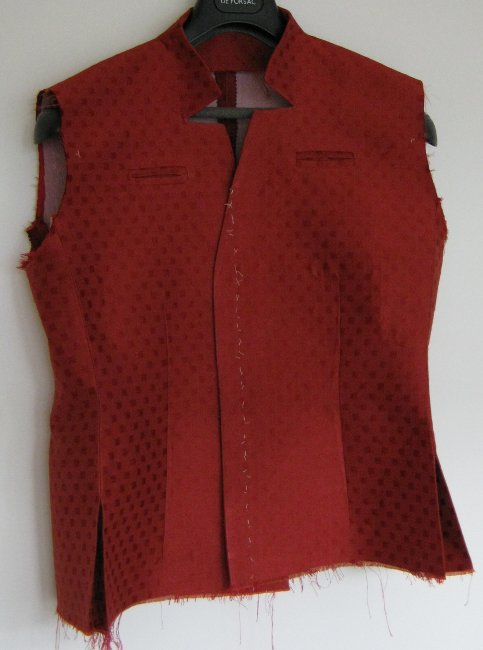
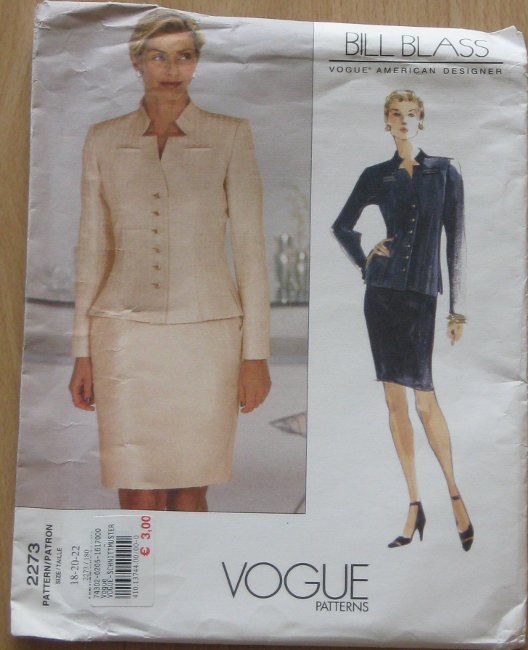
Den Bill Blass Schnitt von Vogue habe ich vor wirklich vielen Jahren bei Alfatex in Köln billig bekommen. 1999 steht auf der Tüte. Was mir damals gut gefallen hat war die Ausschnittform und die finde ich letztlich zeitlos. Also habe ich den alten Schnitt herausgezogen.

Ich habe Gr. 20 gewählt und zur Hüfte auf Gr. 22 erweitert. Auf eine FBA habe ich verzichtet, denn es gibt keine Seitennaht. Das Seitenteil reicht vom mittleren Rückenteil bis zum mittleren Vorderteil. Da das Projekt auch einen Abgabetermin hatte und ich wie üblich wenig Zeit, habe ich auch auf ein Probemodell verzichtet. Bei Vogue vertraue ich drauf, daß es mit meinen üblichen Änderungen tragbar wird. Und „übliche Änderung“ heißt hier, daß ich rundum 2cm Länge oberhalb der Taille rausgenommen habe.

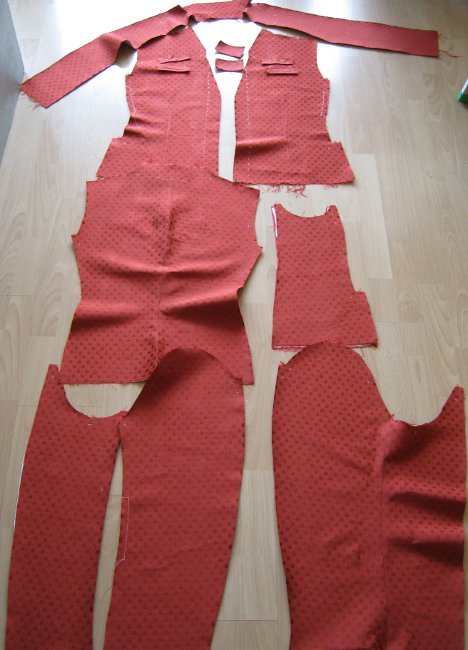
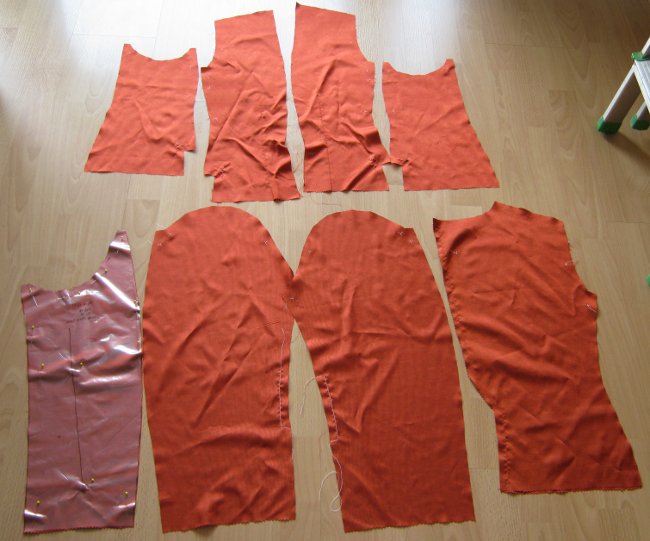
Der Schnitt kommt mit vielen Teilen, denn alle Futterteile sind extra Schnitteile. (Und soweit ich es probeweise aufeinander gelegt habe sind sie tatsächlich nicht identisch.) Beim Rauskopieren des Schnittes ist das lästig, beim Ändern auch, dafür beim Zuschneiden recht praktisch.

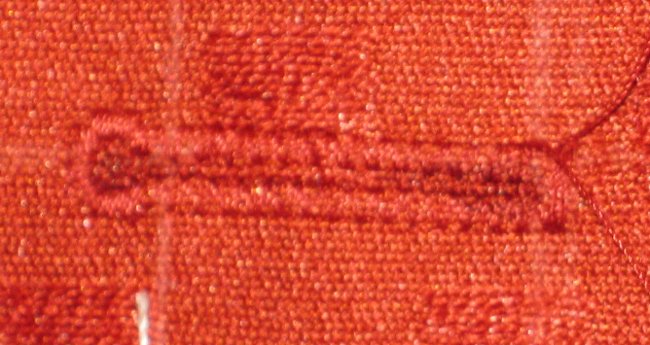
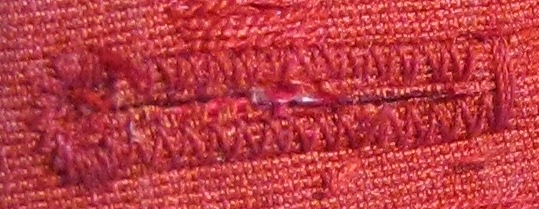
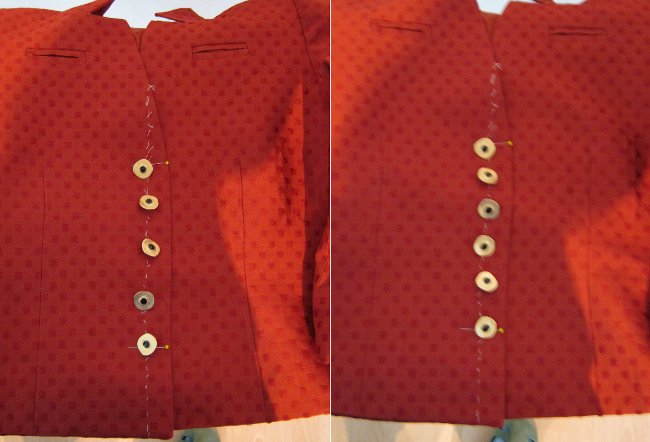
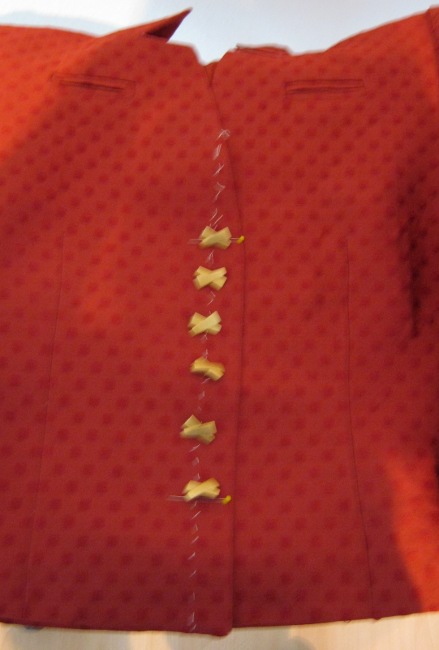
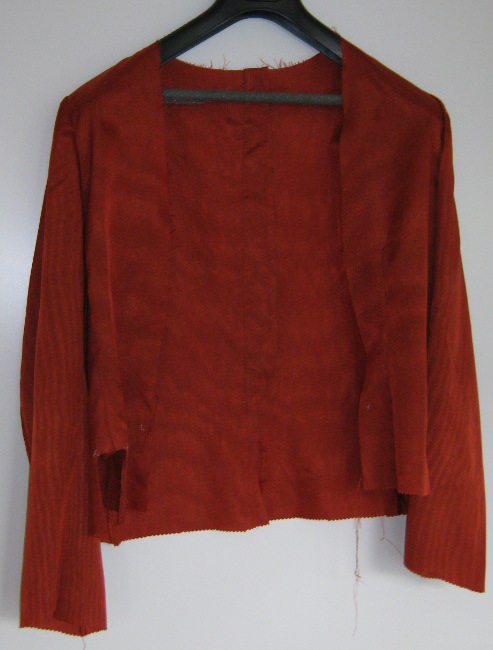
Beim Nähen habe ich mich brav an die Anleitung gehalten, wobei nicht nur die Besätze, sondern auch alle Oberstoffteile mit Vlieseline verstärkt werden. Mein Stoff war eh recht fest, vermutlich hätte ich das nicht gebraucht. Aber wenn die Jacke mal im Koffer landet dürfte sie das ein Stück weit vor Knittern schützen. Die Pseudopaspeltaschen sind nicht ganz perfekt geworden, da hätte ich das mit anderen Methoden vermutlich besser hin bekommen. Aber zum Ändern war keine Zeit und wenn ich es anhabe fällt es weniger auf, als auf dem Bügel. Dafür war es glaube ich das erste Mal, daß ich ein Futter weitgehend mit der Maschine eingearbeitet habe und das Futter nicht hinterher irgendwo zu kurz war.

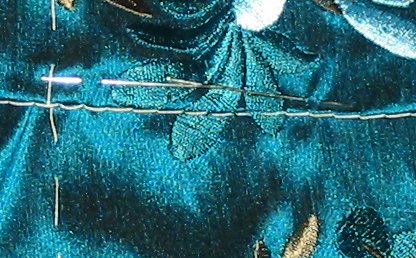
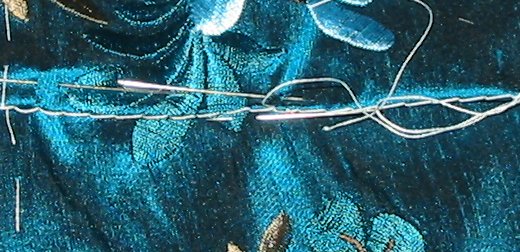
Was hingegen nicht passte war der Unterärmel an den Oberärmel. Da fehlen dem Oberärmel 7mm, auch wenn man sich an die Paßzeichen für das Einhalten am Ellbogen.

(Wer will, kann die Entstehungsgeschichte der Jacke im Detail nachlesen.)

Jacke Vogue 2273
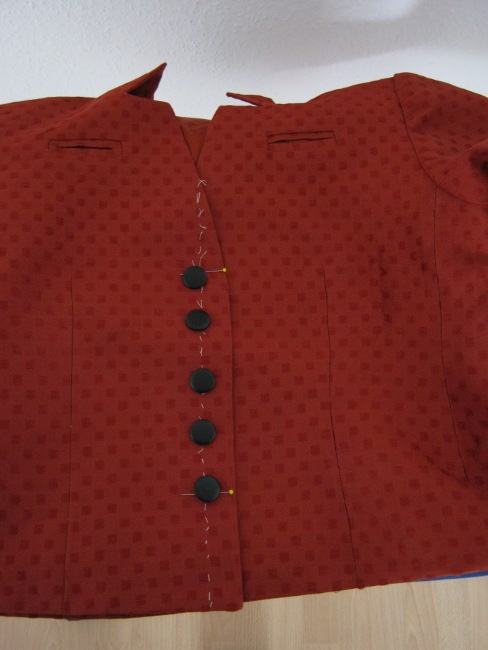
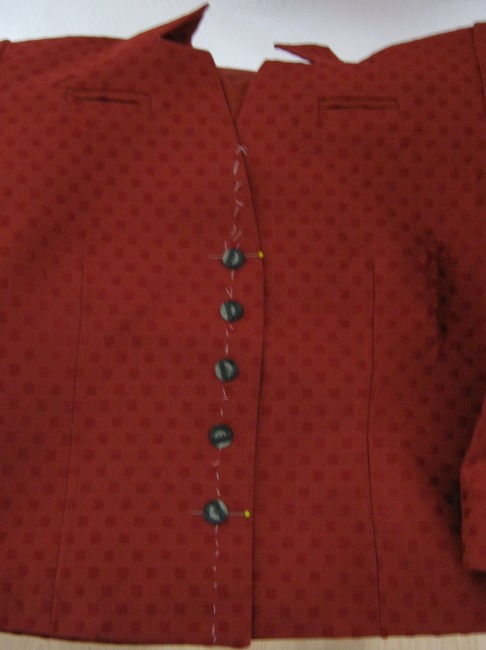
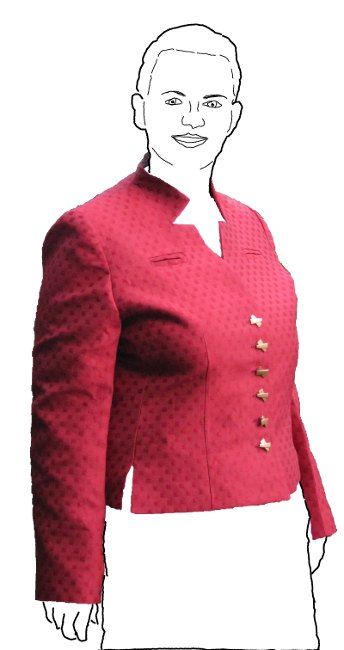
Mit dem Ergebnis bin ich so lala zufrieden.

Die Jacke ist tragbar, die fehlende FBA sieht man aber. Die Ärmel fühlen sich ein wenig weit und keulig an (andererseits besser als zu eng) und vor allem etwas steif. Und ein wenig kürzer für meinen Geschmack.

Aber wie gesagt, immer noch besser, als alles was ich von der Stange bekomme. Jetzt brauche ich nur noch einen passenden schmalen Rock dazu, denn von den Proportionen her geht die kurze Jacke nur mit Rock.

Der Ausschnitt gefällt mir jedoch immer noch wahnsinnig gut, so daß ich überlege, entweder doch den Schnitt mal noch besser anzupassen oder den Kragen an eine andere Jacke hinzubasteln.

Und was mir auch gut gefällt ist die Position der (Pseudo) Paspeltaschen. Die sind zwar als Taschen unnütz, aber sie liegen nicht genau auf der Brust. So sind sie eben ein schmückendes, aber nicht verspieltes Detail. Also so wie ich es mag. 🙂

Die Knopfauflösung…

The solution of the button question…

Gibt es heute im Laufe des Tages im Bernina Blog. (Zumindest wenn ich mich nicht im Datum getäuscht habe…) Also mal vorbei gucken. 🙂

Should be up today in the Bernina Blog. (At least if I remember the date right….) So check it out today. 🙂

Sicherheitsknopfloch

Security button hole

Die „Auflösung“ der Knopffrage verrate ich natürlich noch nicht, wenn ihr das wissen wollt, dann müßt ihr am 27.07. im Bernina Blog vorbei schauen, da gibt es dann das fertige Bild. (Oder Geduld haben, bis ich Zeit habe, es hier zu zeigen.)

My button solution will not be shown here now. If you want to know that you’ll have to check the Bernina Blog on 07/27, there will be a picture of the finished jacket. (Or you are patient enough until I have the time to show it here.)

Aber derweil erzähle ich was von den Knopflöchern. Es gibt zwar ein paar Bilder, aber leider keine guten, die Makrofunktion dieser Kamera und ich stehen irgendwie auf Kriegsfuß. Oder ich sollte einfach die Bedienungsanleitung noch mal lesen…

But I’ll tell you something about my buttonholes. There are pics also, but not very good ones. The camera should be able to do Macro shots and sometimes does, but sometimes not. And I don’t know why. Maybe I should read the instructions again…

Problem bei dieser Jacke war, daß die Seide sehr leicht ausfranst und daß die oben aufliegenden Fäden auch nicht freiwillig liegen bleiben, wenn man sie durchtrennt. Handknopflöcher waren aus Zeitgründen keine Alternative, aber es gibt da auch ein paar Tricks mit der Maschine…

A problem with this fabric was, that the silk was fraying easily and also the loose fibers on top that form the pattern wont stay put once cut. Sewing button holes by hand was not an option due to the deadline, but there are some things you can do with the sewing machine…

KnopflochErster Schritt, ist die Position zu markieren und ein normales Augenknopflich zu nähen. Dabei wird die Raupe ein wenig „lockerer“ eingestellt, also die Stichlänge minimal erhöht. Danach wird zwischen den Raupen Fray Check aufgetragen. Bei dem dicken Stoff sogar einmal auf der Jacke und einmal am Beleg.

(Den Schritt, bei dem man vier der Augenknopflöcher wieder auftrennen muß, weil man das Auge mal wieder an die falsche Seite genäht hat, den kann man gut weglassen…)

First step is to mark the position and sew the eyelet button hole. Change the stitch length of the „normal“ setting of your sewing machine, making the stitch length a little longer. The button hole will be less densely sewn. Not apply fray check to the fabric between the sewn button hole. In my case (the fabric is very thick) from both sides. Apply on the jacket and apply on the facing.

(The step where you have to rip out four button holes because the eyelet is showing in the wrong direction can easily be omitted… )

KnopflochDanach den Fray Check wirklich gut trocknen lassen.

Danach das Knopfloch aufschneiden. (Falls man dabei die Raupe mit erwischt ist das nicht so schlimm, durch das Fray Check kann sich nicht alles auflösen.)

Allow the Fray Check to dry very well.

Then cut the button hole open. (If you cut some of the stitches it is not a problem, with the Fray Check on it it will not unravel.

Knopfloch fertigUnd dann wird noch mal ein Knopfloch genäht. Diesmal mit der normalen Stichlänge.

Am besten man orientiert sich wieder an seinen Markierungen, die sollte man also nicht entfernen, bevor man ganz fertig ist.

Meistens wird es nicht ganz so perfekt schön wie ein einfach genähtes, weil man (oder weil ich) dann doch nie zu hundert Prozent treffe, aber dafür hält es. Und wenn die Knöpfe zu sind, sieht man vom Knopfloch eh nicht viel…

Then bring your button hole back to the machine and sew the same eyelet button hole as before, but this time with the standard setting and dense stitches.

It works best if you use your original markings, so you should not remove those before everything is completely finished.

I have to admit that the result is normally not as perfect as a „normal“ button hole because one (or because I…) never is able to match the two button holes perfectly, but it is stable and that’s a lot. And if the buttons are closed one doesn’t see to much of the button hole stitches anyhow…

Knopfalpträume

Bad button dreams

KnöpfeDie Jacke „Seidenträume“ ist tatsächlich fast fertig, aber vor den letzten Schritten geht der Jammer wieder richtig los.

Knöpfe!

The „silk dreams“ jacket is nearly finished, but now next trouble is ahead.

Buttons!

Schlichte schwarze gibt meine Knopfkiste her, aber die sind ein wenig hart und langweilig.

My button box has simple black ones but the contrast is a bit high and they are quite boring.

KnöpfeDiese hier gefallen mir schon besser, aber ich habe nur fünf davon und da sie kleiner sind wären schon sechs nötig.

Those I like better, but I have only five and since they are smaller I’d need six to make it look good.

Die Anleitung sieht übrigens auch sechs Knöpfe vor.

Six buttons is also what the pattern uses.

(Daß die Bilder unscharf sind liegt daran, daß die Kamera im Moment keine Lust hat, zu blitzen. Es könnte an den schon etwas schwachen Batterien liegen…)

KnöpfeDiese Blumenknöpfe sind glaube ich von Jim Knopf.

Definitiv zu verspielt… geht gar nicht.

Those stylized flowers are from Jim Knopf, I think.

No… to child-like… no way.

(The pics are all a bit blurry, I am sorry. the flash light on the camera refuses to work. Might be that the batteries are low…?)

KnöpfeGut, ohne Blitz erkennt man bei diesen Knöpfen gar nichts…

Es sind transparente Kunststoffknöpfe mit Goldglitter drin.

Okay, without flashlight you don’t see anything of those buttons….

They are transparent and have gold glitter in the plastic.

Sehen aber doch irgendwie billig aus. Und waren es vermutlich auch. (Die habe ich mal bei einem Knopfswap eingetauscht und sie waren mit billigem Tesa-Imitat aneinandergeklebt, deswegen fühlen sie sich auch noch immer leicht klebrig an…)

Well… look cheap. What they probably also were. (I got them via a swap and they were taped together with a cheap tape so they still feel sticky from the glue on the tape even after all those years…)

CoutureknöpfeDiese Goldknöpfe sind schon mal nicht ganz schlecht. (Ich habe sie mal auf einem Pariser Flohmarkt gefunden, sind gebraucht, hat ihnen aber nicht geschadet….)

Bleibt die Frage, ob fünf oder sechs und ob Goldknöpfe nicht doch etwas zu viel Pracht sind?

The metal vintage buttons I picked once on a Paris flea market aren’t bad. (They are used ones, but that doesn’t show…)

Still… five or six? And do I really want so much gold or is it too much?

KnöpfeDiese Goldknöpfe (okay, eher messing…) hatte ich mal an einer Strickjacke. Für die sie übrigens eigentlich zu schwer waren…

Jedenfalls habe ich die Knöpfe behalten, als ich die Jacke weggeworfen habe.

Sollten sie hier wieder zum Einsatz kommen?

Those brass buttons I bought very long ago for a knitted cardi. (And they were too heavy for it but I used them nevertheless…)

When I threw away the cardi I kept the buttons because I thought they were to special to throw away. (Not to mention that they were expensive also.)

Is that the moment to reuse them?Vintage Knöpfe

Noch mal Vintage vom Flohmarkt in Paris sind auch diese hier… (Ich kann nicht mal sagen, was für ein Material. Sie sind sehr leicht und es ist sicher ein Kunststoff, aber wie „normaler“ moderner Kunststoff fühlt es sich irgendwie auch nicht an?)

Der Farbton gefällt mir ja ganz gut dazu.

Again vintage buttons from a Paris flea market. (I can’t even say what they are mad of. They are very lightweight and I think its a kind of „plastic“. But they somehow don’t feel like „ordinary“ modern plastic?)

I like the color.

Aber außer dem „fünf oder sechs davon?“- Problem finde ich sie auch arg hoch und kugelig. Zu dem Design der Jacke paßt doch eher ein flacher Knopf, oder?

HILFE!

But besides the problem if I better take five or six of them… I think they are very high and thick. I think a flat buttons looks better with this jacket?

HELP!

Projekt „Seidenträume“ geht weiter

Project „Silk Dreams“ goes on

Jacke ohne Ärmel und SaumWährend im Bernina Blog die Präsentation der fertigen Modelle schon auf Hochtouren läuft, bin ich noch am Arbeiten. Aber mein Termin ist ja erst am 23.7. (Oder notfalls am 27., wenn ich es selber in die User Galerie hochlade. Aber der 27. ist ein Mittwoch und da ist bei mir mit Internet immer etwas schlecht. Also arbeite ich am 23.) und allmählich sieht es wie eine Jacke aus.

While in the Bernina Blog the presentation of the finished models has already started I am still working. But my dead line is only the 23rd (or 27th if I upload my pic myself, but since the 27th is a Wednesday and a day where I will not be easily online I’ll better go for the 23rd) and it starts to look like a jacket.

Die Ärmel sind nicht im Bild, sind aber fertig genäht und gesäumt, müssen also nur noch eingenäht werden. Vorher bekommt die Jacke allerdings noch ihren Saum.

The sleeves are not in the picture, but they are finished and hemmed and have only to be attached. But before the jacket needs a hem also.

FutterjackeDie Futterjacke ist schon fertig und wartet darauf, nach den Ärmeln (und dem einsetzen der Schulterpolster) eingenäht zu werden.

Das passiert bis auf die Säume mit der Nähemaschine, sollte also nicht allzulange dauern.

Und dann noch Knöpfe und Knopflöcher… sieht also mit dem Zeitplan ganz hoffnungsvoll aus. Ich hoffe, ich finde passende Knöpfe bei meinen Vorräten…

The lining is already completed and waiting to be attached to the jacket. (After inserting the sleeves and the shoulder pads.)

This will be done by machine (except for the hems) so it shouldn’t take to long.

After that adding buttons and making buttonholes. Looks as if I could make it in time. I hope I have fitting buttons in my stash…

Projekt „Seidenträume“

Project „Silk dreams“

Nach den ganzen Strickwerken zeige ich auch mal wieder was Genähtes. Letztes Jahr war es, da wurde Bernina Blog Seide verschenkt. Rote Seide um genau zu sein und da konnte ich nicht widerstehen. Schon im Mai traf der schöne Stoff bei mir ein, am 23 Juli muß ich aber dafür ein ein fertiges Teil „abliefern“. Also Bild und Text, das Genähte darf ich behalten. Wird also allmählich Zeit….

There is not only knitting, here is sewing again. It was last year when in the Bernina blog they offered to give away silk. Red silk… and that was the moment when I had to say ‚Yes, please!‘. The wonderful fabric arrived in may, July, 23 is the day when I have to „deliver“ a finished piece. As picture and some text, the sewn item will be mine. So it’s about time…

Wie das mit Überraschungspaketen so ist… der Stoff war natürlich ganz anders als gedacht. Geplant hatte ich ein Kleid, aber für das was ich so gedacht hatte war der Stoff zu steif. Aber dann bin ich mal in meine Schnittsammlung abgetaucht und siehe da, ein alter Vogue American Designer Schnitt, dessen Jacke ich mir schon lange mal nähen wollte.

Jacke Vogue 2273Diese kurze Jacke bietet sich aus verschiedenen Gründen an: Sie hat nicht viele Teilungsnähte und sie ist kurz.  Beides gut für den eher steifen Stoff mit einer doch etwas empfindlichen Oberfläche. (Rock geht gar nicht, das wäre am Hintern gleich durchgescheuert.)

Of course (that is what always happens if you get fabric you couldn’t touch before) the fabric was not suitable for the kind of dress I had planned for it. But then I checked my pattern collection and there was this Vogue American Designer pattern with the jacket I had wanted to make for years but it never happened.

The pattern is perfect for the fabric: It has only a few darts and seams, also no gathering, so it is very good for the stiff fabric. And it is short. The surface of the fabric gets snags easily, so no way to make a skirt out of it. The fabric would not make it for long if I had to sit on it.

Das Zuschneiden letzte Woche ging ganz gut, alle Teile mit einer leichten Gewebeeinlage zu bebügeln (mit feuchtem Tuch) war hingegen eine Strafarbeit…

Cutting the fabric was quite easy, but pressing interfacing with a humid cloth on all fabric pieces was no fun at all…

JackenteileHier also der aktuelle Stand: an der Jacke sind die Besätze zusammengenäht, die Vorderteile haben Abnäher und ich arbeite gerade an den Pseudo-Pattentaschen. Die hintere Mittelnaht ist gemacht, ebenso ein Teilungsnaht an einem Ärmel.

That’s what I’ve done so far: the facings of the jacket are sewn. The fronts have the darts done and I am working on the welt of the fake pockets. The back middle seam is done and one seam of one sleeve.

FutterteileAuch am Futter habe ich schon genäht: Die Abnäher in den Vorderteilen und die hintere Mittelnaht. Und etliche Stütznähte.

I also started to work on the lining: Darts in the fronts are done also the back seam. And a lot of stay stitching.

Ich arbeite also parallel am Futter und der Jacke. (Muß ich sicher nicht erklären, ist ja ein alter Hut.)

So I work on the jacket and the lining more or less the same time. (I guess I won’t have to explain that, because everyone knows that, too.)

Shoppingtrip fürs nächste Projekt

Shopping for the next project

Jaja, ich weiß, ich müßte dringend mal den Trenchcoat fertig nähen. Und eigentlich brauche ich ihn auch, weil es Herbst wird und mein australischer Rinding Coat wirklich immer räudiger wird.

Yes, I know. I should really finish my trenchcoat now. And I need it because my australian riding coat looks worse from day to day and starts falling apart.

Aber da es Herbst wird, naht auch endlich die Zeit wo ich den schon länger fertigen Pullover endlich mal anziehen könnte. Wenn ich denn was passendes dazu hätte. Er paßt nämlich nur zu einem Rock und außerdem habe ich gar nichts graues mehr.

But since autumn is coming I’ll finally get a chance to wear this sweater I finished quite a while ago. And this calls for a straight gray skirt. And I have neither a gray one nor a straight one. Or anything else in gray.

Stoff für RockAlso mußte ich vom letzten Paris Besuch etwas Stoff mitbringen.

Grau gemusterte Möbelstoffe waren mein Begehr, was ich größtenteils in den Grabbelkisten auch fand. Es soll nämlich ein schmaler Rock im Stil der populären spanischen Marke werden. (Früher hätte man es Patchwork Stil genannt…)

So I had to buy some fabric at my last visit to Paris.

I was looking for gray decorator fabrics and was able to get some, mostly from the grab tables and boxes. I want to make a skirt in the style of the now so popular spanish brand. (Before you would have called that patchwork style… )

Ich habe keine Ahnung, wie das hinterher an mir aussehen wird, aber der finanzielle Einsatz hielt sich in Grenzen. Also werde ich es einfach mal rausfinden.

(Die beiden blauen Seidenstücke unten im Bild haben hingegen mit dem Rock nichts zu tun. Die sind irgendwie so in die Tasche gehüpft. Für je einen Euro konnte ich die doch nicht auf dem Wühltisch liegen lassen, oder? 😉 )

I have not the slightest idea how that will turn out my size, but the financial investment was quite limited. So I’m going to find out.

(The pieces of blus silk at the bottom have nothing to do with my project. But they were 1 EUR each, I couldn’t leave them there, could I? 😉 )

In einer perfekten Welt…

In a perfect world…

… hätte ich am Sonntag die Jacke fertig bekommen, hätte gestern das Futter zugeschnitten und es heute genäht, damit ich morgen das Kleid zuschneiden könnte und es bis Donnerstag so weit genäht hätte, daß Frau mhs mit ihrem Rockabrunder die Länge festlegen könnte.

… I’d finished the outer jacket on Sunday, had cut the lining yesterday and had sewn it today. So I could cut the dress tomorrow and sew the basic shape of it until Thursday so Frau mhs could come with her magic machine and helping me to determine the length of the dress.

JackeIn einer weniger perfekten Welt habe ich die Jacke gestern fertig genäht, habe heute das Futter zugeschnitten und genäht, so daß ich eine Chance habe, morgen das Kleid zuzuschneiden und es bis Donnerstag so weit genäht zu bekommen, daß der Rockabrunder tatsächlich zum Einsatz kommen kann. (Frau mhs, bitte den „Pftpft“ mitbringen. 😉 )

In a less perfect world I finished the jacket yesterday and cut and sew the lining today so I can cut the dress and still have a chance to have the basic construction done until thursday.

Futter und Jacke sind jetzt so weit, daß nur noch Handarbeit übrig ist. Säume und Belege festnähen und das Futter einnähen. Da ich das Wochenende mit meiner Mutter verbringen werde, hoffe ich auf genug Zeit zum Handnähen bei gemütlichen Gesprächen auf dem Sofa.

Construction of jacket and lining are finished, there are only handstitches to do. Stitching the hems and the facing and attaching the lining is what is left to do. I’m spending the weekend with my mother and I hope I’ll be able to do the handsewing while we sit around and chat.

Muster passend nähen

Matching the embroidery

Gestern habe ich immer noch viel „Kleingestichel gemacht, also Sachen die viel Arbeit machen, aber ein wenig sichtbares Resultat ergeben. Wobei das mit dem „wenig sichtbar“ hier durchaus Absicht ist. Denn die Stickerei soll an der hinteren Mittelnaht ja möglichst ohne Versatz ineinander übergehen. Und wie man das macht, zeige ich heute.

Yesterday I did more „little stitchy steps“, things that are time consuming, but don’t give a lot of visible results. On the other hand „not visible“ is sometimes what is intended, like on the back middle seam where I want the embroidery to match. Hot that can be done I’m going to show today.

AufsteckenDer Trick dabei ist, daß man von der rechten Stoffseite her heftet. Man nennt die Technik auch „hohl heften“.

Dazu wird an einem Teil die Nahtzugabe weggefaltet. (Ich habe mit der Maschine eine Heftnaht entlang der Nahtzugabe gemacht um mir die Nahtlinie zu markieren.) Und dann wird das Teil mit der gefalteten Nahtzugabe auf das andere Teil gelegt und die Musterstellen werden passend festgesteckt.

The clue is to baste from the right side.

You fold the seam allowance of one of your fabric pieces to the left side and then you lay it on the other piece, matching the fold to the seamline of the other cut piece. You match the pattern (in my case the flower of the embroidery, but this works equally to match stripes or check or whatever.)

HeftenDann wird geheftet. Weil ich einen feinen Stoff habe benutze ich Nähgarn und eine sehr feine Nadel.

Ich steche abwechselnd genau auf der Nahtlinie des unteren Teils ein…

Then it’s already time for basting. Since I have a fine fabric I am using sewing thread and a very fine needle.

I make one stitch exactely on the seamline….

Heften… und dann einen Stich genau in den Bruch des gefalteten Teils.

… and another stitch exactely in the fold of the other piece.

Und dann wieder in die Nahtlinie, und wieder in den Bruch… und so weiter.

(Wenn man farblich passenden Nähfaden nimmt und ganz kleine Stiche macht, dann kann man im übrigen auch so nähen. Das hilft auch, wenn man mal wieder nach dem Rückschneiden der Nahtzugabe auffällt, daß man die Ärmel falsch eingenäht hat…)

And so you go on, one stitch on the seamline, one stitch in the fold…

(If you take matching thread and then make tiny stitches you can also sew instead of baste. That is very usefull when you find out that you did sew the sleeves on the wrong side after you cut back the seam allowance…)

Heftnaht von linksSo sieht die Heftnaht dann von der linken Seite aus.

Da ich nur an wenigen Stellen die Stickerei auf der Nahtlinie habe, habe ich auch nur diese Stellen geheftet. Der Rest wurde nur gesteckt.

That’s what the basting looks from the wrong side of the fabric.

Since there are only few motives that cross the seamline I only basted those parts of the seam. For the rest pinbasting had to do.

NahtAnschließend wird genau auf der Heftnaht genäht.

Den Heftfaden hinterher wieder herauszuziehen macht nicht wirklich viel Spaß, aber das ist unvermeidlich…

Sewing has to happen exactly on the basting stitches.

Getting out the basting thread is no fun, but that cannot be helped.

Dann bügeln, non links, von rechts…

Then pressing, wrong side, right side…

fertig genähtJa und es hat fast geklappt…

*hüstel*

And it worked out… nearly….

Ich habe die Technik zwar schon ein paar Mal angewandt, aber nocht nie auf Stickerei. Das muß ich wohl noch mal üben, dadurch daß der Stickereistoff etwas steif ist, war es schwierig zu heften.

Aber dadurch daß die Stickerei an dieser Stelle Ton in Ton ist, sieht man es aus der Entfernung nicht mehr. Denn wie ich schon sagte… richtiges Auflegen ist die halbe Miete… 🙂

It’s not the first time I used this technique, but never on embroidered fabric. Some more practice will be good… The embroidery is a bit stiff so basting wasn’t that easy.

But since the embroidery has the same color as the fabric this little mistake is only visible from very close. As I said, placement while cutting is important. 🙂

Was keiner mehr sehen wird

What will not be seen later

EinlageViel Zeit war die letzten Tage nicht, aber ich habe immerhin die Einlage aufgebracht.

Vogue sieht in der Anleitung ja gar keine Einlage vor, aber der Kragen steht ohne Hilfe sicher nicht. Und die Knöpfe kann man auch besser annähen, wenn alles etwas stabiler ist.

Deswegen habe ich den Kragen und die vordere Kante mit Seidenorganza verstärkt, der einfach aufgeheftet ist. Später wird er in den Nähten mitgefasst, bei der kurzen Jacke sollte das reichen.

Jedenfalls gibt es so heute mal einen Blick auf die linke Stoffseite.

There was not much sewing time the last days, but I managed at least to do the interfacing.

The Vogue instruction do not show any interfacing, but the collar cannot stand as on the pic of the envelope without that. And for the sew on snaps it will also be better if there is a bit more stability.

So I stabilized the collar and the front with silk organza that I just basted within the seamline. When closing the seams the organza will be attached also. Since the jacket is rather shirt this should be enough.

So you get to see the wrong side of the fabric today.