The English version of this pattern review can be found on pattern review.
Nach dem neuen Pattern Magic Buch habe ich ja schon die ganze Zeit gegiert, aber diesmal habe ich es tatsächlich geschafft, auch was daraus umzusetzen. Und zwar noch im Jahr des Erscheinens des Buches. Beträchtlich für mich, oder? (Die Buchvorstellung von mir findet ihr auf der hobbyschneiderin.)
 Natürlich sind nicht alle der Sachen für meine Figur umsetzbar, aber einige Anregungen habe ich gefunden. Und ich habe mir das Modell „Zwei gleicher Art A“ vorgenommen.
Da die mitgelieferten Blöcke nicht für meine größe taugen habe ich mir einen schmalen T-Shirt Schnitt ohne Abnäher vorgenommen (war mal aus einer All Woman), den ich schon lange für mich angepaßt hatte.
Daraus mußte ich dann erst mal einen Grundschnitt mit Kimonoärmeln (also mit angeschnittenen Ärmeln) basteln. Dazu habe ich die Anleitung von Aldrich genommen, habe dann aber die dort vorgesehene Schulterrundung wieder rausgenommen, weil die in der Pattern Magic Anleitung nicht vorgesehen ist. Mit diesem Block habe ich mir dann die Anleitung aus dem Buch vorgenommen und die Schnittteile entsprechend von Hand (und mit Lineal und Bleistift) verändert.
 Das funktionierte gut, die Anleitung war klar. Nur wie man unterhalb der Hüfte vorgehen muß war nicht explizit beschrieben. War aber leicht abzuleiten.
Was eine gute Idee gewesen wäre: Die Markierungen, die man für die Schnittveränderung braucht auch gleich für den endgültigen Schnitt zu übernehmen, das macht einem das Zusammennähen nämlich einfacher.
Denn eine Nähanleitung gibt es nicht, auch Paßmarken muß man sich selber einzeichnen. So man vorher dran denkt…
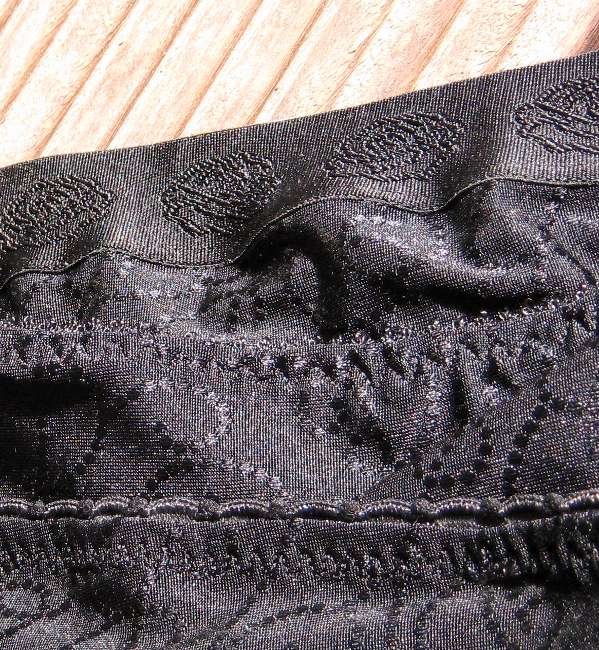
Mein Stoff ist ein Baumwoll Interlock, der fester ist, als die im Buch empfohlenen Stoffe. Hier werden mehr Stretch und auch eher weichere Stoffe empfohlen. Was nicht heißt, daß es nicht geht, aber es wird halt anders. (Wobei mich das Modell aus einem Wolljersey auch mal reizen würde, schon um zu sehen, wie es da fällt…)
 Die Falten habe ich nicht mit einem Faden gezogen sondern die Mehrweite gleichmäßig verteilt und mehr oder weniger von Hand gelegt und mit vielen Stecknadeln gesteckt. Nähen dann einfach mit Steppstich, Saum und Ärmelsaum ebenso, hier aber mit dem Alterfil Elastic 120. Und trotz des Falten einlegens war es fix genäht.
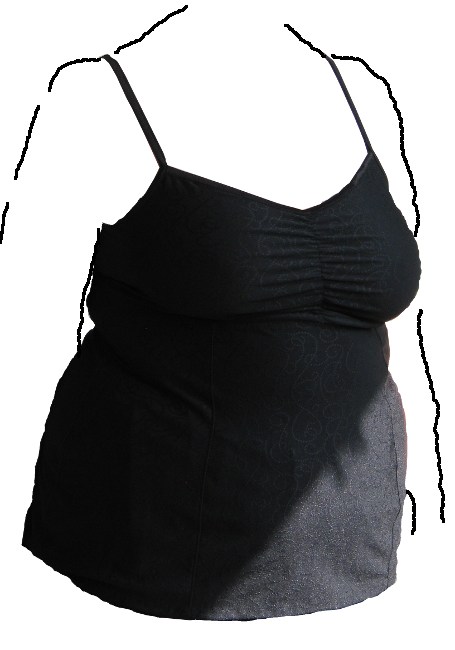
Von vorne gefällt mir der Look auch sehr gut. Eben sehr ungewöhnlich, aber mir gefällt es. Die vorverlegte Schulternaht sperrt ein wenig, nicht so, daß man sich nicht bewegen könnte, aber es ist da nicht optimal bequem. Falls ich den Schnitt noch mal ausprobiere werde ich entweder da auch den elastischen Faden nehmen oder die Schulterrundung wieder einarbeiten, die mein Schnitt ursprünglich mal hatte.
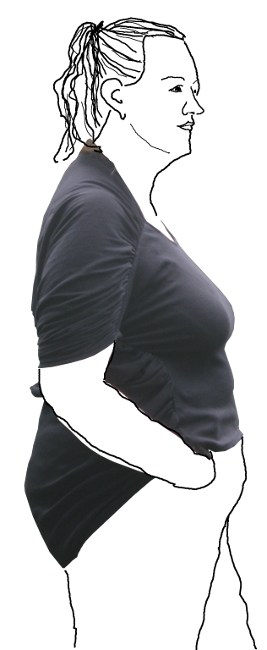
Auch von der Seite gefällt es mir ganz gut. (Ein schlankes Elfchen bin ich nun mal nicht, Aber kein Grund, immer langweilig durch die Gegend zu laufen.) Allerdings sollte ich nicht eine Hose dazu tragen, die maximal aufträgt. :o)
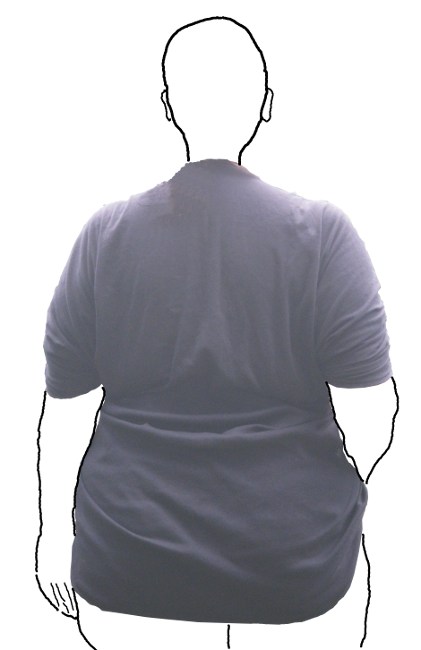
Von hinten hingegen sind die Falten genau über dem Po natürlich suboptimal. Wobei das sicher teilweise dem Schnitt geschuldet ist und teilweise dem Stoff. Ich denke, aus einem weichen Viscosejersey würden sie anders fallen. Und mit ein wenig zurechtzupfen sehen sie vielleicht auch anders aus.
Letztlich wußte ich ja… die Schnitte aus dem Buch sind auffallend und nicht unbedingt der Körperform folgend. Mal sehen, ob ich es irgendwann aus einem anderen Stoff noch mal ausprobiere. Reizen würde es mich schon. Wie auch einige andere Modelle und Ideen aus dem Buch….