Jetzt schon für Weihnachten stricken…

Start Knitting for Christmas now…

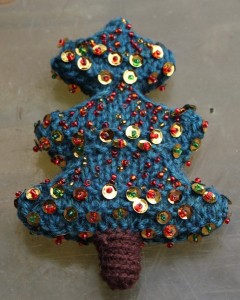
gestrickter BaumDer Sommer ist vorbei, Weihnachten steht quasi vor der Tür…

Summer is over, Christmas is nearly there…

Und ich hatte da noch dunkelgrüne sowie braune Wollreste, Füllwatte sowie allerhand Perlen und Pailletten.

And I had some dark green and brown wool, stuffing, and some beads and sequins.

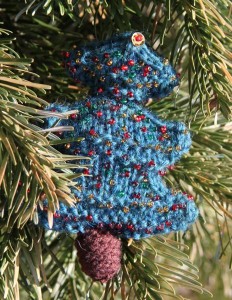
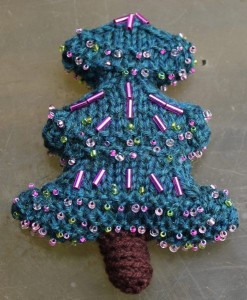
Gestrickter WeihnachtsbaumEin prima Resteprojekt, man braucht weniger als 20m von der grünen Wolle und zwei Stricknadeln. Die sollten etwas kleiner sein, als man das normalerweise machen würde, dann das Gestrick soll recht dicht sein.

It is nice to use up some remnants, you need less than 20 m of the green wool and two knitting needles. Size a little smaller than what you would normally choose, because you want a dense gauge.

Der Stamm wird dann mit knapp zwei Metern brauner Wolle gehäkelt.

The trunk is crocheted, with less than 2m of brown wool.

StrickbaumPerlen und Pailletten sind aus meinem Chaoshaufen, aufgenäht mit AlterfilS 120, den ich zufällig in genau der passenden Farbe da hatte. 🙂

Beads and sequins were what I was having in my drawer. I used my my trusted AlterfilS 120 for sewing, I had some in exactely the matching color. 🙂

Falls das jemand nachmachen mag, findet er die Anleitung hier.

If you want to try yourself here are the instructions.

Meine ersten Kam Snaps, ein Erlebnisbericht

My first Kam Snaps

Seit geraumer Zeit sind ja Kam Snaps aus Plastik in aller Munde bzw an allen Klamotten zu finden und rufen durchweg Begeisterungsstürme hervor.

For quite a while now plastic Kam Snaps are what everybody seems to use and those plastic snaps get praise everywhere.
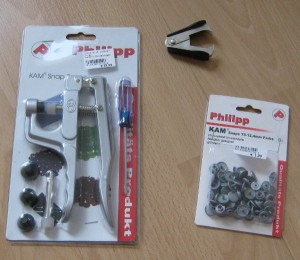
Ich habe nur halb verstanden warum, aber als ich Zange und Snaps irgendwann Anfang diesen Jahres mal bei Alfatex gesehen habe, konnte ich nicht widerstehen und habe mir eine Zange und einige Knöpfe mitgenommen. Unter anderem in grau, weil ich schon an die Jacke dachte, die ich jetzt in Arbeit hatte. (Den Klammerentferner braucht man, weil die Packungen an jeweils zwei Stellen brutal zusammengeklammert sind. Die mit den Snaps ist zusätzlich noch mit Klebstreifen verschlossen, hier war jemand gründlich…)

I did not fully understand why everybody was so crazy about it, but when someday early this year I saw pliers and snaps at Alfatex I decided to grab a plier and some snaps. Some of them in gray, because I already had the jacket in mind I’ve been working on the last months. (The staple remover is a necessary tool because the packages are closed with two stabile staples each. The one with the snaps had been secured with additional tape also. Somebody wanted to make very sure…)
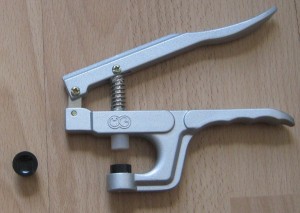

Nach dem Auspacken stelle ich erst mal fest, was es nicht gibt: Eine Anleitung.

After opening the packages the first thing I am finding is what I am not finding: instructions.

Gut, auf der Packung meiner Snaps steht drauf, daß sie Größe “T5” sind. Und auf einem der schwarzen Teller steht ebenfalls “T5”. Aber wie bekomme ich den jetzt an die Zange?

Okay, the package of my snaps tells me they are size “T5”. And one of those black thingies has also “T5” written on it. But how do I attach it?

Also erst mal google angeworfen und siehe da, bei einem englischsprachigen Kam Snap Händler gibt es eine Anleitung.

So I switched on my computer and google found me a Kam Snap Dealer in the US who offers a tutorial.
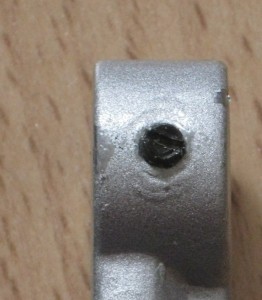
Ah ja, einfach umdrehen, auf der anderen Seite gibt es eine Schraube. Die löst man, nimmt den Teller raus und dann kann man den anderen Teller reinlegen und wieder zuziehen. Die Anweisung, dies vorsichtig und mit Gefühl zu tun, sollte man wohl besser berücksichtigen. Die Schraube sieht nämlich schon neu etwas “zerfranst” und malträtiert aus…

Ah… turn the pliers and you see the screw. Open it, take out the black thingy, but in the other one and turn the srew closed. It is evident that you should do that carefully (as the instructions on the website state) because the screw looks already a bit “wonky” and as if it had been badly treated, even when new out of the box…
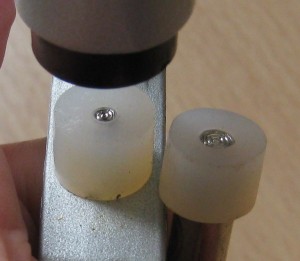
BolzenAuch bei den Bolzen von oben gibt es zwei Größen. Zum Glück muß man die nicht erst entfernen, um zu sehen welchen man hat. Und glücklicherweise ist auch schon der richtige vormontiert. Den auszutauschen sieht nämlich deutlich komplizierter aus…

The bolt comes also in two sizes. Luckily I can compater these without removing the one already installed and luckily it is alreday the right size. Because changing that looks a good deal more complicated…
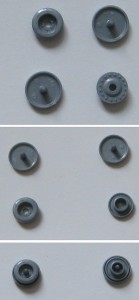
Also dann auf zu den Snaps… es gibt drei unterschiedliche Teile, also vermute ich mal, daß ich sie so brauche.

Now checking the snaps… there are three differently shaped pieces, so I guess that is how I am going to need them.

Na gut, fast… so sind sie richtig gedreht.

Okay, nearly correct… I have to turn them like this.

Ja, so passen sie aufeinander.

Yes, stacking like this.
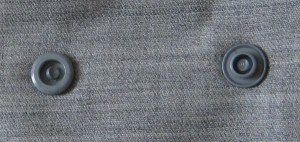
Bevor ich an die Jacke gehe, probiere ich das aber erst mal auf einem Stoffrest aus. Reindrücken lassen sie sich ja ganz gut, aber so richtig schließen tut das nicht. Und der “Gnöbbel” meines Oberteils sieht nicht so ganz aus, wie auf dem Beispielbild der Webseite.

Before I am using it on my jacket I do a test one some fabric remnant. Pressing the snaps doesn’t feen difficult, they seem to be well installed, but somehow they do not really close. And my socket looks a bit different from  the pics of the tutorial.
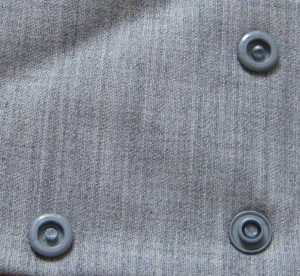
Also zwicke ich ein zweites Oberteil hinein und drücke weniger fest zu. Das funktioniert gar nicht. Also noch mal fest zugedrückt… nein. Vielleicht mal das Unterteil nachdrücken? Ja, jetzt scheint es zu halten.

So I’m trying a second socket and press less firmely. No, doesn’t work. Again firmer… no… Repressing the stud. Yes, now it seems to close.
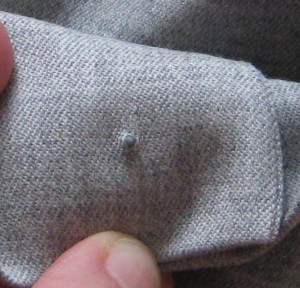
Jetzt wird es aber ernst und ich nehme mir die Manschetten meiner Jacke vor.

Now it’s time to be serious and I am switiching to the cuffs of the jacket.

Am Probeteil habe ich schon gemerkt, daß die Dornen auch ohne Ahle durch den Stoff gehen. Und ich kann den Dorn sogar durch beide Teile der Manschette stecken.

I had already seen on my test scrap that I can push the cap through the fabric without using an awl. And I can even poke it through all layers of my cuff.
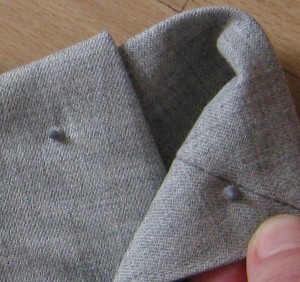
Durch das so entstandene Loch stecke ich dann schnell den Dorn vom anderen Unterteil.

I do remove the cap from the lower layer of the cuff and poke the other cap through it before the hole closes.

Auf diese Weise kann ich schon mal sicher sein, daß der Knopf hinterher genau passen schließt. Das ist auf alle Fälle praktisch!

So I can be sure, that the position of the two parts of the snap will be correct. That’s for sure a useful feature!
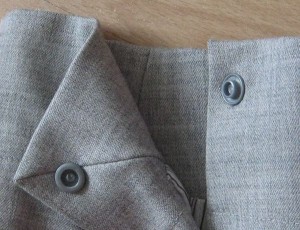
Und zwei beherzte Zangedrücker später is der erste Knopf schon erfolgreich installiert. (Im Ganzen sind es nur zwei, auf jeder Manschette einer.)

Using the pliers twice the first button is successfully installed. (It’s only two snaps, one for each cuff.)

Und hier schließen sich auch besser, als auf meinem Probestück. Ich denke, das liegt daran, daß mit der Einlage und den diversen Nähten der Stoff hier dicker liegt. Falls ich mal noch andere Snaps kaufe, sollten das dann eher welche mit dem kürzeren Dorn sein, nicht die mit dem längeren.
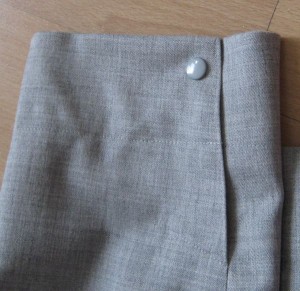
And here it also closes better than on my testing scrap. I think, the prongs were a bit too long for my sample. The cuff has some interfacing and there is also a seam under the snap that makes the material thicker, so that is probably why it works better. If I should buy snaps with anotherprong size I should take shorter ones, not longer one.

Im Ganzen bin ich jedenfalls zufrieden und werde mir im Laufe der Zeit noch ein paar andere Farben anschaffen. Genauer als bei der Prym Variozange fühlt sich die Passung der Teile für mich jedoch nicht an und generell macht die Zange einen etwas lumpigen Eindruck. Mal sehen, wie lange sie hält. Für Metall-Drücker werde ich wohl eher bei Prym bleiben.

All in all I am happy with the system and will buy more snaps in other colors over the time. I had read at some places in the internet that the pliers were more precises than the Prym Vario Pliers. Well… to me it doesn’t feel like that, on the contrary the pliers feel less stabile. Let’s see how long it lasts. For metal snaps I will probably remain with the Prym system.


Gefaltete Karojacke, die Entstehung

Folded checkered jacket and how it was made

Schnitt Jacke Butterick5927Ich erwähnte es schon, die Jacke war dann doch etwas weniger “mal eben schnell” als geplant, daher zeige ich hier, wie ich sie genäht habe.

I think I already mentionned it, the jacket was not as quick as planned, so I’ll show you what I did.

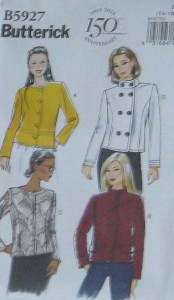
Der Ausgangspunkt für meinen Schnitt was Butterick B5927. Ich habe die Vorderteile von Version B genommen, habe die Schößchenteile aber angeklebt, so daß ich ein durchgehendes Schnitteil hatte. Die leichte Formung, die es hatte, habe ich dabei vernachlässigt. Und ich habe das Teil an der vorderen Mitte enden lassen, weil ich einen Reißverschluss verwendet habe und keine Knöpfe. Das Rückenteil ist im Orignal mit Mittelnaht, ich habe aber im Bruch zugeschnitten und auch hier die Taillenformung aufgegeben. Dafür habe ich im Vorderteil eine FBA gemacht und so einen Brustabnäher erhalten. Die Ärmellänge habe ich ausgemessen und auf meine Wunschläge gekürzt.

The starting point for my pattern was Butterick B5937. I used view A, but added the lower front piece directly to the upper front piece so I had only one front piece. I lost a bit of shaping that way. And I made the front part only to the middle, like view C, because I made a zipper instead of buttons. The back has a shaped seam in the middle which I skipped. I cut my back on he fold, again loosing a part of the shaping. On the other hand I made an FBA and added a breast dart that way. For the sleeves I tried the pattern on my arms and shortenend it to the lengths I wanted.

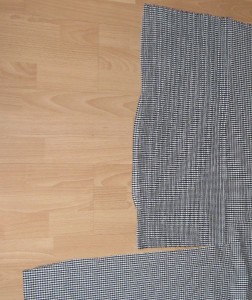
genähte FaltenDanach habe ich schmale Falten (=Biesen) genäht. Ich hatte vorher verschiedene Faltenbreiten und -abstände getestet. Die Variante, die mir am besten gefiel war letztlich nicht möglich, weil ich dafür noch mehr Stoff gebraucht hätte. Ich habe die Falten jeweils ein Kästchen breit genäht und die Abstände variiert. Da ich den Stoff quer geteilt habe sieht man, wie viel Stoff diese erst wenigen Falten “gefressen” haben.

Then I started sewing tucks (pintucks). I had tested different widths of tucks and different spacings. My preferred version was not possible, because that would have required even more material. So I finally decided for “one check” as depth of the tucks and varied the spacing. The picture shows only a fractions of the tucks needed for one front and you can see how much fabric that “eats up”. 

Falten flach nähenAnschließend werden die Falten wieder flach genäht und zwar zuerst auf Taillenhöhe.

After that the folds are layed and sewn flat. I started on the waistline.

Anschließend werden die Falten abwechselnd in die eine und in die andere Richtung gelegt und immer wieder durch Quersteppen festgenäht. Auch hier hatte ich verschiedene Abstände vorher getestet.

Muster DetailThen the tucks are layed flat with alternating directions on the fabric and sewn that way. Again I had determined the spacing of my topstitching on samples.

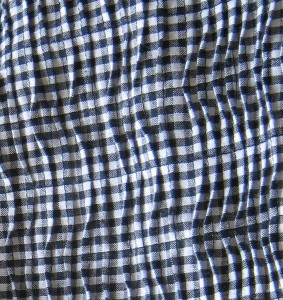
Durch diese Stepperei bekommt man nicht nur einen interessanten optischen Effekt, sondern auch einen Stoff der etwas stabiler und auch wärmer wird, als der ursprüngliche eher leichte Baumwollstoff. So wird aus einem Blusenstoff ein leichter Jackenstoff. Ich habe die einzelnen Schritte absichtlich nicht gebügelt, dadurch wird der entstehende Stoff sogar ein wenig elastisch.

The result is a fabric that does not only look interesting, but that also changes it’s quality. It becomes stronger and warmer without a lining. So I could transform a blouse fabric to something suitable for a light jacket. I did not press or iron after the different sewing steps, so the resulting material has even a bit elasticity.

Vorderteil
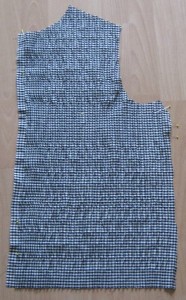
Ich habe den Stoff zuerst gesteppt und dann zugeschnitten. Wobei ich auf Höhe des Brustabnähers die Quersteppungen erst mal weggelassen habe. Die Quersteppungen machen den Stoff ja fester und steifer, das wollte ich beim Abnäher nicht unbedingt haben.

I first topstitched the fabric and cut the pattern then. Only where the breast dart would be I left out the widthwise stitches. Those make the fabric a little stiffer and firmer which was not exactly what I wanted within the dart…

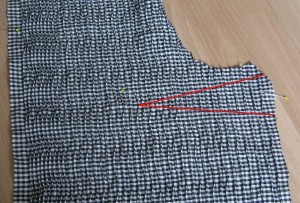
AbnäherDann habe ich die Form des Abnähers mit einer Naht markiert, habe die restlichen Quernähte jeweils bis einige Stiche in den Abnäher hinein genäht und danach den Abnäher geschlossen.

Then I staystitched the shape of the dart, made my topstitching on the rest of the fabric only until I was some stitches inside the darf and closed the dart afterwards.

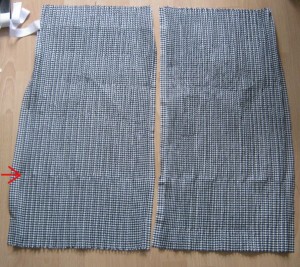
Die Vorgehensweise für den Rücken war ähnlich: Erst ein rechteckiges Stück Stoff nähen, dabei habe ich von der Mitte aus angefangen. Danach zuschneiden. Und dann habe ich noch zwischen die Falten in der hinteren Mitte kleine Abnäher gesetzt, um zumindest ein bißchen Taillierung hinein zu bekommen.

For the back I worked similarily: I started sewing the folds in the middle and worked then the tucks towards the sides on a rectangular piece of fabric. Then I cut my pattern and after that I added some thin darts between the middle folds to create a bit of waist shaping.

Im Grunde genommen alles ganz einfach, kostet nur etwas Zeit. Und Nähgarn, ich habe knapp 1000m AlterfilS120 verbraucht…

Basically it’s very easy, it takes only some time. And sewing thread. I’ve used nearly 1000m of Alterfil S120…


Spitze, aber Zackzack!

Lace, and make it quick!

Wir wissen alle, daß schnelles Nähen nicht meine Spezialität ist, aber manchmal geht es doch. Wenn es muß.

We all know that fast sewing is not what I am an expert in, but sometimes I can. If I have to.

SpitzenrockSpitze ist ja dieses Jahr wieder ein heißes Modethema und da ich vor einiger Zeit auf eine Vernissage eingeladen war, hatte ich Lust, mir dafür einen Spitzenrock zu nähen. Ich habe nämlich seit 2008 einen großen Rest dunkelblauer Spitze liegen, von der ich damals ein wenig für die Baumarktchallenge gebraucht hatte.

Lace is a hot fashion topic this year and one I like. When I was invited to a vernissage some time ago I thought this would be a great occasion to sew a lace skirt. Because there also was a piece of navy lace in my stash that I had bought for a Challenge in 2008. I had used a tiny bit and didn’t know what to do with the rest at that time.

Jetzt war aber die Zeit knapp, daher kam die übliche Verarbeitung von Spitze mit Zwischenfutter und Futter nicht in Frage. Also habe ich eine “Abkürzung” genommen, die aber dennoch ein sauberes Resultat hervorbringt. Das Prinzip besteht darin, daß man das Zwischenfutter weg läßt und die Nahtzugaben mit dem Futter sauber einfasst. Wer das nicht kennt, kann die ausführliche Anleitung mit vielen Bildern im Hobbyschneiderin24 Forum anschauen.

Now time was a bit tight and working lace requires a interlining and a lining, which takes time. Time I didn’t have. So I took a kind of “shortcut” which still creates a clean result. Basically you leave out the interlining and use your lining to bind the seam allowances in one step. If you don’t know this technique you can  check my tutorial on Hobbyschneiderin24. Which is, I am sorry, in German only. But if there is really a request to have it in English I can do it here.

Als Schnitt habe ich meinen selbsterstellten Rockschnitt nach dieser Anleitung verwendet, ein passender Schnitt beschleuningt den Nähprozess natürlich auch ungemein.

As pattern I’ve used my self drafted skirt pattern after these instructions. Having a TNT pattern helps to speed up the process also.

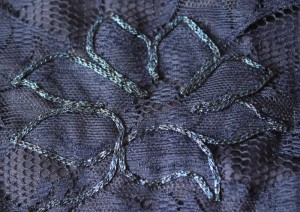
Und weil der Rock so fix fertig war, hatte ich noch die Zeit für einen besonderen Akzent von Hand: Auf der h+h 2013 hatte ich von der italienischen Firma Roncari Piero ein paar Produktproben bekommen. Bisher verkauft das in Italien produzierende Unternehmen nur an Designer und Hersteller, aber sie wollen jetzt auch Kurzwarenhersteller ansprechen. Ich hoffe nur, daß es gelungen ist, denn ich hatte noch selten Soutache, die sich so wunderbar in Form legen lies.

Since sewing went fast I had some time left for a bit of handmade embellishment. On the h+h 2013 the company Roncari Piero had distributed some samples. And what shall I say… this is really professional material. You can see how well I could shape it in all angles. The company produces in Italy and so far they have only sold to designers and fashion lables. But now they are offering there wonderful soutache also to “normal” dealers. I hope many ordered there, because I want to be able to buy that lovely stuff from my local dealer.

Krinkel-Stern-Karten, Teil 3

Crash-Star-Cards, part 3
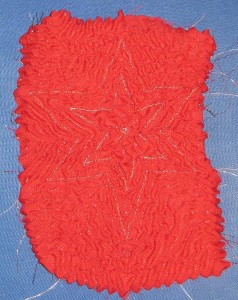
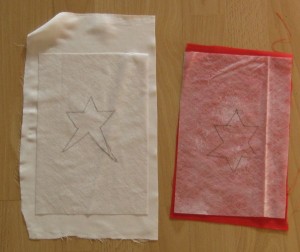
etwas gecrashte KarteWas jetzt passiert ist, daß das Soluvlies sich unter dem Dampf anfängt zusammen zu ziehen.

What happens now is that the Soluvlies starts to retract under the hot steam.

Und man bekommt einen leichten Krinkel-Effekt.

So the fabric starts to crincle.

gekrinkelter SternJa und dann bewegt man das dampfende Bügeleisen einfach so lange über dem Stoff, bis einem der Effekt gefällt.

And then you move your steaming iron over the fabric until you like the effect.

gekrinkelter SternAchtung, wenn es zu viel ist, kann man den Effekt nicht mehr rückgängig machen!

Be carefull, if you steam to much there is no way to “undo” the effect!

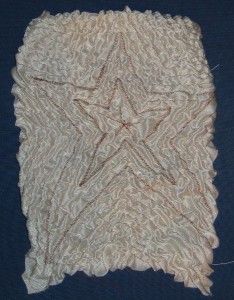
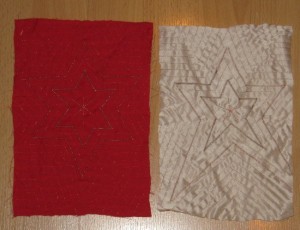
Zur Illustration zeige ich es auch noch mal auf weißer Seide, die photographiert sich plastischer.

As a second example I show the same on white silk, here the effect stands out better on the picture.

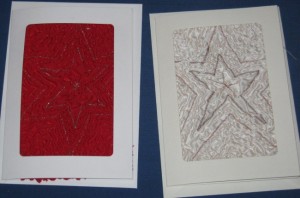
fertige KartenDanach muß man die Stoffstücke nur passend zuschneiden und in eine fertige Passepartout Karte kleben.

Then you cut your fabric and glue it into a passepartout card.

Je nach Stoff und Garn sind die Effekte sehr unterschiedlich. Der rote Stoff war übrigens ein leichter Wollstoff, den ich mal bei Bornstein-Stoffe bestellt hatte. (Ja, die gibt es nicht mehr. Ja, das war lange her. Der Rest des Stoffes war ein Kleid.)

Depending on fabric and yarn the effect turns out differently. The red fabric was a lightweight wool I’d ordered long ago from Bornstein-Stoffe. (“Long” means the company is out of business for quite a while. The rest of the fabric became a dress.)

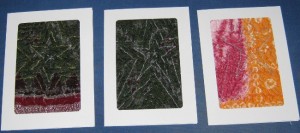
WeihnachtskartenZum Abschluß noch ein paar andere Beispiele, wie die Karten aussehen können. Die beiden links sind aus dem Rest eines Ikatsaris aus Indien, der rechts aus einem afrikanischen Batikstoff. Diesmal mit silbernem Stickgarn von Alterfil gestickt.

Here some more examples how different cards can look. The two on the left were made from Indian ikat sari fabric, the right one is an african batik. Embroidery was silver thread from Alterfil.

Falls ihr euch davon anregen laßt, selber Karten zu machen, erzählt mir davon oder zeigt sie mir!

If that inspires you to make your own cards then please let me know or show me!

Krinkel-Stern-Karten, Teil 2

Crash-Star-Cards, part 2

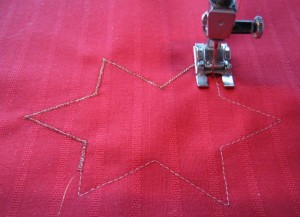
Zickzackstich
Jetzt wird die Kontur des Sterns mit einem schmalen Zickzackstich abgenäht. Dabei nähe ich genau über die vorherige Naht. Der Zickzackstich sollte zwar eng sein, also eine kurze Stichlänge haben, aber keine ganz geschlossene Raupe. Hier habe ich Madeire Stickgarn in Kupfer benutzt, weil ich das noch hatte. Metallic sieht jedenfalls gut aus dafür.

Now I am oversewing the stitches from the right side of the fabric with a narrow zigzag stitch. The stitchlength should be short, but not as dense as you would normally choose for an appilque or a button hole. Metallic embroidery thread looks usually nice, here I choose some copper embroidery thread from Madeira I still had in my stash from another project.

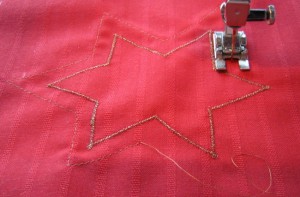
Kontur nähenJetzt benutze ich meine Zickzackkontur um füßchenbreit daneben einemal mit Steppstich herumzunähen. Auch hier gilt, daß die Stichlänge nicht zu kurz sein sollte.

Now I am using the outline as a guide for another round of stitching, here with a straight stitch. Again the stitch length should not be too short.

Kontur im ZickzackstichDie nächste Runde wird dann noch mal mit Zickzackstich genäht.

Next round is a zig zag stitch again.

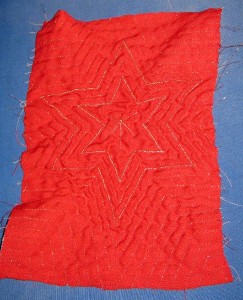
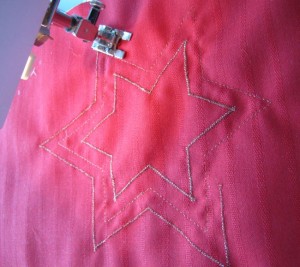
Danach nähte man immer im Steppstich in Runden um den Stern herum und folgt der Kontur des Sterns. Bis sozusagen kein Stoff mehr da ist.

Afterwards you continue in rounds around the star with straight stitch only. Always following its contours. Until you run out of fabric.

Stern in Runden genähtSo sieht das ganze dann aus, wenn man fertig ist.

That’s the way it looks after you’re finished.

In die Mitte habe ich noch einen Stern aus sich kreuzenden Linien genäht.

In the middle I’ve sewn crossing lines that also mimics a star.

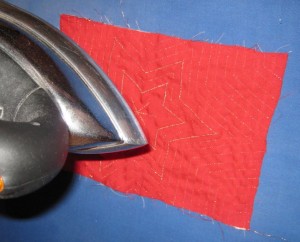
kräftig dampfenJetzt kommt das Bügeleisen zum Einsatz. Sehr kräftig dampfen, aber dabei den Stoff nicht berühren…

Now it’s all up to the iron. Steam as much as possible, but don’t touch the fabric with the sole of the iron…

So… jetzt könnt ihr entweder selber ausprobieren was passiert oder ihr müßte warten, bis ich Zeit für den dritten Teil habe. 😉

Now you can either try yourself what happens… or you wait until I have the time to write part 3 of the story. 😉

Krinkel-Stern-Karten, Teil 1

Crash-Star-Cards, part 1

Da ich auf meinem Rechner gerade die Bilder gefunden habe, zeige ich jetzt mal eine weitere Möglichkeit, aus Stoffresten Weihnachtskarten zu basteln. Diesmal braucht man außer Stoffresten: einen Bleistift, Vlieseline Soluvlies, Sprühzeitkleber, bevorzugt Maschinenstickgarn (Nähgarn geht technisch auch, aber Stickgarn sieht besser aus) sowie ein Bügeleisen mit viel Dampf.

I just recovered some pictures on my computer so I’ll show you another possibility to transform random fabric scraps into Christmas Cards. Apart from the fabric scraps you need: a pen, Vlieseline Soluvlies (In some countries the products are sold unter the brand name “Pellon”, it might be “Wash N Gone” but I can’t tell for sure from the website. It’s a non woven water soluble stabiliser. If you can’t get “Soluvlies” please test first, if the desired reaction happens!), temporary spray adhesive, machine embroidery thread if possible (sewing thread works also, but embroidery thread looks nicer) and a steam iron that steams well.

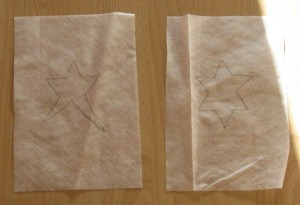
Vorzeichnung auf SoluvliesZunächst schneidet man ein Stück Soluvlies zu. Es sollte deutlich größer sein, als die Karte später. Besonders gerade muß man nicht schneiden, am Ende wird ohnehin alles begradigt. Darauf zeichnen wir ungefähr in die Mitte mit Bleistift einen Stern. Man kann sich eine Schablone für gleichmäßige Sterne machen oder frei Hand zeichnen.

You cut a piece of Soluvlies a good deal bigger than the intended card. You don’t need to take care for cutting straight, we will cut back in the end. Then you take the pencil and draw the outlines of a star in the middle. If you like a regular shape you can use a stencil or you just draw it as you feel, irregular looks often more dynamic.

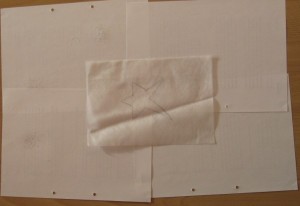
Vorbereitung zum KlebenDanach bedeckt man seine Arbeitsfläche gut mit Papier, legt das Soluvlies mit der unbemalten Seite nach oben drauf und verpaßt ihm einen leichten (!) Sprühstoß aus dem Sprühzeitfixierer. (Keinen dauerhaften Sprühkleber, sondern solchen, dessen Klebewirkung nach einiger Zeit von selber verfliegt!)

Then cover your working environment well with paper, put the piece of Soluvlies in the middle, the side with the drawing on is facing downwards. Now give it a light spray from your temporary spray adhesive. (And make sur it is a temporary one, not real glue!)

aufgeklebtDann braucht man Stoffstücke, die etwas größer als die Soluvlies Stücke sein sollten. Da klebt man die vorbereiteten Soluvlies Stücke auf die linke Stoffseite.

Now you need some fabric scraps that are a bit bigger than your pieces of Soluvlies und you adhere the Soluvlies to the left side of the fabric.

Danach kommt die Maschine dran, Stickgarn für den Oberfaden ist schöner und mit Sticknadeln läuft es auch besser. Im Unterfaden kann man hingegen auch Nähgarn nehmen, da ist es egal.

The thread your sewing machine with machine embroidery yarn and if you have take an embroidery needle. For the bobbing you can take any sewing thread, it doesn’t matter there.

Stern markierenDanach näht man die Kontur des Sterns erst mal von der Seite mit dem Vlies her ab. Dabei eher lange Stiche nehmen, aber trotzdem die Ecken genau treffen. Also ggf. vor den Ecken die Stichlänge wieder etwas reduzieren.

Now choose a longer straigh stitch and sew the contours of your star from the side with the Soluvlies. To make sure to match the edges exactely reduce the stitch lenght when approaching the the “turning points”.

MarkiertWenn man die Stoffstücke jetzt umdreht, ist der Umriß auf der rechten Seite gut sichtbar. (Einmal auf ein Bild klicken bringt übrigens eine größere Version…)
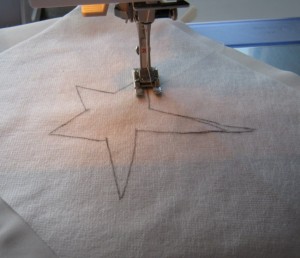
Now turn your fabric. The star is well visible on the right side of the fabric. (Clicking on a picture shows you a bigger version…)
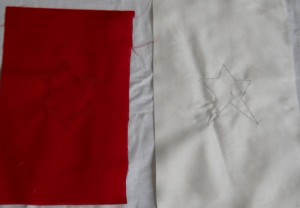
Und sobald ich wieder Zeit habe, geht es weiter… 😉

And as soon I have the time to continue writing, I’ll show you how to proceed… 😉

Wider die geplante Obsoleszenz

Against obsolescence

Die Hersteller allerlei Konsumgüter lassen sich ja immer was einfallen, damit wir Sachen wegwerfen müssen, die eigentlich noch fast gut sind. Aber nicht mit mir!

Producers often try to construct their articles in a way that we have to throw them away even though they are mostly good. But I am not willing to play that game!

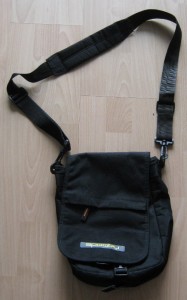
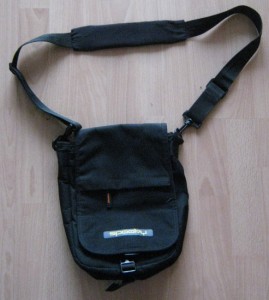
TascheHier haben wir eine Tasche, die erst einige Jahre alt ist und die mein Mann nur selten nutzt. Sie sieht eigentlich noch ganz gut aus.

Und ist das weitgehend auch noch.

Here is a purse that is only some years old and that is only rarley used by DH. All in all it looks still fine.

And also is mostly fine.

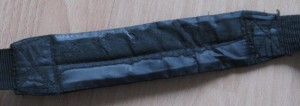
GurtpolsterBis man die Polsterung des Gurtes anschaut. Von der löst sich da was ekliges.

Until you look the padding of the strap, there is some stuff coming off.

Das an sich wäre auch nicht schlimm, ohne das geht es eigentlich gut. Nur… das Zeug was abgeht, das hinterläßt üble Flecken auf der Kleidung. Die teilweise selbst die Waschmaschine überlebt. (Was allerdings erst auffällt, seit mein Mann nicht nur eine schwarze, sondern auch eine helle Jacke hat. 🙂 )

That would not be a big problem, because whatever it is you don’t really need it. Only… the residue that comes off leaves very ugly black spots on the clothes. That kind that does not completely come off in the washing machine. (Which we only noticed when DH had not only black jackets but also a beige one. 🙂 )

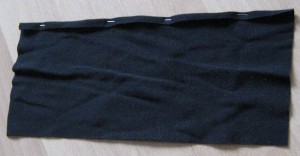
InterlockAlso nehme ich einen Rest schwarzen Interlocks. Der wir so breit zugeschnitten wie der Umfang des Polsters und zwei Zentimeter länger. Dann wird eine Längsseite etwa einen Zentimeter auf die linke Seite umgebügelt.

I took a piece of cotton interlock, cutting a rectangle that is 2cm longer than the length of the padding and as wide as the circumference of the padding. Then I am folding one long side a scant centimeter to the left side of the fabric.

Dann lege ich mein Stoffstück um den Träger, so daß der gefaltete Rand etwa einen Zentimeter die Schnittkante überlappt. Dadurch wird der Stoff etwas gedehnt und liegt später straff.

Then I am wrapping the fabric around the padding. The folded edge overlaps the cut edge by about one centimeter. So the fabric is a bit stretched and will later lay flat over the padding.

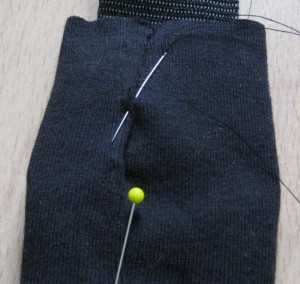
HandnahtDann wird von Hand genäht. Nur durch den Stoff, nicht durch das Polster.

Then some hand stitching. Only through the fabric, not through the padding.

Danach kann man die Naht entweder auf der Unterseite lassen oder an die Kante schieben. Ich habe sie an die Kante geschoben.

After that you can either leave the seam where it is or turn the fabric until the seam is on the edge of the padding. That is what I’ve decided for.

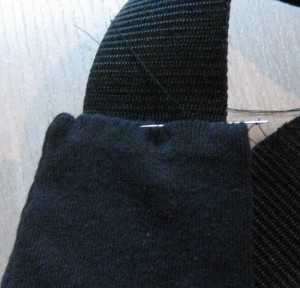
HandsticheDann wird der Stoff an den Schmalseiten etwa einen Zentimeter nach innen eingeschlagen und auch von Hand festgenäht. Hier nähe ich ihn teilweise am Gurt selber fest, damit er sich nicht verzieht.

Then turn a one centimeter hem to the inside of the tube and sew by hand. Here I attached the fabric also to the strap itself so it won’t shift.

Reparierte TascheUnd schon haben wir eine reparierte Tasche, die noch mal sechs Jahre oder so halten kann. 🙂

Now we have the problem fixed. And the bag can be used for another six years or so.

Die Reparatur hat mich kein Material gekostet, weil ich noch Reste hatte und es von Hand zu nähen kostete weniger Mühe, als den Träger abzutrennen, die Abdeckung drüberzuschieben (dann an den Rändern doch von Hand anzunähen…) und den Träger wieder festzunähen.

To fix the problem did not cost me any money because I still had that bit of fabric needed and handsewing took less time then removing the stitches from the strap, pulling the fabric tube over it (attaching it by hand on the ends anyway) and resewing the strap.

Hefeteig, Teil 2

Yeast Dough, part 2

gegangener VorteigNach einer gewissen Wartezeit wendet man sich dem Teig wieder zu und zieht das Tuch wieder weg.

After a certain waiting time you remove the towel.

Der Vorteig ist größer geworden und man erkennt viele Gärbläschen. (Mein Vorteig ist ziemlich flüssig, also sieht man mehr Bläschen. Wenn man mehr Mehl hinein mischt, sieht man weniger Blasen, dafür geht er stärker auf.) Bei mir hat er diesmal etwa eine Stunde in der recht kühlen Küche gegangen, weil ich derweil weiter mein Futter in den Mantel eingenäht habe….

The pre-dough has risen and you see bubbles from the fermentation. (My pre-dough is rather liquid, so you see a lot of bubbles. If the pre-dough contains more flour, it will show less bubbles but will rise more.) This dough I had left for about one hour in the rather cool kitchen, because I was handsewing some of my lining into the coat.

  Teig ZutatenDann kommen die restlichen Zutaten in den Teig. Zucker, Ei und Milch. Zucker rechnet man 50g – 100g auf 500g Mehl. Wenn man einen sehr süßen Belag hat, dann eher weniger Zucker, hat man eher säuerliche Früchte oder möchte den Kuchen ohne weiteren Belag essen, dann eher mehr Zucker. Letztlich aber ganz nach Geschmack. Eier rechnet man 1 – 2 auf 500g Mehr, je nach Geschmack. (Wer kein Ei mag oder veträgt nimmt etwas mehr Milch und Fett und läßt das Ei weg.) Und bei der Milch kann man 1/8 – 1/4l auf 500g Mehl rechnen. Das hängt einmal davon ab, wie viel Fett und Ei man drin hat und auch ob der Teil lieber etwas weicher oder etwas fester werden soll. Die Milch darf auch gerne wieder etwas angewärmt sein. Und keine Angst, wenn man hinterher den Teig zu weich findet… einfach noch etwas Mehl einkneten. Hefeteig nimmt das nicht übel.

Then you add the rest of the ingredients: Sugar, Egg and Milk. Sugar you take 50g – 100g für 500g flour. If the topping is very sweet take rather less sugar, if there is no topping or you use sour fruits you’d like more sugar. According to your taste. Eggs you can take one or two on 500g flour. (And if you don’t like or can’t have eggs you take more milk and butter and no eggs.) For milk the formula is 1/8l – 1/4l for 500g of flour. Depending in how soft or firm you like your dough. And how much butter and egg you have added. If it is too soft in the end… no worry, just add more flour later, no problem.

Teig rührenJetzt wird gerührt. Ich habe die Knethaken vom Rührgerät genommen, ein Kochlöffel tut es aber auch. Oder man nimmt gleich die Hände.

Now mixing. I used the hand mixer, but you can use a wooden spon also. Or directly your hands.

Schon nach relativ kurzer Zeit sieht man, daß der Teig sich von der Schüssel löst.

Relatively quickly you will see that the dough lifts itself from the bowl.

Teig geknetetDann wird aber noch weiter geknetet. Entweder mit dem Rührgerät oder mit den Händen. Am Ende nehme ich immer die Hände. Dabei spüre ich auch, ob der Teig nicht zu sehr klebt. Ich tauche meine Hände in Mehl, knete eine Zeit, wenn der Teig noch klebt, dann nehme ich wieder etwas Mehl, knete das ein,.. so lange bis ich eine nette Kugel habe, die auch nicht mehr arg an den Fingern klebt.

Then you continue kneading. Either with the hand mixer or with your hands. I always use my hands in the end, because so I can feel if the consistency is right and not to sticky. I put a bit of flour to my finger, knead the dough, if it is still to sticky I add a little more flour and so on… until it is a nice ball which is not too sticky.

Hefeteig aufgegangenDann kommt wieder das Tuch drüber und man wartet. Etwa eine Stunde. In der Zeit darf man die Schüssel gerne in einen warmen Raum stellen. Wenn es warm ist geht der Teig schneller, wenn es kühl ist dauert es ein wenig länger. Und wenn man keine Zeit hat, gleich weiter zu machen, dann kann man den Teig auch etwas länger stehen lassen.

Danach ist die Teigkugel jedenfalls größer geworden.

Now cover the bowl again with the tea towel, place it at a warm place, if available. Leave it alone for about one hour. It the room temperature is higher it will take shorter, if the temperature is lower it takes longer. And if you do not have time to finish your cake after one hour you can leave it alone for longer.

After that time you should have a bigger ball of dough.

Teig in der FormUnd den kann man weiter verarbeiten. Ausrollen, formen,…. wie man mag.

And then the dough is ready to become cake. you can roll it out, make buns,… whatever shape you like.

Ich habe den Teig ausgerollt und in eine Springform gedrückt. Darauf kamen dann die Zwetschgen

In my case I rolled it out and put it in the pan. Then plums were added.

ZwetschenkuchenEtwa 40 Minuten bei 180°C später sieht das dann so aus:

About 40 Minutes at 180°C in the middle of the oven ist looks like this:

(Okay, wir haben ihn etwas abkühlen lassen… aber noch warm schmeckt er am Besten. Guten Appetit!)

(Okay we let it cool down a bit… but it is best still warm. Enjoy!)

Der geheimnisvolle Hefeteig…

The mysterious yeast dough…

Da es im Moment gerade nichts sehenswertes aus der Strick- oder Nähkiste gibt, mir aber erst in der letzten Woche wieder zwei gestandene und erfahrene Hausfrauen über den Weg gelaufen sind, die noch nie Hefeteig gemacht hatte, weil sie ihn so schwierig fanden werde ich mich diesmal einem Küchenthema widmen. Zumal ja gerade Zwetschgenkuchenzeit ist und dieser ja wohl bitte nur mit Hefeteig den richtigen Zwetschgendatschi gib. 😉

I have nothing to show sewingwise or knittingwise at the moment. But here it is high season for “Zwetschengendatschi” (which is a cake with a special kind of plums) which normally is made on the base of a yeast dough. And only this week I talked to two experiencend wifes and mothers who told me they never made it because they considered it so compicated and difficult. So for today I’ll talk kitchen.

Wie ich das meistens mache, werde ich nicht nur zeigen, was ich tue, sonern erst mal versuchen zu erklären, warum das so ist und wie Hefeteig grundsätzlich funktioniert: Die einfachste Basis eines Hefeteigs ist Mehl, Hefe, Wasser und etwas Zucker. Locker wird der Hefeteig durch die Hefe. Hefe sind Plize, die mit etwas Zucker und Wasser bei Wärme anfangen zu gären. Durch die Gärung entstehen Gase, diese wiederum sind dann als Bläschen im Teig eingeschlossen. Beim Backen wird die Luft in diesen kleinen Luftbläschen dann warm, dehnt sich aus und es bleiben dann größere Lufträume als Poren im fertigen Gebäck. Dadurch geht das Gebäck beim Backen auf (wird größer) und ist hinterher locker und gut zu essen, nicht steinhart.

I’ll try to explain first how yeast dogh works in general: The basic ingredients are flour, yeast, water and a bit of sugar. Yeast is a living organism and if you “feed” it with sugar and add warmth and water it will start to ferment. Fermentation produces gas which is enclosed as tiny bubbles in the dought. While baking the air in the bubbles will extend because of the heat, the dough will rise. And after baking you have pores that make your cake (or bread) taste fresh and light. 

Die Grundzutaten, also Mehl, Hefe, Wasser und etwas Zucker kennen wir als Pizzateig oder von Fladenbroten. Zusätzlich kann man auch noch Fett und Ei zugeben. Durch Fett wird der Teig saftiger und weniger trocken, auch Eier machen den Teig saftiger, gehaltvoller und tragen zum Geschmack bei. Gleichzeitig wird der Teig aber “schwerer”, je mehr Eier und Fett im Teig sind, desto weniger geht er auf. Wasser hingegen benötigt man zwar, um das Mehl zu einem Teig zu verbinden, aber es macht am Ende das Backwerk trocken. Denn das Wasser verdunstet beim Backen wieder. Verwendet man Fett und Eier, um den Teig zu binden, benötigt man entsprechend weniger Wasser und der Teig wird nicht so schnell zu trocken und schmeckt auch nicht so schnell altbacken. Bei süßem Gebäck ersetzt man Wasser gerne durch Milch.

The basic ingredients, flour, yeast, water and a bit of sugar we know from pizza dough or some flat breads. Fat and eggs are often added. Fat makes your baked good less dry, also eggs add moisture. And taste. On the other hand the dough gets heavier the more fat and eggs you add. so it’ll rise less. Water on the other hand is necessary to make the flour into a dough. But it will evaporate in the baking process so the more water you add to the dought the drier the result will be after baking. This is why you use fat and eggs to make the flour into a dough. The more fat and eggs you use, the less water you need and the less dry your cake will be and also it will not taste stealth as quickly as if you only use water. For cakes and other sweet bakery water is often replaced by milk.

Hefeteig zu machen ist keine Zauberei, es gibt auch viele Wege, die zum Ziel führen. Ich habe auch etliches ausprobiert, bin aber zu der Technik zurückgehrt, mit der schon meine Oma Hefeteig gemacht hat. Ich mag das Ergebnis so am liebsten und es funktioniert am zuverlässigsten. Es klingt vielleicht manchmal kompliziert, ist es aber nicht. Und auch wenn die Gesamtzeit der Zubereitung ein wenig länger ist besteht sie doch hauptsächlich im Warten. Und da kann man was anders machen. Nähen zum Beispiel. 😉

To make yeast dough you don’t have to be a genius and there are different ways to do it. I’ve tried several ones, but in the end I returned to how my grandmother made it. I prefer the result that way and for me it works reliably that way. It may seem complicated but it really isn’t. And even though the prepration time is a little longer it does not mean you have to work all the time. Most of it is waiting for the fermentation to take place. While you are doing other stuff, like sewing. 😉

Am besten fängt man damit an, daß man Eier, Butter und Hefe schon eine Weile vor dem Backen aus dem Kühlschrank holt, damit sie Zimmertemperatur bekommen. Wenn man das vergißt ist es aber auch keine Katastrophe der Teig braucht nur länger, bis er aufgeht.

You start with getting your ingredients like eggs, butter and fresh yeast out of the fridge some time before you start. It works best at room temperature. But if you forget to do so it’s no problem either. Fermentation will just take longer.

Mehl

Das Mehl wird in eine Schüssel gesiebt. Man kann das Sieben auch weglassen, etwas lockerer wird der Teig aber, wenn man das Mehlsieb benutzt. (Oder ein Gemüsesieb und einen Löffel zum durchtreiben, falls man kein Mehlsieb hat.) In die Mitte meines Mehles forme ich mit einem Löffel eine Kuhle.

You take your flour and sieve it into a bowl. If you don’t have a flour sieve you can either take any other mesh that is fine enough to work and a spoon to “rub” the flour through or you use the flour without sieving. Your cake will be a little less airy, but it will work, too. Then you take a spoon and make a hollow in the middle of your flour.

Ich benutze normales Weizenmehl, Dinkelmehl funktioniert ziemlich genauso, wenn man Vollkornmehl benutzt, dann sollte man mehr Flüssigkeit zufügen. Für einen Blechkuchen benötigt man etwa 500g Mehl, ich habe hier nur 300g genommen, das gibt eine recht dicke Teigschicht für eine Springform.

I am using standard wheat flour (no self raising, please), spelt works the same. If you take wholemeal you’ll need more liquid later. For a baking tray of cake I’ll need 500g of flour, for a springform pan 250g – 300g are enough. I used 300g here, that makes a thick layer of dough.

Hefe einbröselnAls nächstes kommt die Hefe. Ich benutze die handelsüblichen 42g Hefeblöckchen aus dem Kühlregal. (Die billigen funktionieren übrigens keinen Deut schlechter als Dr. Oetker…) Ein Hefewürfel reicht für 500g-1000g Mehl. Als Faustregel kann man sagen, je mehr Fett und Eier man im Teig hat, desto mehr Hefe. Für einen Kuchenteig rechnet man also 500g Mehl auf einen Würfel Hefe, wenn man Hefebrot backen möchte, kann es auch mehr Mehl sein, wenn man dann weniger Fett und Eier nimmt. (Man muß aber nicht mehr mehr nehmen…) Ich habe hier etwa einen halben Würfel genommen und diesen in die Kuhle hineingebröselt.

Next step is the yeast. I am taking fresh yeast which here comes in small packages of 42g and can be found with the refrigerated goods. One package is supposed to raise 500g – 1000g of flour. So if you have other package sizes available or ask for how much flour they are supposed to last. If you have more fat and eggs, the yeast will raise less flour. So here I have a cake that will get more fat and eggs, so I will count one package for 500g. If you make bread which uses less fat and eggs you can use more flour. (But you don’t have to…) Here I’ve used about half a package of yeast and crumbled it into the hollow.

Milch zugefügtZur Hefe kommt ein halber Teelöffel Zucker (um die Gärung zu starten) sowie warme Flüssigkeit. In diesem Fall Milch. Je wärmer die Milch, desto schneller die Gärung. Allerdings ist Hefe ein lebender Organismus, wenn die Flüssigkeit zu warm ist, dann stirbt die Hefe und es gibt keine Gärung. Ich mache die Milch gerne etwa handwarm, eine Microwelle ist hier hilfreich. Alles zwischen 30°C und 38°C funktioniert nach meiner Erfahrung gut. Ist die Milch kälter kann man lange auf die Gärung warten, ist sie deutlich wärmer kann es sein, daß sie stirbt und dann gärt da nichts mehr. Die Menge ist an dieser Stelle nicht so kritisch, einfach ein wenig hineingießen, wenn es nicht reicht, kann man jederzeit nach schütten.

Now I am adding half a teaspoon of sugar (to start fermentation) and some warm liquid, here it is milk. Warm milk assures a quick and good fermentation, but yeast is a living organism, if the temperature is too high it will die. If the milk feels hand warm it is usually okay. (Microwave comes handy to warm the milk a bit.) Between 30°C and 38°C works normally fine, if the temperature is lower you’ll have to wait long for the fermentation, if it is much higher your yeast can die and there will be no fermentation. How much liquid you add doesn’t matter that much. Just pour a bit and if you find out it isn’t enough to dissolve the yeast add more in the process.

VorteigNun nimmt man einen Löffel und mischt vorsichtig, bis sich Hefe und Zucker gelöst haben. Dabei mischt man schon ein bißchen Mehl mit hinein. Das Ergebnis ist ein noch recht flüssiger Brei. Die Temperatur meiner Milch war offensichtlich gut, denn man sieht im Bild schon die ersten Gärbläschen.

Now you take a spoon and start mixing milk and yeast until sugar and yeast are completely dissolved. Doing this in the hollow of your flower assures that you are already mixing in a bit of flour also, which is good. The reasult is quite slurry. No liquid, but nor a firm dough either. The temperature of my milk was evidently good, because the bubbles show that fermentation started instantly.

Das Ergebnis nennt man “Teiglein” oder “Vorteig”. Er dient zum einen dazu, zu sehen, ob die Hefe in Ordnung ist und der Gärprozess zustanden kommt. Zum anderen ist meine Erfahrung, daß der Teig später im ganzen gleichmäßiger aufgeht, wenn man die Hefe erst mal im Kleinen “arbeiten” läßt.

What you have here is often called “Teiglein” in German, It is a kind of a “pre-dough”. There are two reasons to make it: For once you can check if the yeast is okay and if the fermentation works properly before you add all other ingredients. Secondly my experience tells me that the fermentation in the end is more regular over the whole dough if you give the yeast time to develop before you add all the other ingredients.

Butter zufügenJetzt schnippt man mit dem Rührlöffel ein wenig über den Mehlrand, so daß etwas Mehl über den Vorteig stäubt. Auf dem Mehlrand kommt eine Prise Salz und die Butter wird vorsichtig darauf abgelegt. Beides darf nicht mit dem Vorteig in Berührung kommen! Die Butter bekommt so die passenden Temperatur.

Now you “snip” with your spoon over the rim of the flour border so some flour will cover the pre-dogh. Then add a pinch of salt on the flour border and pieces of butter. Both should not touch the pre dough! This makes sure the butter will have the right temperature later.

Was die Buttermenge betrifft arbeite ich mit 50g – 100g Butter auf 500g Mehl. Je nach dem, wie schwer er werden soll. diesmal habe ich auf meine 300g Mehr etwa 40g Butter genommen, also ziemlich viel. Da wir nur zu zweit sind, essen wir keinen ganzen Kuchen an einem Tag und mit mehr Butter schmeckt er länger gut. Außerdem kommen Zwetschgen drauf, die selber ja kein Fett enthalten. Wenn ich eine Mandel-Butter Belag machen würde oder wenn ich süße Brötchen haben will, die hinterher noch mit Butter bestrichen werden würde ich eher weniger Butter nehmen. (Und man darf sich gerne ins Gedächtnis rufen, daß die Buttermengen im Vergleich zu den meisten anderen Kuchenteigen immer noch sehr gering ist.)

For butter you count 50g – 100g with 500g flour. Here I took 40g of butter with my 300g flour, so quite a lot. One reason is that we are only two and won’t eat a cake in one day, more butter makes it last longer without going stealth. Also I will put fruit in top which contain no fat at all. If I made a topping of almonds and butter I’d use less butter in the dough. Or if I’m making sweet buns which will have spread butter on them I’d also use less fat. (And whatever: compared with most other doughs for cakes, cookies or muffins yest dough contains few fat.)

Gehen lassenAnschließen bedecke ich die Schüssel mit einem Küchentuch, damit der Vorteig in Ruhe gehen lassen kann. Unter dem Tuch ist er vor Zugluft geschützt und die durch Gärung entstehende Wärme wird besser gehalten.

Now I take a tea towel and cover my bowl. The pre dough is protected from draft and since fermentation produces heat also this will be kept well.

Die Zeit fürs Gehen lassen des Vorteigs hängt von der Umgebungstemperatur ab, grob gesagt zwischen 10 und 20 Minuten, je nach dem, ob ich 25°C oder 38°C im Zimmer habe. Wenn die Küche kühl ist, kann man ihn auch gerne in ein wärmeres Zimmer stellen. Das gehen lassen im Ofen zu beschleunigen ist riskant, denn da ist die Hefe schnell tot. Und wenn man nicht nach genau 20 Minuten Zeit hat, sich den Teig wieder zu widmen? Nicht schlimm…. gärt er halt weiter…

Now you can take a break and do something else for about 10 – 20 minutes. Depending on the temperature of the environment. Anything between 25°C and 38°C works. If you think about putting the bowl in the oven to speed fermentation: better not, the risk is very high that the yeast will be killed and fermentation will stop. But you can move the bowl carefully to a warmer room in your house, if the kitchen is cool. And if you do not have the time to return after exactly 20 minutes? Doesn’t matter… fermentation will go on. Nothing to worry about.

Wie man sieht habe ich mir auch schon Ei, Milch und Zucker bereitgestellt. Denn Milch und Ei sollten ja auch nicht zu kalt sein. (Schon wieder ein ziemlich langer Artikel. Ihr müßt vom Lesen müde sein. Zumindest bin ich es vom Schreiben… deswegen beim nächsten Mal mehr.)

And as you can see I’ve also already prepared milk, egg and sugar. Because milk and sugar should have room temperature before I go on. (Long article already… you must be exhausted from reading. At least I am from writing… so next time more.)