„Biker“-Jacket: zippered pockets (part 2)
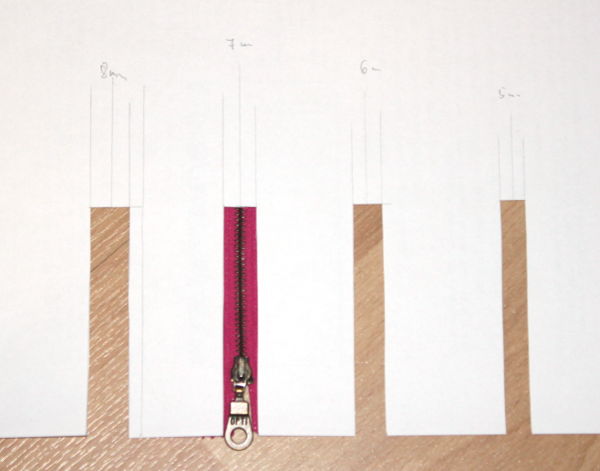
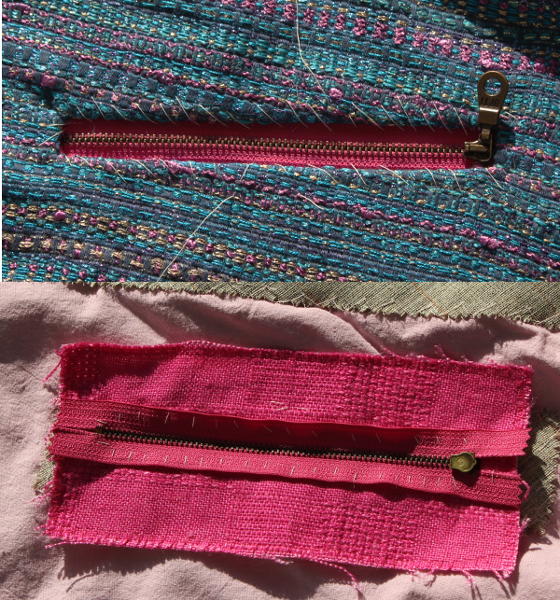 Der nächste Schritt ist relativ einfach, der Reißverschluß wird schön zentriert in die Öffnung gesetzt. Und geheftet. Weil die Stofflagen sehr dick sind, habe ich die Stiche schräg (Außenseite der Jacke) bzw. quer (Innenseite der Jacke) zur späteren Nahtlinie gesetzt. So sitzt er wirklich stabil und nichts kann sich verschieben.
The next step is quite straightforward and easy, the zipper is positionend under the opening and then handbasted into the opening. I used stitches that go across the later seam liine because the layers are very thick. So its really stabile and nothing can shift.
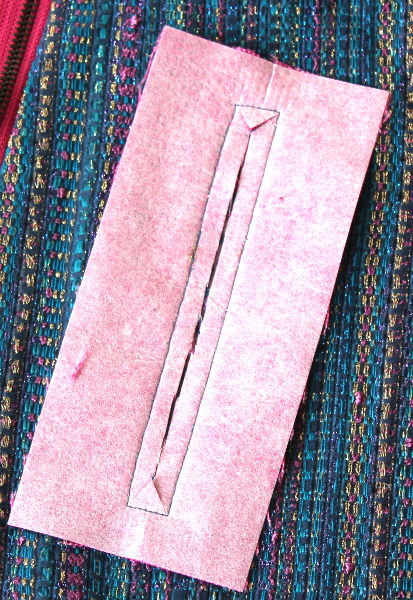
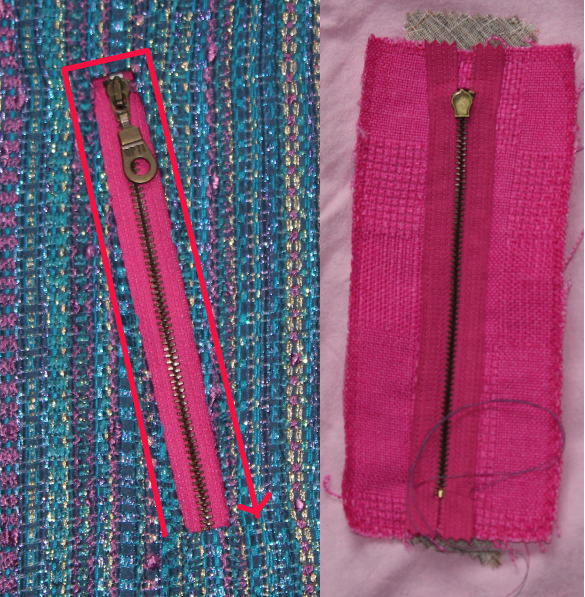 Auch logisch… jetzt wird genäht. Allerdings nicht ganz herum, sondern U-förmig. Die untere Querlinie lasse ich aus. Da liegt nämlich der Stopper drunter. Aus Metall. Das hält die beste Nadel nicht aus.
Logically the next step is sewing. But not all around, but like an (inverted) “U”. At the bottom of my zipper is a metallic stop. Not a good idea trying to sew through that….
Oben näht man bis kurz vor den Reißverschlußschlitten, dann hebt man (Nadel bleibt im Stoff) das Füßchen, zieht den Schieber ein Stück runter, so daß man ungestört die obere Kante nähen kann. Wo man auf der anderen Seite wieder auf den Schieber trifft, zieht man ihn dann am Füßchen vorbei nach oben und kann ungestört fertig nähen.
You start in one of the bottom edges, then you sew up nearly to the top. Then you stop, leaving the needle in the fabric, lift the pressure foot and slide the zip down. Now you can sew the top without having the zip in the way. When sewing down you stop again before getting to the zip, lift the pressure foot and pull the zip up again.
Wichtig ist außerdem, nur so weit außen zu nähen, daß man das Reißverschlussband auch trifft… Die Fäden habe ich dann erst mal alle auf die linke Seite gezogen, weil ich mir nicht sicher war, ob ich nicht doch von Hand ein paar Stiche unten quer nähe (nur in die oberen Stoffschichten). Am Ende habe ich es aber gelassen. Funktional ist die Naht nicht nötig und optisch sieht man sie in dem dicken, bunten Stoff auch nicht.
What is important is to make sure the stitches catch the zipper band…. The starting and ending threads I’ve pulled to the inside of the jacket, because first I was not sure if I should make some handstitches in the outer layers. Finally I decided against it, because they were not necessary to attach the zipper and the seam was not really visible anyhow, because the stitches got lost in that thick and agitated fabric.
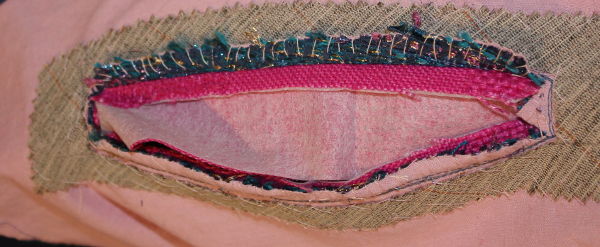
 Für die Taschenbeutel schneide ich zwei Rechtecke aus Futterstoff (Venezia) zu. Die dürfen ruhig ein Stück länger sein als der Reißverschlussbeleg und auch gut breit. Meine sind sogar noch etwas knapp.
For the pockets I cut two rectangles from lining fabric (Venezia). They should be a good deal longer than the zipper facings and large also. Mine are even a bit small.
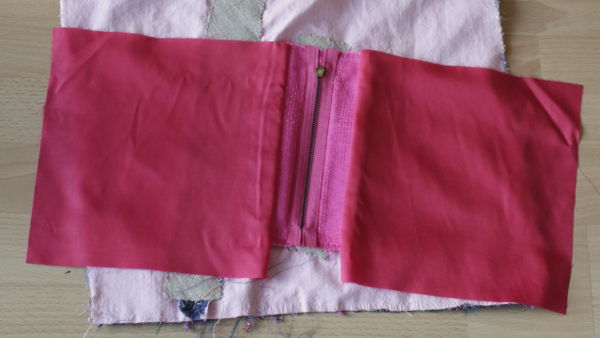 Die Taschenbeutel werden dann rechts auf rechts an die Belege angenäht. Oben schließen sie bündig mit dem Beleg ab, unten stehen sie über.
The pockets are sewn to the facings right sides together. On top they have the same length as the facing, at the bottom the lining pockets are longer.
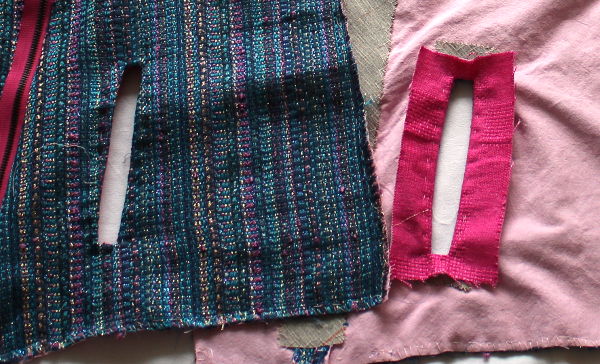
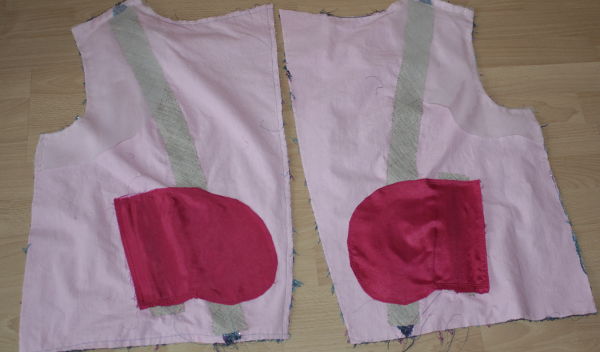
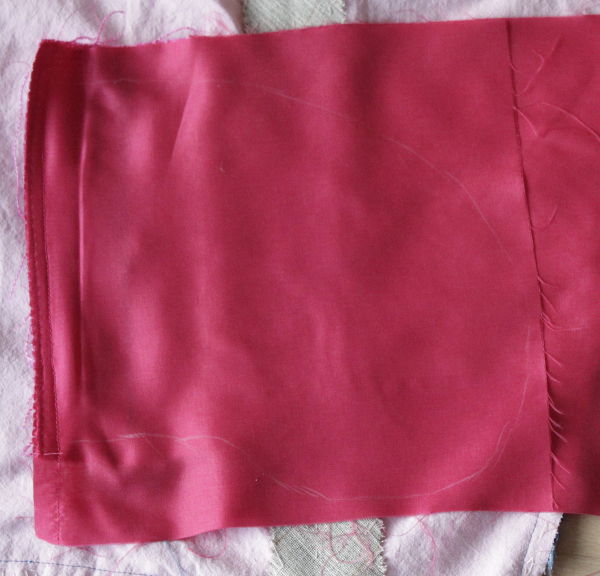 Die beiden Taschenbeutelteile werden jetzt in Richtung vorderer Mitte der Jacke gelegt, Die Form des Taschenbeutels zeichne ich dann von Hand. (Klick aufs Bild machts groß.) Der Beutel schließt genau an den Reißverschluß an, geht dann aber in einem Bogen nach unten. Auch hier muß man aufpassen, nicht über die Metallzähne des Reißverschlusses zu nähen.
Now I am folding both pocket pieces to the front middle of the jacket. I draw the shape of the pocket by hand. (Click on the pic shows a bigger version.) The pocket starts and ends exactly on the height of the zipper, but curves down then. Again you need to be careful not to sew over the metal parts of the zipper.
 Um die Taschenbeutel zu nähen, stecke ich sie und nähe dann nur die beiden Schichten Futterstoff zusammen. Danach werden sie noch versäubert und die Taschen sind fertig. 🙂
To finish the pockets I pin the layers of lining fabric together and sew them. Only the both layers of lining, of course. Then zigzagging around and the pockets are finished. 🙂