„Corsett“ for the jacket
Beim Nähen merke ich ja gelegentlich, dass es Gründe gibt, warum in der Bekleidungsindustrie manche Dinge auf eine bestimmte Art und Weise gemacht werden. Zum Beispiel Kunststoffreißverschlüsse, die aussehen, als ob sie aus Metall wären.
While sewing I discover sometimes that there are reasons why some things are done in a certain way in clothing industry. Like using plastic zippers that look like metal.
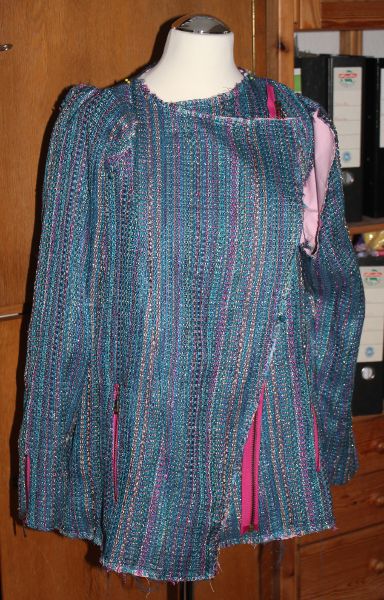
Ich mag so was nicht, also bekommt meine Jacke natürlich echte Metallreißverschlüsse. An was ich nicht so wirklich gedacht habe war, daß ein Metallreißverschluss schwer ist. Und mein Stoff ist eher leicht und weich. Einen groben Metallreißverschluss trägt der nicht. Geht nicht gibt es aber nicht. Also braucht meine Jacke innen eine Art „Korsett“ an allen Stellen, wo Reißverschlüsse sitzen, das die Reißverschlüsse trägt.
I don’t like that kind of „fake“, so I am using zippers with real metal teeth. What I had not really considered before is, that those zippers are relatively heavy, my fabric on the other side soft and having not much body. Since „impossible“ is not possible for me my jacket needs a kind of a „corsett“ inside. At all places where zippers will sit, so the weight of the zippers will not hang on the fabric, but on something sturdier.
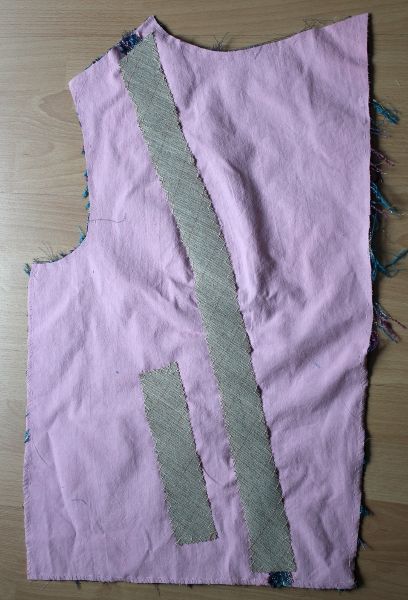 So wirklich steif soll es aber auch nicht werden, ein Kompromiss ist also gefragt. Ich habe mir dann bei Plissee Becker Rosshaareinlage geholt. Diese mit der Zackenschere schräg in etwa 5cm breite Streifen geschnitten. Die Streifen habe ich dann etwas gedehnt mit Hexenstich über die Teilungsnaht genäht. Durch den Unterlegstoff geht das ganz gut, an dem kann man den Streifen einfach festnähen. Die Nahtzugaben bleiben frei. Genauso kommt ein Streifen über den Tascheneingriff. Dabei ist der Streifen auf beiden Seiten etwa 3cm länger als der Eingriff später.
On the other hand I do not want it really stiff. So I needed a compromise. So finally I got traditonal tailoring horse hair interfacing at Plissee Becker. I cut it on the bias in about 5cm wide strips, using the pinking shears. Those strips then were handsewn over the seams of the fronts. With the underlining fabric that is not so difficult, there is something to sew it on. The seam allowances stay free. Same for the pockets, I am sewing a strip over each pocket opening. About 3cm longer on both sides of the opening.
 Genauso kommt ein Streifchen über den Ärmelschlitz. Auch hier lasse ich die Saumzugabe frei.
Same for the sleeve vent. A short strip gets sewn over the position of th the sleeve vent. Also here I am leaving the hem allowance free.
 Da der Stoff nicht steif werden soll, schneide ich für die Reißverschlüsse wieder Schlitze in die Einlage. Diese Schlitze sind auf jeder Seite 2mm breiter als der Reißverschlussschlitz sein soll. Auch diese Stoffkanten werden mit Hexenstich festgenäht, aber ganz knapp an der Kante der Einlage.
I don’t want it stiff around the zippers, so I am cutting away the interfacing at the place, where the zippers will get sewn in. On each side 2mm larger than the opening is supposed to be. Again the edge of the interfacing gets sewn to the interlining. Making sure to stich really close to the cut edge.
(Das Bild zeigt den Ärmelschlitz, an der Tasche schneide ich genauso aus. Nur nicht U-förmig, sondern als geschlossenes Rechteck.)
(The pic shows the vent opening. I am doing the same for the pocket openings, only here I am not cutting a u-shaped opening, but a closed rectangular one.)
Als nächstes muß ich herausfinden, wie ich die Reißverschlüsse sinnvoll eigenäht bekomme…
Next thing will be to figure out how to sew in the zippers in a way I like it…


