Placement is everything, and that is not only true for real estate
Und das gilt nicht nur für Immobilien.
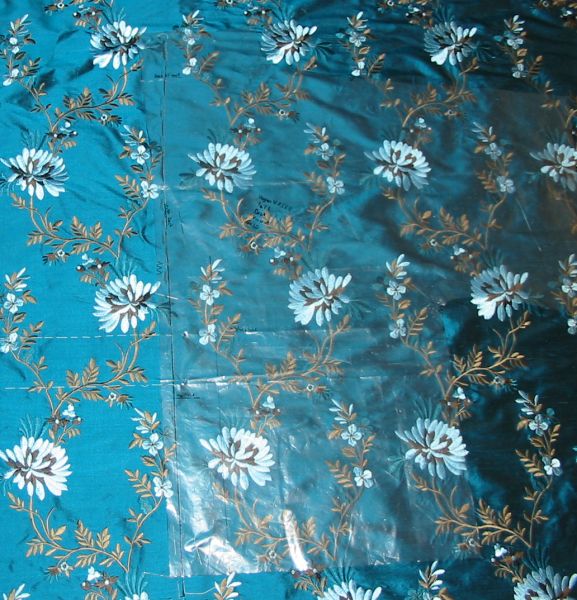
Mein Stoff hat ja eine flächendeckende Stickerei, also muß ich den Schnitt so auflegen, daß es zumindest in der hinteren und vorderen Mitte paßt. Wie man das macht, zeige ich heute. Es ist nicht wirklich schwierig, aber zeitaufwendig. Der Zuschnitt nur des Oberstoffs dauerte vier Stunden.
My fabric has an all over embroidery so I have to choose well where to cut, because I want the pattern to match at the middle front and back. How to do this I’m going to show now. It is not really difficult, but time consuming. Cutting the outer fabric only took me four hours.
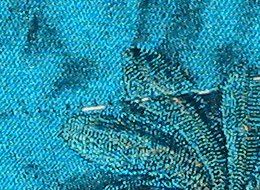
 Zuerst habe ich den Stoff mal ausgebreitet und die Schnitteile ein wenig hin und her geschoben. Einlagigs Zuschneiden ist hier ohnehin Pflicht, das Muster ist nicht gespiegelt oder so. Dabei habe ich festgestellt, daß ich das Rückenteil so zuschneiden kann, daß die Naht (oder zumindest der gerade Teil der Naht, in der Krümmung kann man das Muster nicht passend machen) fast ganz zwischen den Motiven verläuft. Das spart schon mal viel Mühe. Auch beim Vorderteil habe ich mir eine Stelle gesucht, wo ein „Bruch“ etwas weniger auffällig ist.
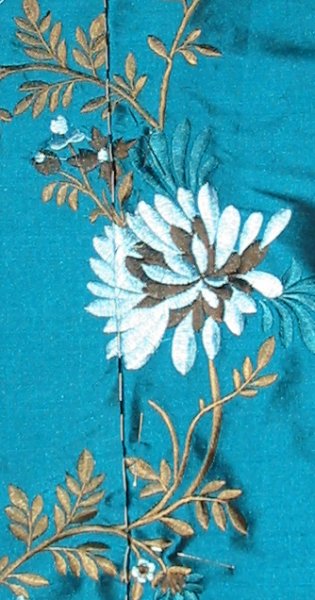
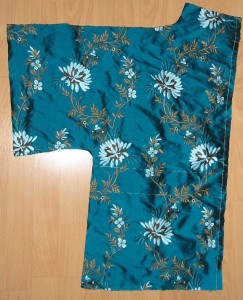
Anschließend habe ich ein Vorderteil und ein Rückenteil zugeschnitten. Am Vorderteil habe ich die vordere Mitte (sowie den Tunnel für die Schleife) mit einem Heftfaden markiert, diese benutze ich auch als „Paßstelle“. Alternativ kann man auch die Nahtzugabe der vorderen Kante markieren und an der vorderen Kante anpassen,
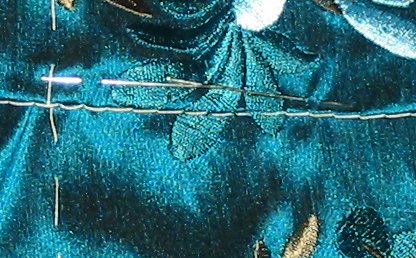
Am Rückenteil, das hier im Bild zu sehen ist, habe ich den Taillentunnel markiert und dann die Nahtzugabe der hinteren Mitte.
If you want to match a pattern like that you have to cut single layer. I took my two pattern pieces (back and front) and decided how to arrange them on the fabric. I found that it was possible to cut the back in a way that most of the center back seam is between the embroidery and will only have to be matched on a few places. For the front also I found a placement with not to much going on where the fronts will overlap.
Then I cut one front and one back, single layer. On the front I thread traced the casing for the belt and the front middle which I use for the matching. At the back (see pic above) the casing it thread traced and the back middle seam is also marked.
 Anschließend wir der Stoff an der Markierung nach links gefaltet, also am Rückenteil die Nahtzugabe weggefaltet und am Vorderteil alles jenseits der Mittellinie.
Danach heißt es puzzlen. Nämlich das zugeschnittene Teil so auf den Stoff legen, daß kein Musterversatz da ist. Dabei lohnt es sich, auch die Reihenfolge der Teile zu ändern. Ich konnte ein Vorder- und ein Rückenteil nebeneinander zuschneiden, bei den beiden anderen Teilen ging das nicht. Hätte ich das zweite Rückenteil darüber plaziert und dann das zweite Vorderteil noch mal darüber hätte mir der Stoff (immerhin 3m für einen Schnitt, der 1,80m bei ungemusterten Stoffen braucht) nicht gereicht. Andersherum, also erst das zweite Vorderteil und dann das zweite Rückenteil ging es problemlos und ich hatte mehr als genug für die Schleife übrig. (Das Bild zeigt jetzt übrigens das Vorderteil.) Und natürlich feststecken, wenn man die richtige Plazierung gefunden hat.
Next thing is to fold the cut pieces at the chosen placement line to the wrong side of fabric. On the back you fold back the seam allowance, on the front you fold along the middle line.
Not just match the cut pieces to the fabric. It’s worth checking different option. I my case I could cut the first front and the first back from one width of fabric. Not so the second ones. I tried to layer first the second back piece and then the second front above that… my fabric wouldn’t have been enough. But starting with the second front and placing the second back above saved me largely enough for the tie. When you have found a position on the fabric where the pattern matches pin the already cut piece to the fabric.
 Wichtig ist an der Stelle noch ein Gegencheck mit dem Papier(oder in meinem Fall Folien)schnitt, ob das Schnitteil auch zur Seite genug Platz hat um noch drauf zu passen.
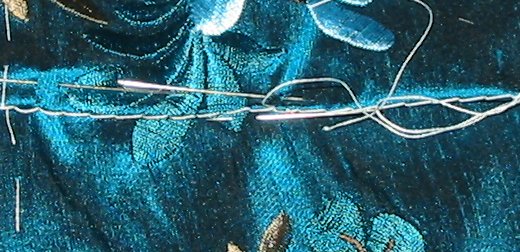
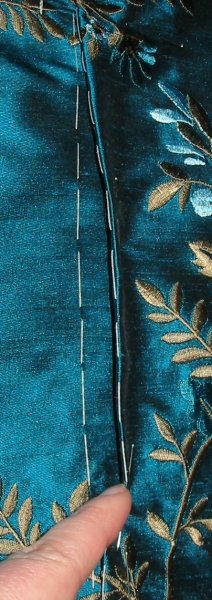
Dann markiere ich wieder mit einem Nähfaden (dicker Heftfaden auf Seide ist nicht so gut, ich will ja keine großen Löcher, feine Nadel und gutes Nähmaschinengarn sind gerade richtig) die Faltlinie meines Schnitteils auf dem noch ungeschnittenen Stoff.
Don’t forget to check with your paper pattern piece that you have enough width to place the pattern you want to cut next.
Then you take sewing thread and a fine needle (basting thread wouldn’t be good on silk, who wants big holes?) an threadtrace the foldline of your cut piece to the uncut fabric.
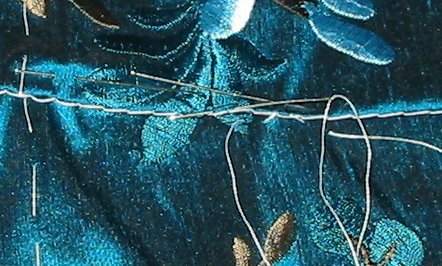
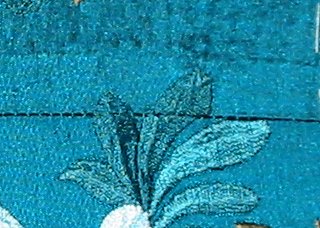
 Das zugeschnittene Teil kommt weg und entlang der gehefteten Linie lege ich jetzt wieder meinen Folienschnitt auf. Dabei verläuft beim Rückenteil (im Bild) die Nahtlinie der hinteren Mitte auf der markierten Linie, beim Vorderteil die vordere Mitte.
Schnitteil feststecken und das bereits dzugeschnittene Teil noch mal daneben legen. Einmal um an Querlinien (hier die Markierungen für den Tunnel) zu kontrollieren, ob die Höhe auch stimmt, zum anderen um sicher zu gehen, daß man nicht hinterher zwei linke oder zwei rechte Teile hat…
Now you remove the cut piece and put the pattern on the fabric. (Plastic sheet here is better than paper because you can easily see through.) For the back the seamline of the pattern has to match the threadtraced line on the fabric, for the front the middle front.
Pin the pattern to the fabric and before you cut place the already cut front or back against the fabric again. Once to check horizontal lines (in my case the casing for the tie) to match also and second to be sure that you do not end up with two left fronts or two right backs…
Dann nur noch zuschneiden. Das Zuschneiden der beiden Teile für den Gürtel war übrigens reine Erholung…
Then cut the rest. After that cutting the tie was real fun!
Das war es, womit ich den gestrigen Tag verbracht habe. Heute hingegen standen die Paspelöffnungen für den Gürtel auf dem Plan.
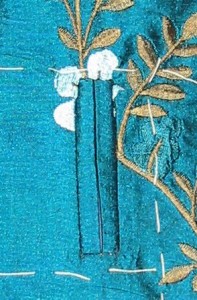 Capricorna hatte mir den Tip mit einer Technik aus Threads gegeben. Das Heft hatte ich nicht, aber ich konnte mich erinnern, daß Summerset mal ein kleines Tutorial gemacht hatte (danke dafür!) und das versorgte mich mit den Informationen, die ich brauchte.
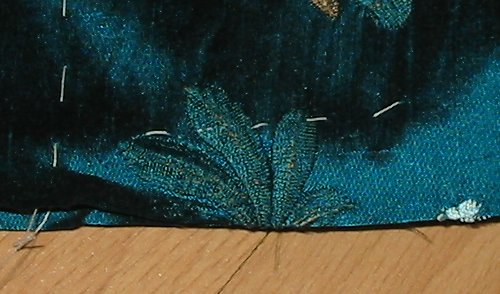
Und so sieht die Öffnung auch passabel aus. (Wenngleich ich sie als gemogelt empfinde, weil die Schnittkanten nicht eingefasst werden, sondern die Paspeln nur druntergeschoben… aber optisch ist das Ergebnis gut.)
Cutting was what I did yesterday, today I worked on the welt openings for the tie.
Capricorna had suggested to use a technique from Threads. Only I didn’t have that issue, but I remembered that Summerset once made a little tutorial about it (thanks for that!) and that provided me with all the information I needed.
So the opening for the tie looks good. (Though I still feel this technique is kind of „cheating“, because the edges are not really bound… but the result looks good.)
Außerdem habe ich den Gürtel genäht (bis auf die letzten Handstiche, aber die können warten) und die Schnitteile für die Belege gezeichnet. Aber das ist ja nicht so schwierig. Morgen ist dann erst mal wieder ein langer Tag Geldverdienen angesagt, da wird es wohl nichts mit Nähen.
Also I made the tie today (except the last slipstitches, but that can be done later) and I drew the pattern for the facings. But that’s not difficult at all. Tomorrow there will be a long day making money, so probably no time for sewing.

 Die Clutch aus der Threads läßt mich ja nicht los. Diesmal brauchte ich allerdings tatsächlich eine weitere kleine Tasche.
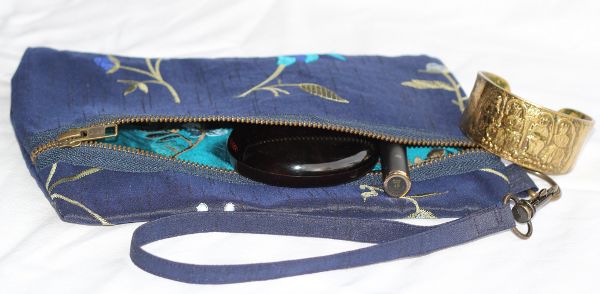 Also habe ich mir bei Marché St. Pierre in Paris in der Abteilung für hochwertige Deko Stoffe einen Rest bestickter Seide aus der Kiste gefischt. Als Reißverschluss habe ich bewußt einen groben (eigentlich teilbaren) Zipper mit dicken Messingzähnen genommen. Und weil ich sonst kein passendes Futter da hatte, habe ich die Tasche einfach mit einer anderen bestickten Seide (nämlich von der Kimonojacke) gefüttert. Etwas dekadent… aber ist ja eine Abendtasche…