That went wrong…
 … im wahrsten Sinne des Wortes.
… as you can see.
Ich hatte da noch einen Rest katia “Linen” und wollte schon lange mal das mit dem Schnurhäkeln ausprobieren. Zumal wir außerdem ein neues Brotkörbchen brauchen konnten. Unseres ist relativ klein und länglich, so daß es in der Küche genau seinen Platz findet. Und fällt so gut wie auseinander. Aber in dem Format gibt es so was nicht zu kaufen. Also dachte ich an häkeln, dann wäre es waschbar.
I had some katia “Linen” left. And I had wanted to try clothesline crochet for quite a while. I thought I could make a new bread basket for us. Ours was falling apart and had a quite longish shape which made it fit exactely into a free spot in the kitchen. And we had not been able to get a replacement in the same size. So crocheting one soundend good to me, also it would be washable then.
Aber bevor man so was angeht, kann man die Technik ja erst mal testen. Als dann Bärbel letzten Sommer ein solches Projekt vorstellte, wurde ich wieder dran erinnert. Und dann dauerte es auch nur fast ein Jahr, bis ich dazu kam, es auszuprobieren…
But before using a new technique on a bigger project I prefer testing. Bärbel’s project from last summer remindend me of my plans and it took only nearly a year until I’ve found the time to start….
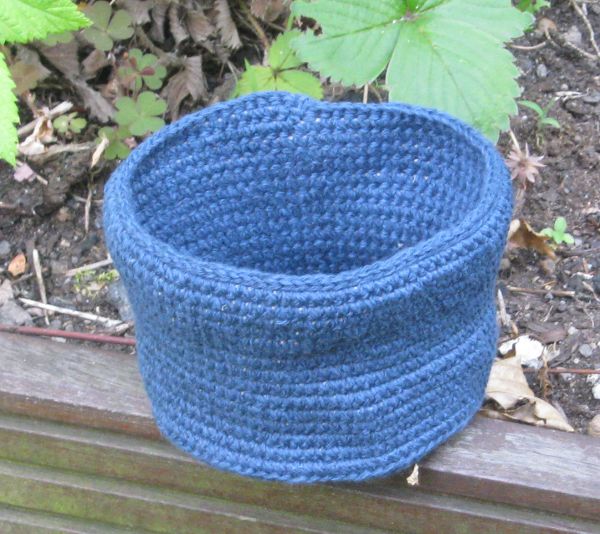
Benutzt habe ich also das Baumwoll-Leinen Garn, eine 3mm Häkelnadel und billige Paketschnur. Zunächst mal das Ergebnis: Siehe Bild, das ist ganz offensichtlich nicht meine Technik.
So I used the cotton linen yarn, a 3mm crochet hook and cheap string. For the result: Look at the picture. This is not my technique.
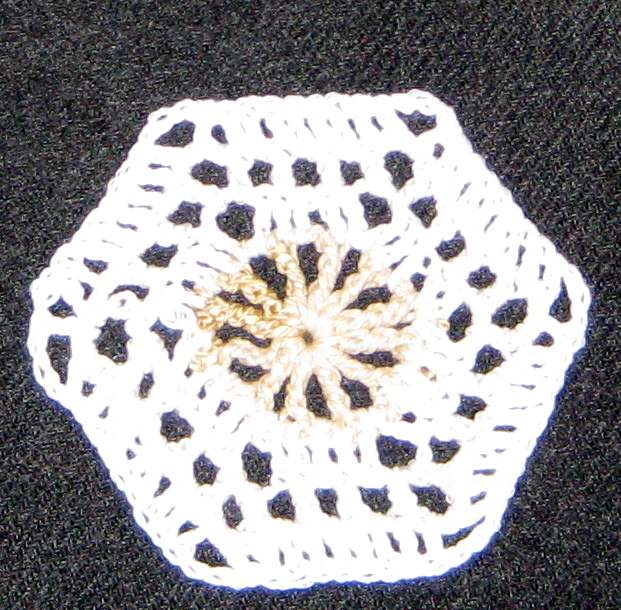
Das Häkeln selber war auch sehr “ergiebig”, ich denke fast jeder Zentimeter des Garnes wurde mindestens zwei Mal gehäkelt: Mit “sliding loop” anschlagen, feste Maschen, zusammenziehen, auftrennen. Paketschnur anders wickeln noch mal bis Runde zwei. Auftrennen bis Runde 1. Runde 2-5 häkeln. Auftrennen. Runde 3-6 Häkeln. Auftrennen. Runde 4-8 häkeln. Auftrennen. Runde 6-10 häkeln. Dann hatte ich endlich einen Boden der halbwegs flach war. (Ich kenne die Grundregel, wie man zunehmen muß, damit es flach wird. Aber entweder stimmt die nicht, paßt nicht, wenn man um Schnur herumhäkelt oder meine Maschen haben die falschen Proportionen…)
On the other hand I got the maximum of crochet fun out of the yarn, because I think nearly every centimeter of yarn was crocheted at least twice. Starting with a slinding loop, crocheting 1st round. Ripping it all and “looping” the string differently. Crocheting round 1 and 2. Ripping. Crocheting round 2-5, ripping, corcheting round 3-6, ripping, crocheting round 4-8, ripping, crocheting round 6-10. Then I finally had a bottom that was mostly flat. (I know the basic rule how to add stitches to get a flat round object. But either they do not apply to to clothesline crochet, do not apply or do not apply to my stitches.)
Danach sollte man meinen, daß es einfach nur gerade hoch geht. Dabei habe ich die Schnur immer etwas angezogen. Am Ende kurvte mein Körbchen gewaltig nach innen. Also habe ich es bis Reihe 5 aufgetrennt und das ganze mit weniger Zug auf der Schnur neu gehäkelt. Ergebnis: Siehe oben. Sehr “free form” nur nicht das was ich wollte.
Then you should think that crocheting straight up shouldn’t be a problem. I pulled the string a bit while crocheting to keep it taut. Then the basket curved more and more inward. In the end I ripped it down to round 5 and did it again. This time I kept the string less firm. Result: see picture above. Very “free form” but not what I wanted at all.
Aber gut, dafür teste ich ja…. das wird kein Brotkorb. Was glücklicherweise nicht mehr nötig ist, denn vor wenigen Tagen kam ein neuer… ich habe da eine Freundin, die sehr geschickt mit Peddigrohr ist und paßgenau einen neuen geflochten hat. 🙂
Well, that is why I am testing… this is never be a bread basket. Which isn’t necessary any longer, because some days ago I got a new one… A friend of mine is very good im basekt weaving and made a new one that fits the spot. 🙂