Das große Ganze…

… habe ich auch noch nicht gezeigt. Vom Mai wohlgemerkt. *hüstel*

Schnitteile Jacke
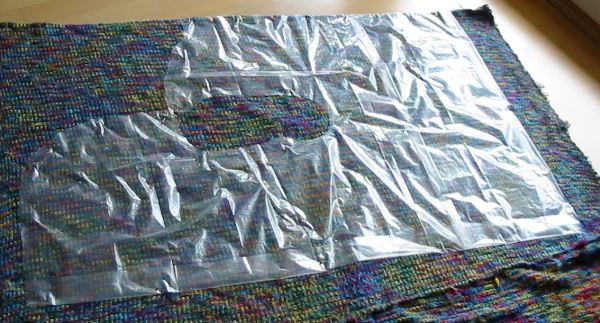
Also kommen hier erst einmal die Schnitteile der Jacke.

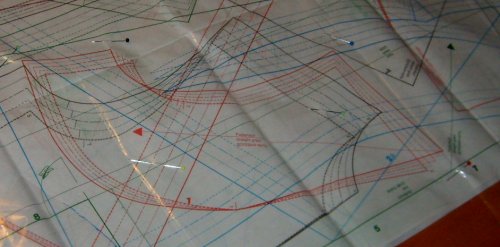
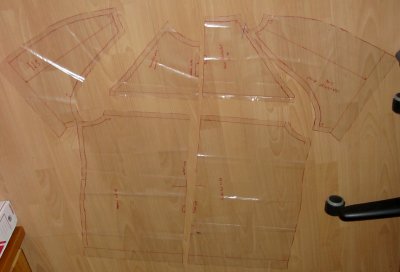
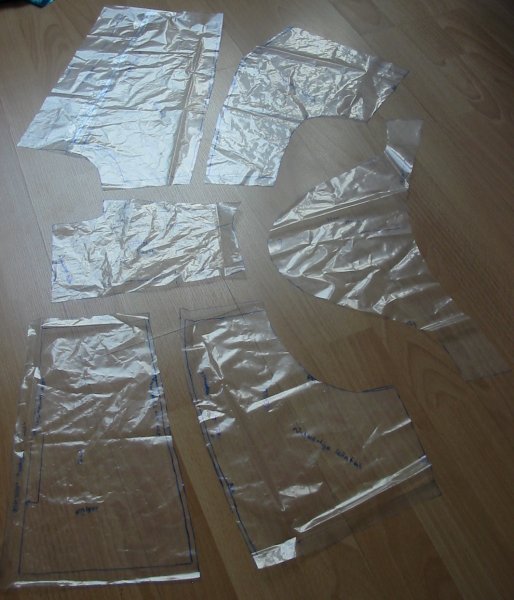
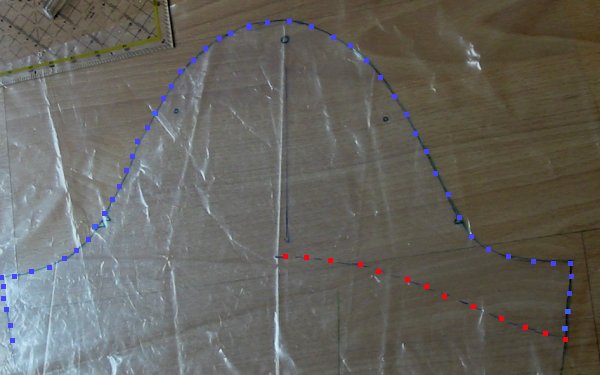
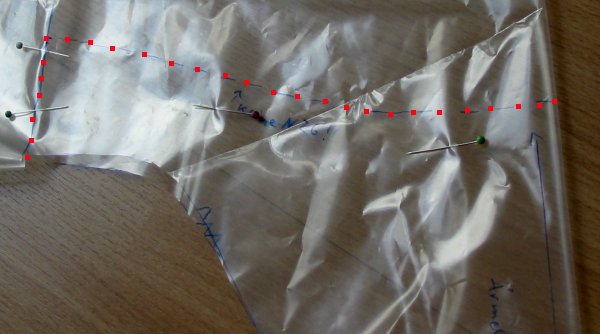
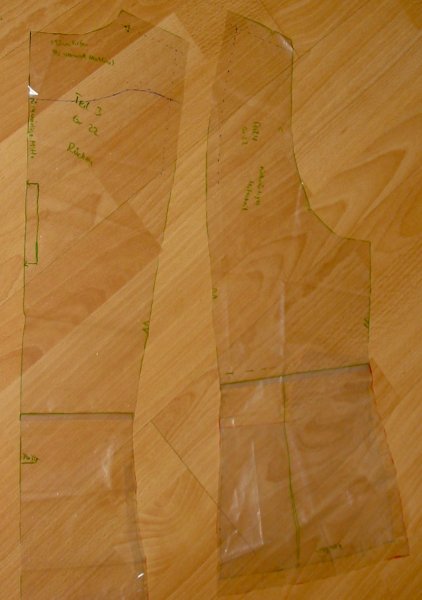
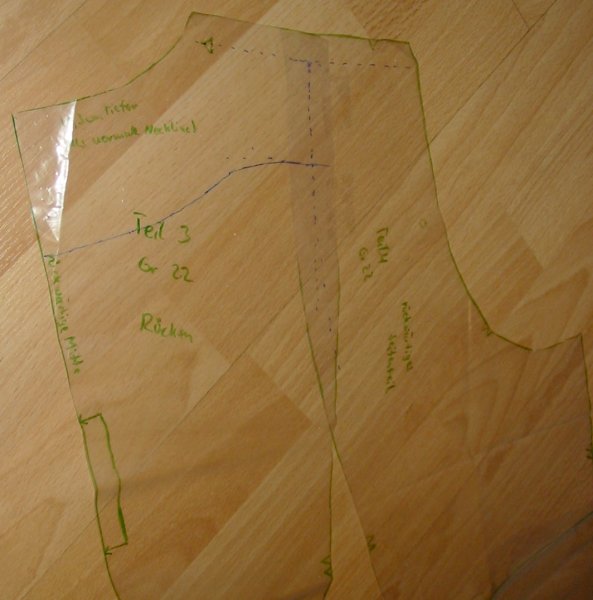
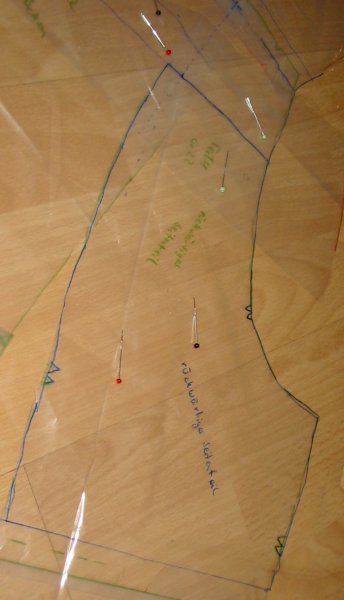
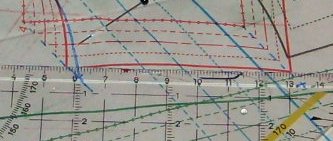
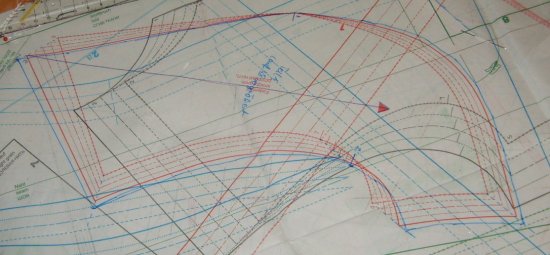
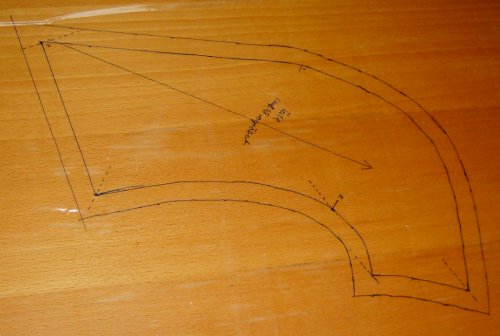
Unten auf dem Bild sind die beiden Rückenteile, darüber der Sattel. Oben liegen die beiden Vorderteile. Und rechts der Ärmel.

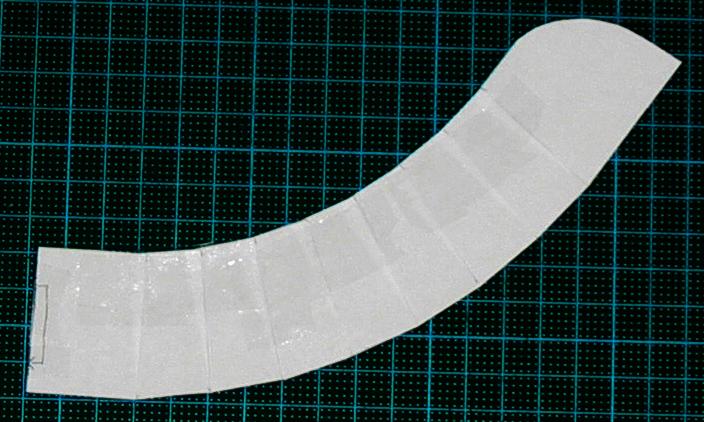
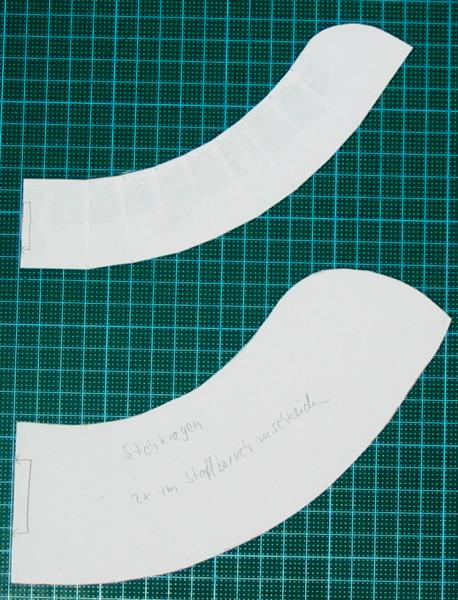
Auf dem Bild fehlt noch der Kragen und die Schulterklappen. (Von letzteren habe ich leider kein Bild gemacht. Für die Knopfblende und den Bund gibt es kein Schnitteil, die sind rechteckig und ich habe sie einfach vermaßt und direkt auf den Stoff gezeichnet.

I’ve never shown the “big whole”… from may. neither the whole outfit nor the pattern of the jacket.

So here are the finished pattern pieces of the jacket: on the bottom of the pic the side and middle back pattern, above them the yoke and an top the side and middle front pattern. On the right side the sleeve.

Not on the picture ist the collar and also the epualets. (I forgot to take pictures of the latter one.) For the buttonstand and the “waist”band (which is not on waiste level) I made no patterns. They are rectangular and I marked them directely on the fabric.

Mai Outfit

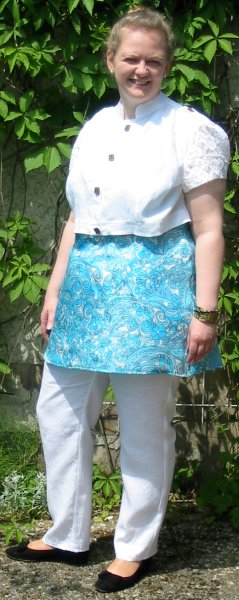
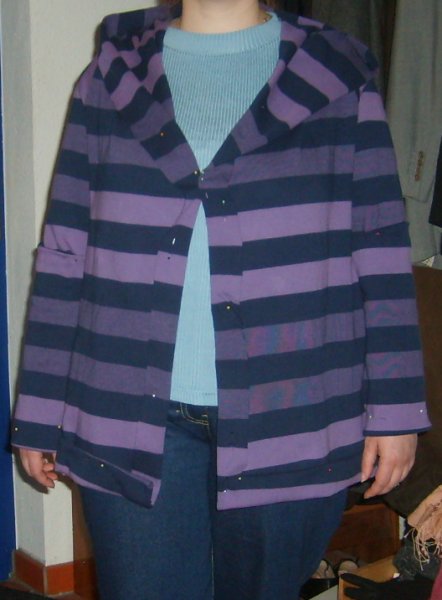
Und hier endlich…. ein Bild vom Gesamtoutfit.

Ich war mir relativ unsicher, ob die Proportionen mit dem kurzen Jäckchen bei meiner Figur eine gute Idee ist.

Aber ich muß sagen, zu meiner eigenen Überraschung gefällt es mir tatsächlich. Und wenn ich genau hinsehe… Ich glaube mein Indienurlaub hat Spuren hinterlassen. Ein Kameez wäre länger, aber mit Churridar und einer Jacke (die auch länger wäre) würde es ähnlich aussehen.

Statt schwarzer Schuhe habe ich auch türkise und seit dem Schlußverkauf in Paris sogar weiße. (Na gut, off white…)

Eine Frage bleibt allerdings: Was für eine Handtasche paßt dazu? Ich könnte mir ja so ein oversized Riesenteil vorstellen (ein Vorteil wenn man dick ist, man kann beliebig große Handtaschen verwenden ohne auszusehen wie der sprichwörtliche Schwanz, der mit dem Hund wedelt…), aber wie genau sollte sie aussehen? Und welche Farbe?

Vorschläge? Ich bin offen für alles…

And here is finally the picture of the complete May outfit. I was not sure at all whether the cropped jacket was a good idea for my figure.

But to my own surprise… I like it! And if I give it a closer look… I think the holiday in India still shows. Sure, a kameeze would be longer, but with churridar and a typical jacket (which would be longer also)… it’s not so far of. I think.

Instead of black shoes I also could wear turquoise ones and since the summer sale in Paris I also own white (okay, off-white) ballerinas.

Remains one question: What kind of a bag/tote/purse/… do I wear with that? I could imagine one of those huge oversized ones (an advantage when you are oversized you can wear big bags without looking like the tail that wags the dog….), but what exactely should it look like? And what colour would be good?

Any ideas? I’d appreciate to hear of them…

Jacke Rückansicht
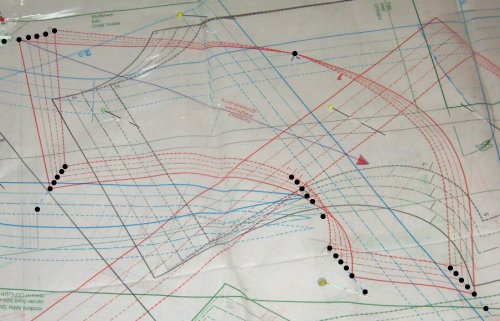
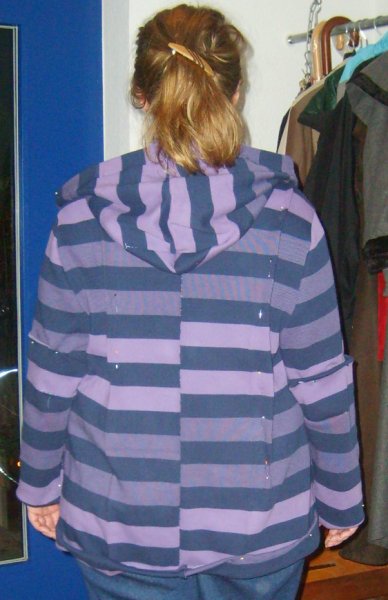
Zu guter letzt auch noch ein Bild von der Rückansicht der Jacke.

Aufgenommen NACH einem Tag tragen und einem Abend herumsitzen, deswegen ist sie so zerknittert und die Rückenfalte ist aufgedehnt.

Aber ich denke die Details wie die Rückenfalte und der Sattel sind wenigstens gut erkennbar.

And finally I managed to take a picture of the back of the jacket.

It was taken after a day of wearing the jacket and a long evening sitting around, so it is wrinkled and the box pleat on the center back is opened up.

But I think you can at least see the details like the pleat and the yoke.

So, dann ist hiermit der Montivationsmonat Mai auch abgeschlossen… Ist ja erst Juli… (und zu kalt um das Outfit anzuziehen…. :-/ )

So finally the May sew along is done. It’s only July now… (and to cold to wear that outfit…:-/ )

Stehkragen

Zwar ist schon Juli, aber vom Mai ist noch was nachzutragen. Und zwar fehlt meinem Kurzjäckchen ja noch der Stehkragen. Und auch der ist ganz einfach zu basteln.

It’s already July, but there is still something missing from May. My short jacket also has a collar, a simple stand-up collar. And for those who have never done one I’ll explain how to make it.

Zuerst einmal brauche ich die Linie an der der Halsausschnitt entlangläuft. Bei meinem Originalschnitt war der Ausschnitt etwas tiefer gesetzt, daher muß ich am Schnitt den Halsausschnitt verkleinern. In meinem Fall konnte ich eine bereits nach dem Schnitt genähte Jacke anziehen und eine Nähfreundin hat den Abstand Stoffkante zu meiner natürlichen Halslinien gemessen. (Man kann eine Kette um den Hals legen oder eine etwas scherere Kordel um die Linie zu finden.) Danach habe ich hinten 4cm zugegeben, vorne und an den Seiten etwas weniger. Bevor ich den Kragen konstruierte habe, habe ich die bis dahin fast fertige Kurzjacke (mit den Ärmeln, denn die können den Verlauf noch etwas verändern!) angezogen und danach den Ausschnitt hinten wieder etwas vergrößert. (Dran denken, daß Nahtzugabe dran ist!)

Ein Stehkragen verläuft eher nah am Hals aber im Detail ist das natürlich wieder persönliche Geschmackssache. Deswegen anprobieren und gucken.

First I had to determine the neckline. My original pattern had a lowered neckline so I had to add to the pattern, getting the jacket going up to my neck. In this case, as I already had a finished jacket after the same pattern I just put the jacket on and had a sewing friend measuring the distance between jacket neckline and my natural neckline. (You can wear a short collier or just use a not to lightweight cord around your neck to see where the neckline is.) After that I added 4cm to the pattern neckline in the back middle and a little less on front and shoulder line. Before finally constructing the collar I put on my now sewn white jacket (sleeves set in because that can change the neckline of a garment) and decided to lower the neckline again by 1cm in the back middle, tapering zu the shoulder line. (When putting your garment on do not forget that the fabric has seam allowances!)

A stand-up collar normaly runs quite close to the neck, but how close is matter of personal taste. So try and check is best.

Stehkragen Danach markiere ich die Kragenansatzlinie an meiner Jacke und messe deren Länge mit einem senkrecht gestellten Maßband. (Zur Markierung nähe ich einfach eine Naht in 1,5cm Abstand von der Kante, auf der Naht nähe ich später den Kragen an, man sieht sie also nicht mehr. Man kann aber auch Kreide oder die eigene Lieblikngsmarkiermethode benutzen.)

Next step is to determine the length of the collar. For that I’m marking my seamline und measure the length of it with a flexible ruler or a tape measure. (To mark the line I’m just sewing 1,5cm from the cut edge with my sewing machine, later I’ll sew the coller exactly to that line of stitches so it won’t be visible. But you can also use chalk or whatever method you prefere.)

Die gemessene Kragenlänge teile ich durch zwei und schneide dann aus einen Blatt Papier ein Rechteck 1/2 Kragenlänge x gewünschte Kragenbreite. Ich habe mich für 4cm entschieden, was auch die breite der vorderen Belege an der Knopfleiste ist. Das sieht im Gesamteindruck harmonisch aus.

Die vordere Rundung zeichne ich erst auf und schneide sie dann so wie sie mir gefällt.

Als nächstes messe ich meinen Halsumfang und zwar vier cm über der Kragenansatznaht. Mein Stehkragen soll relativ eng anliegen, überlappt aber nicht. Daher benutze ich dieses Maß für die obere Kante meines Kragens.

Ich schneide etwa alle 2cm an der einen Kante meines Papiers ein und zwar fast durch, aber nicht ganz, so daß das Papier an der anderen Längskante gerade noch zusammenhängt. Und jetzt überlappe ich an der oberen Kante das Papier, bis ich die gewünschte Länge (bzw. “Kürze”) erreicht habe. Ich überlappe immer nur einen halben Zentimeter (es wird also bei jedem Einschnitt einen Zentimeter schmaler) bis ich meine gewünschte Halsweite erreicht habe. Dadurch legt sich der Kragen automatisch schon fast in eine schöne Rundung.

Schnitteil für StehkragenThen I’m cutting a paper rectangle, length is half the measured length of the seamline, height is how I wand my collar to be. I choose 4cm because that is also the width of my buttonstand so the overall impresson of the garment will be calm and balanced. (Also my neck is long enough to look good with that collar width.)

The curved front of collar I’m just drawing free and cut it when I like the result. If not I just try again on another piece of paper.

Next step is to determine the length of the upper edge of the collar. Measuring again, this time my neck 4cm (=collarheigth) above the line where collar and jacket will meet. I wanted the collar quite close to my neck and it doesn’t overlap at the front, so I just took that measure directly without adding ease.

To make my piece of paper a collar pattern I’m cutting every 2cm, from one long side to the other,but not completely through but I’m leaving hinges on the lower part of my paper (collar). The rest is just overlapping, not more than 0.5cm per cut (This means every cut-operlap section reduces the collerwidth on the upper end by 1cm.) until the desired width is reached. Overlapping only small amounts per cut forms a nice curve automatically, you don’t need a curved ruler or anything like that.

Der Rest ist quasi Formsache… die rohe Kragenform wird noch mal auf ein frisches Blatt Papier gelegt, eine Nahtzugabe angezeichnet, der Stoffbruch in der hinteren Mitte markiert und der Kragen beschriftet.

Schon fertig.

Den Eintrag darüber zu schreiben dauerte länger als den Kragen zu konstruieren… :o)

The rest is just finishing touches…. I position the “raw” collar pattern on a fresh sheet of paper, I add seam allowances, mark the fold on the middle back and lable my new collar pattern.

Done.

Writing this entry took much more time then constructing the collar… :o)

Miniärmel

Mein Originalschnitt hat lange Ärmel, für den Summer hätte ich aber natürlich gerne kurze. Und zwar ganz kurze, solche die praktisch nur die Schulter bedecken. Ich bin mir nicht ganz sicher, ob es dafür einen eigenen Namen gibt. Ich nenne sie jedenfalls einfach Miniärmel

ÄrmelschnittMy original pattern has long sleeves, but as it’s summer I want short ones. Very short ones. I’ve read the expression “cap sleeves” for sleeves like that, but in other books I’ve found the terminus “cap sleeve” for another type of sleeve… so I’m just calling it “minisleeve”.

Einen langen Ärmel in einen kurzen verwandeln ist eigentlich ganz einfach: einmal quer rüber abschneiden. Nur bei ganz kurzen Ärmeln stößt das an gewisse Grenzen. Einmal quer rüber schneidet die halbe Armkugel ab, das wollte ich aber nicht.

Trotzdem ist es nicht schwierig.

Ich habe an der angezogenen Jacke die Länge des künftigen Ärmels mit Stecknadeln bestimmt und dann vom Schulterpunkt aus bis dahin gemessen.

Diese Strecke messe ich dann an meinem Schnittärmel ab, senkrecht vom Schulterpunkt ab nach unten, parallel zum Fadenlauf.

An der Ärmelnaht messe ich etwa 5cm ab, dabei ist die Nahtzugabe der Ärmelansatznaht schon dabei, die effektive Ärmellänge unter der Achsel ist also 3.5cm. Dann verbinde ich die beiden Markierungen (die unter dem Schulterpunkt und die an der Ärmellnaht) mit einer geschwungenen Linie. Das ist auf dem Bild die rote Linie.

Ich sagte doch, daß es ganz einfach ist… 😉

Transforming a long sleeve in a short sleeve is not difficult, just cut it straight. Only if you want a very short sleeve there is one problem: this would cut the sleevehead. This was not what I intended.

Still.. it is not difficult. First I did put on the long sleeve jacket from the same pattern. Then I did mark the desired sleeve length with pins, going down from the shoulder line. Then I measured the distance from shoulder line to my pin on the sleeve. The same distance I’m marking on my pattern. Parallel to the grainline.

At the sleeveseam I am measuring five centimetres. This is taking into account that my pattern includes 1,5cm seam allowance, so the lenght of the sleeve unter the axle is 3.5cm. Then I just have to draw a curved line (that is the red one on the picture) from the armseams to my marked point in the middle of the sleeve.

As I’ve promised… super easy!.

Ärmelsaum bestimmenAllerdings mag einigen aufgefallen sein, daß ich meine Saumlinie nur bis zur Mitte gezeichnet habe.

Der Grund ist ein ganz praktischer: Ich würde es nicht schaffen, eine in beide Richtungen genau gleich gebogene Linie zu zeichnen.

Also zeichne ich sie halb, falte den neuen Ärmel der Länge nach zur Hälfte und schneide einfach an meiner Linie entlang. Schon ist sie zu beiden Seiten gleichmäßig.

Maybe you have noticed that my line goes only half the way.

Again a simple reason: I would never be able to draw a hemline that is symmetrical to both sides.

So I’m just drawing one half of it, then I’m folding my new sleeve lengthwise and cut along my drawn line. Voila… a symmetrical hemline.

Was jetzt noch fehlt ist eine Saumzugabe, dieser Ärmel bekommt aber keine. Auf Grund des Materials habe ich mich zu einer anderen Technik entschlossen (und keine Zeit gehabt, ein Photo zu machen):

Den Ärmel habe ich aus Spitze gearbeitet, gedoppelt mit Seidenorganza. Damit der Saum sauber aussieht, habe ich den Ärmel am Saum verstürzt, auch das geht einfache.

Für jeden Ärmel ein Stück Spitze und ein Stück Organza nehmen, die etwas größer sind als der Ärmel. Diese beiden Stücke werden rechts auf rechts aufeinandergelegt und dann entlang der Schnittkante des Ärmelschnittmusters die Saumlinie eingezeichnet. Entlang dieser Linie habe ich die beiden Stoffstücke gesteppt, dann die Nahtzugaben zurückgeschnitten und gewendet.

Dadurch entsteht eine sehr saubere Kante, die auch die richtige Saumform hat. An diese Kante lege ich den Ärmelschnitt an und schneide danach den Ärmel erst zu. Dann muß ich mir auch keine Gedanken machen, ob die weiche Spitze sich irgendwie verschiebt, die Ärmelform paßt. Nur noch Ärmelnaht nähen und Ärmel einsetzen. (Für gebogene Säume ist vertürzen übrigens immer eine gute Lösung, man kann das auch mit einem Besatz machen.)

What is still missing is the hem allowance. Well.. not really missing, because due to my choice of material for the sleeves I decided to use another technique, without a hem.

The sleeves are made from lace, underlined with silk organza.For each sleeve I cut a piece of lace and a piece of organza, a bit bigger than the sleeve will be. Then I’m putting a piece of lace and a piece of organza together, right sides facing. On this “sandwich” I’m drawing directely the hemline, using my plastic pattern a a template Then stitch along that line, cut back the surplus fabric (aka seam allowance), iron and torn over. (Left sides of the fabric are facing.)

So you have a neat and perfectly shaped hemline. Then I’m putting my pattern piece on the sandwich, exactely matching the lower end of the pattern piece and my seam. After that I can cut my sleeve, without having to bother about not matching pieces of delicat, unstable lace after turning the hem… The rest is the normal procedure: seaming the sleeve and sewing it in the armhole. (Making a turned hem like this is always usefull if you have a curved hem. If you don’t want to double your fabric you can cut a facing.

Passenabtrennung

Schnitteile RücketeilJetzt geht es los mit der Konstruktion der Passe. (Ein Klick auf das jeweilige Bild macht es übrigens größer.)

Zuerst nehme ich die beiden Rückenteile, links das mittlere Rückenteil, das im Stoffbruch geschnitten wird, rechts das seitliche Rückenteil. Da meine Schnitte mit Nahtzugabe sind zeichne nicht mir die Nahtlinien ein.

Gestrichelte Linien, 1,5cm von der Kante entfernt, am Halsausschnitt, an den Schulternähten und an der Naht die die beiden Rückenteile verbindet.

(Von der blauen Linie auf dem mittleren Rückenteil bitte nicht verwirren lassen, das war der Beleg einer früheren Version. Als einfach ignorieren.)

This is how the yoke is constructed. (Clicking on a pic shows a bigger version.)

On the picture you see the both parts of the back. On the left the middle back, cut on fold, on the right the side back panel. My patterns do already include the seam allowances, so I have to mark the sewing lines.

Dotted lines, 1,5cm from the edge of the pattern pieces. I’ve marked this in the neckline, the sholder and on the seam that will connect the two (in the end three…) back panels.

(The blue line of the middle back has no meaning here. That’s the facing of another version. So please ignore it.)

Rückenteile zusammengelegtJetzt füge ich die beiden Rückenteile an der Teilungsnaht zusammen.

Man erkennt daß die Teilnungsnaht im oberen Teil gerade ist und an dieser Stelle können die Schnitteile genau aneinander gelegt werden, alsi die Nahtlinien liegen übereinander.

Befestigt werden sie mit Tesafilm.

(Ich verwende Folie für meine Schnitte, deswegen kann ich gut durchsehen und die Teile einfach übereinander legen. Wer mit Papierschnitten arbeitet schneidet die Nahtzugaben einfach ab bzw. arbeitet mit Schnitteilen ohne Nahtzugabe.)

First I’m putting the two back panels together.

You can (hopefully) see that the upper part of the seamline is quite straight, so you can put them precisely next to each other. The seamlines overlap exactely. (More or less….)

Then I’m using clear tape to hold the pattern pieces in place.

(I’m using clear plastic sheet for my patterns, so it is easy to see through and overlap them If you are using paper for your pattern then you have to cot of the seam allowances or use patterns without included seam allowances.)

Schnitteile an Schulter zusammengelegtDie gleiche Prozedur mache ich beim Vorderteil. Mittleres und seitliches Vorderteil werden zusammengeklebt.

Man erkennt vielleicht, daß die vordere Teilungsnaht nur auf einer sehr kurzen Strecke gerade ist und sich somit auch nur auf einer kurzen Strecke überlappen läßt. Das hat zum einen was mit dem Schnitt zu tun, zum anderen aber auch mit meiner Figur, die viel Kurve erfordert.

Anschließen werden Vorderteil und Rückenteil an der Schulternaht zusammengelegt. Dabei beachte ich besonders das Paßzeichen am Halsausschnitt und daß die Naht auch am anderen Ende, also am Armausschnitt genau aufeinander liegt.

Dazwischen ist die Naht etwas gebogen, kann daher nicht exakt aufeinander treffen. Je nach Stärke der Biegung und Schnitt kann man das einfach ignorieren (das habe ich getan) oder am Ende am unteren Rand der Passe wieder durch eine Biegung ausgleichen.

Same procedure for the front. middle front and side front panel are overlapped and taped together.

If you look closely you can maybe see, that on the front the seamlines are only straight for some centimetres, so they can overlap only on that short distance. That is due to the pattern but mostely to my curvy figure. Patterns that do fit me have usually nothing straight…

Now I’m assembling front and back at the shoulder seam. Important here ist that the two seam lines match exactely on the neck side and on the other end an the sleeve side.

Between the seamline is a bit curved, so I cannot match it here.Depending on how strong the curve is you can either ignore it (that’s what I did in this case) or you can add that to the bottom of the yoke, forming a slight curve there.

Sattel zeichnenJetzt kann ich die Passe auch schon zeichnen.

Dank der Folie lege ich einfach eine weitere Schicht Folie über meine zusammengeklebten Teile und zeichne eine Passe.

In meinem Fall geht sie ein kleines Stück ins Vorderteil, nämlich so weit wie die Teilungsnähte aufeinanderliegen, und im Rückenteil habe ich einfach eine gerade Linie von Armausschnitt zu Armausschnitt gezogen. Im 90° Winkel zum Stoffbruch in der hinteren Mitte und genau durch die Stelle verlaufend, bis zu der die Rückenteile genau aneinander liegen.

Wichtig ist die Schulterline einzuzeichnen, denn die braucht man hinterher um Kragen und Ärmel ordentlich einnähen zu können.

Man kann es auch problemlos kürzer machen. (Länger wäre dann schwieriger, geht aber natürlich auch)

Now I can draw the yoke.

I’m just adding another layer of my clear plastic sheet over all the other layers that are taped together. And then I’m drawing the yoke.

In my case the yoke goes only a bit into the front, not further then the matched seam lines. For the back yoke sean I’m drawing a line in an 90° angle to the middlne back. The yoke ends where the seamlines of the back patterns stop to be straight.

Important is to draw the shoulder line, because this will be very helpfull when sewing in the sleeves and sewing on the collar.

A smaller yoke is easily possible. (A bigger one would be more complicated..)

Neues Rückenteil zeichnenNun müssen nur noch die Rückenteile und Seitenteile neu gezeichnet werden.

Eine weitere Schicht Plastikfolie kommt darüber und jetzt zeichne ich die Kontur des alten Schnitteils bis zur Passe nach. Dann kann man die Folie entfernen und ein neues Stück Folie auf das nächste Teil auflegen. Bis man alle vier Teile neu gezeichnet hat. (Meine Teile sind natürlich kürzer als die ursprünglichen Jackenteile, weil ich die Jacke ja gleichzeitig noch kürzer haben möchte.)

An die Passennaht muß dann natürlich noch eine Nahtzugabe angezeichnet werden, auch an der Passe selber natürlich.

Und schon hat man einen Jackenschnitt mit Passe.

Now I only have to remake the front and back patterns.

So I’m adding another layer of plastic and I’m tracing the contour of the side back (that’s the piece I’m showing in the picture) up to the yoke. Then I’, removing that plastic layer, add another piece of plastic foil and trace the next piece until all four pieces are done. (My pattern pieces for front and back are also shorter than the original ones, because I want a shorter jacket.)

Now just adding seam allowances where the front and back pieces meet the yoke. And adding seam allowances to the yoke, of course.

That’s all, the jacket with yoke is done.

Schnitt aufgeblasen

ProbejackeNachdem der letzte Motivationsmonat abgehandelt ist, kann ich jetzt auch endlich von der Kapuzenjacke für diesen Monat erzählen.

Da der Schnitt nur bis Größe 42 im Heft war, habe ich ihn brutal auf Größe 48 vergrößert und hier ist dann auf alle Fälle ein Probemodell fällig. Aus einem dicken Sweat, der meinem Originalstoff in Dehnbarkeit gar nicht so unähnlich ist. (Das Lager alter Stoffe von Frau mhs schrumpfte so mit wieder deutlich…)

Now that everything about my March-jeans is told, I can start writing about my hooded jacket for this months “motivation of the month”.

As the pattern does only exist up to (German) size 42 sizing it up to 48 is kind of brute force,,, And this cannot be done without a muslin. Made out of a rather thick sweat knit which has about the same amount of stretch than my original fabric. (The stash of fabrics nobody wants to wear anymore of Frau mhs did shrink a good deal…)

Von vorne sieht das Ganze schon gar nicht schlecht aus. Die Streifen treffen nicht aufeinander, aber das liegt daran, daß ich aus Stoffspargründen und auch wegen der Eile nicht auf den Streifenverlauf achten konnte.

Unten und vorne sind die angeschnittenen Blenden nach außen gesteckt. Unten habe ich die Jacke etwas gekürzt und auch der Ärmel ist zu lang.

Wir haben beim Nähkränzchen eine ganze Zeit über die Länge diskutiert, bei einer warmen Jacke mag ich es durchaus etwas länger. Aber nicht so lange…

The front view isn’t that bad.The stripes do not match, but I had not cut in a way they could… It wasn’t supposed to be wearable and I wanted to do it quickly.

The cut on facings are fold and pinned to the right side of the garment. In front of the mirror I decided to make the jacket about 5cm shorter and I had to shorten the sleeves a good deal.

Together with Capricorna and Frau mhs I discussed quite a while about the sleeve length. On a warm jacket I like a little longer sleeves, but not that long…

Probejacke RückansichtVon Hinten sieht man zum einen mal deutlich, daß die Streifen nicht aneinenader passen können… der Schnitt hat in der hinteren Mitte keine Naht, aber der Probestoff war nicht groß genug.

Was man auch sieht: an den Hüften ist die Weite in Ordnung, aber an den Schultern ist es viel zu weit. Also mal ein paar Falten weggesteckt, die dann auch im Schnitt weggefaltet werden müssen.

First thing you see on the back side is why the stripes can not match at the front… the pattern does not have a seam at the back middle, but the test fabric was not large enough. So there had to be a seam.

The other thing you can see well is that at the hips I need all that fabric, but that’s its to wide at the shoulders. So I had to fold that away in my pattern.

SchnittkonfliktNachdem ich diese Veränderungen alle auf den Schnitt übertragen hatte, sah ich mich allerdings mit einem neuen Problem konfrontiert…

Jetzt überlappten sich einige Stellen, so daß nur noch ein oder zwei Milimeter Nahtzugabe an jeder Seite geblieben wäre. Nicht praktikabel…

After copying all those alteration to my pattern I found an new problem…

Now some parts ob my pettern did overlap (or nearly overlap) leaving something like an 1 or 2 mm seam allowance.

Not good…

SchnittAber kein Problem ohne Lösung…

An der Kapuze habe ich am Hinterkopf “Abnäher” rausgefaltet. Dadurch wir die Kapuze kleiner und verliert wohl etwas an Reiz, andererseits ist sie im Original sehr groß, was an meinem dicken Stoff auch nicht ganz optimal wirkt. Also kann ich mit dem Kompromiss leben.

Jedenfalls paßt letztlich der Schnitt auf den Stoff, ohne Naht im Rücken. Auch wenn ich den Stoff dazu quer nehmen, also quer zum Maschenlauf zuschneiden muß.

But there is a solution for every problem…

I’ve folded kind of “darts” in the back of the hood. So the hood is getting a bit smaller, maybe looses a bit of what makes the pattern spacial, but on the other side it is very large which is not the best for my thick fabric. So I can live with that compromise.

And so I was finally able to place the pattern piece on the fabric without unwanted seams. Even though I had to take the fabric “crossgrain” (if it had a grain, it’s a knit fabric, so it hasn’t.)

Und um die Spannung zu nehmen: Die Jacke ist fertig, ich habe sie am 13. getragen. Die Schnittkritik und die Bilder kommen demnächst.

The jacket was finished on time, I wore it on the 13th of april. Pics of the finished garment and pattern review will come in the next days. I hope…

Runde 1

SchnittmusterDiese Woche hat sich unsere kleine Nährunde zum ersten Mal zum Thema “Motivationsjeans” getroffen. Ich hatte damit auch endlich die Möglichkeit, mal einen Blick auf den Schnitt zu werfen.

Das gab auch schon mal einige Überraschungen. Der Schnitt im Ganzen sieht irgendwie seltsam aus… hinten gibt es keinen Bund, sondern der Sattel dient quasi als Formbund und wird gedoppelt. Hier ergibt sich für mich schon die erste Änderung: Ich habe ja sehr dicken Jeansstoff und wenn ich den doppelt nehme, wird es sehr unbequem… deswegen werde ich mit einem dünneren Stoff doppeln. Mal sehen, was die Restekiste hergibt.

Außerdem habe ich inzwischen auf Pattern review ein bißchen zu dem Schnitt gelesen und dabei festgestellt, daß ich wohl besser die kleinere Größe nehme, wenn ich den Schnitt wirklich “jeanseng” haben will. So ähnlich steht das auch in der Anleitung… wenn man einen typischen Denim-Sitz haben will, der ein bißchen komprimiert, dann enger nähen. Auch das jetzt ein wenig überraschend, bei einem Jeans-Schnitt. An Schantung Seide als Stoff hätte ich jetzt nicht primär gedacht… Ach ja, die Beine werde ich verlängern müssen, wenn ich Pattern Review glaube.

Jedenfalls habe ich, was den Schnitt betrifft, jetzt die Wahl. Frau mhs hat mir ihren in Größe F überlassen und zudem fand am Düsseldorfer Hauptbahnhof mal wieder ein konspiratives Treffen statt, bei dem ein Schnitt in Größe G übergeben wurde. (Danke!)

This week our small sewing cycle did meet about the Five-Pocket-Jeans for the first time. My first chance, to get a glance on the pattern.

An the first surprises. The pattern or at least some parts of it, looks a bit strange. There is no waistband in the back, but instead the yoke is yoke and waistband in one and it’s self-faced. Which I will definitely not do with my very strong denim. I consider that to be quite uncomfortable. So I’ll go and look in my scraps for something thiner.

As I couldn’t work on the trouser so far I’ve been reading on Pattern Review about it. And this, together with measuring the pattern, brings me to the conclusion, that it might be the better choice to take the smaller size (F) if I want a typical close fitting jeans. Well, that’s also what the instructions say, more or less. Again a bit unexpected on a jeans pattern. I wouldn’T have thought about shantung silk (one of the fabrics mentioned in the intruction) as first choice of fabric for this pattern… Oh, and I will have to lengthen the trowsers from what I can tell so far.

Anyhow, I have the full choice of sizes now, because not only Frau mhs left me her pattern in F, there was also a conspirative meeting on Duesseldorf Main Station where a pattern was exchanged… (Thanks again!)

Capricorna und der SchnittEin paar Überraschungen gab es auch für Capricorna. Sie stellte fest, daß sie den Schnitt wohl schon mal auskopiert hatte und es stand auch “angepaßt” auf der Kopie.

Leider hatte sie keine Ahnung mehr, wann sie ihn wohl angepaßt haben mag und wie gut das Ergebnis war.

So schob sie ihren Burda-Maßschnitt, der gut paßt, auf dem Betzina Schnitt hin und her, nur um festzustellen, daß der irgendwie ganz anders ist… Mal sehen, ob sie uns in ihrem Blog noch irgenwann verrät, für welche Variante sie sich entschieden hat…

There were also surprises for Capricorna. She evidently had copied the pattern long ago and it was also marked as “fitting done”.

Only she doesn’t remember the least bit when she might have done that and how good the result really was…

So she spent a lot of time comparing her burda custom made pattern to the Betzina pattern, just to find out that they have no similarities at all. Maybe she’ll tell us in her blog, what she’ll be going to do about it…

Am weitesten ist schon Frau mhs, die hat nicht nur den Schnitt ausgeschnitten und an ein paar Stellen angepaßt, ihrer war auch schon auf dem Stoff festgesteckt und wartet da nur noch aufs Ausschneiden.

Most results could be seen at Frau mhs work. Her pattern is copied, some alterations were done and the pattern pieces were pinned to the fabric, just waiting to be cut.

Mein Weg hingegen ist noch lang. Ich muß den Schnitt abkopieren und dann erst mal schnell eine Probehose nähen, um zu sehen, ob Größe F reicht und ob es sonst noch grobe Abweichungen gibt. Einen Schnitt nach Sandra Betzina habe ich noch nie genäht, daher kann ich nicht mal ungefähr abschätzen, ob er passen könnte.

On the contrary I sill have a very long way to go. I’ll have to copy the pattern and then quickly do a muslin to check, whether size F ist the good decision and whether there are other major problems. I’ve never used a Betzina pattern before, so I cannot even guess.

Mehrgrößenschnitt vergrößern (Teil 2)

Nachdem Frau mhs so sehnlich darauf wartet, geht es nun weiter…

Schnitt gradierenNachdem man alle wichtigen Punkte markiert hat, muß man sie jetzt nur noch verbinden und hat das neue Schnitteil.

Äh ja, richtig… die Punkte liegen doch arg weit auseinander, wie soll das denn sauber gehen? Ich nehme an, wenn man ein passendes Kurvenlineal hat, könnte das sogar reichen, aber ich habe keines, ich male mir noch mehr Hilfspunkte. Das ist nicht schwer, an verschiedenen Stellen messe ich den Abstand zwischen Größe 44 und Größe 46 und mache außerhalb der Größe 46 einen Punkt. Die Hilfspunkte mache ich so alle 2 – 5 cm, je nach dem, wie ich denke es zu brauchen.

Wer mal an eine gebogene Linie das Lineal anlegt, der merkt schnell, je nach dem, wie man das Lineal dreht, ändert sich der Abstand. Deswegen benutze ich ein Geodreieck, das ich jeweils so anlege, daß die Längslinien auf dem Dreieck möglichst lange auf der roten Linie verläuft. Je nach Krümmung der Kurve können das mehrere Zentimeter sein oder nur ein halber. (Ich entschuldige mich für das Photo… ich hatte meine Kamera vergessen und Frau mhs hat mir ihre geliehen, die prima ist, mit der ich aber nicht so gut umgehen kann. :-/ Die schwarzen Punkte zeigen, wo die Längslinie des Geodreiecks verläuft.)

As Frau mhs urgently wants to see the rest,, here it is….

After the new edges and marks are identified you just have to connect them to get your new pattern.

All right… those points are quite far from each other, so it’s not easy to do this maintaining the correct shape. So I’m drawing more dots around my pattern, every 2 -5 cm (1-2 inch). The method is the same: measuring the difference between size 44 and 46 and make a dot on the other side of size 46 in the same distance.

When you measure along a curved line you’ll find out quickly that depending on the angle you measure the distance, the distance will not be the same. To get a “true” distance I’m using a transparent gridded ruler (if you have a quilter’s grid, that’s perfect). I put it that way, that the vertical grid line on the ruler runs on my 46 size line for the longest distance possible. On a very curvy part this can be only 0,5cm or so, if the curve is flatter it can be up to several centimeters. (I really apologize for the phots. I had forgotten my camera and Frau mhs lent me hers. It’s a good camera, only I know not well how to handle it. :-/ The black dots show the vertical grid line that runs on the red line of the original pattern.)

SchnittlinienDa wo die Linie zwischen zwei Ecken gerade ist kann man natürlich einfach das Lineal an die neuen Ecken anlegen und die Linie mit dem Lineal ziehen.

Aber man muß auf alle Fälle sicher sein, daß dieursprüngliche Linie gerade ist! Am besten man legt sein Lineal zum Testen an, denn viele Linien, die auf den ersten Blick gerade aussehen, sind dann doch gebogen. Und das würde die Paßform beeinträchtigen.

Where the original pattern has straight lines you can of course just connect your new edges with the ruler.

But make sure, that what looks straight also is straight! That’s easily done trying to align the ruler to the original line. Very often a contour that seems to be straight at first sight is a slighly curvy one an making it straight would spoil the fit.
neues SchnitteilJa, dann einfach noch die Hilfspunkte verbinden und das neue Schnitteil ist fertig.

Man sollte es beschriften, auch mit der neuen Größe.

So that’s it. just connecting all the edges, marks, dots… and the new pattern is ready.

Be sure to write the new size on it and any other relevant information.

Mit dieser Methode kann man Schnitte natürlich nicht nur größer, sondern auch kleiner machen.

Trotzdem hat sie ihre Grenzen: Im Prinzip kann man damit beliebig viele Größen nach oben oder nach unten gehen. In der Praxis ist gutes Gradieren dann doch komplizierter und je mehr Größen man damit verändert, desto ungenauer wird es.

Aber man bekommt trotzdem fast immer eine gute Grundlage für ein Probeteil. Und an dem paßt man dann den Rest an.

Mein Probestück paßte schon ganz gut, ich mußte an der vorderen Mitte (pro Schnitteil) noch 0,7cm zugeben, die Schultern um 1,5 cm schmaler machen und den Ausschnitt habe ich um 3cm erhöht. Das Mittelstück meines BHs muß ich nicht dringend vorzeigen.

fertiges Schnitteil mit NZGJa und so sieht das fertige Schnitteil aus, ich habe noch 1,5 cm Nahtzugabe zugefügt und ausgeschnitten.

With this method you can not only size up, but also size down.

Theoretically you can use this method to size up or down as many sizes as you wish. Practically it has limits. Real grading is something different and more complicated. And the more sizes you make a pattern larger or smaller, the less likely it will fit exactly.

But you can be quite sure to have a good basis to sew a muslin. (You always should of an altered pattern!) the rest of the fit can be done on the muslin then.

My muslin did fit quite well for a first try, I added 0,7cm to the front middle seam, decreased the shoulder seams by 1,5 cm and raised the decollte by 3cm. I don’t like to show my bra…

The last picture shows the new pattern ready to use. I’ve added 1,5cm for the seams and I’ve cut it out, of course.

Mehrgrößenschnitt vergrößern (Teil 1)

Shirt
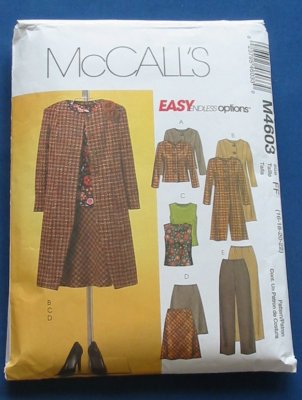
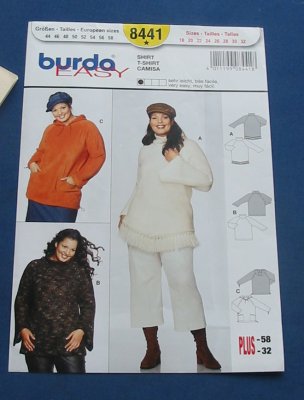
Diese Shirt aus der Burda vom August letzten Jahres habe ich mir für den Motivationsmonat vorgenommen.

Der Haken an der Sache: es ist in Größe 38-46 im Heft und das ist ungefähr eine Größe zu wenig.

Glücklicherweise handelt es sich aber im Heft um Mehrgrößenschnitte, die man vergleichsweise einfach vergrößern kann. Die Versuchung ist natürlich da, einfach mit einem Zentimeter Abstand um die Kontur des Schnitteiles herumzuzeichnen. Bei ganz simplen Schnitten bekommt man damit sogar eine brauchbare Annäherung, aber wenn noch Teilungsnähte dazu kommen (die bei Burda in der Regel auch funktional und nicht nur dekorativ sind) oder die Formen etwas komplizierter sind, dann funktioniert das nicht mehr so gut.

Aber es gibt ja auch einen besseren Weg, der die Proportionen der Teile erhält.

This Top from the BWOF 08/2007 is my “Motivation of the Month” in February. The problem is: the size range is from 38-46 (German sizing) and that means it’s one size to small for me.

Schnittbogen mit FolieIch zeige das Verfahren am Beispiel eines Teiles, des oberen Vorderteils.

Das ist das gebogene Teil mit roter Kontur.

Zuerst lege ich Folie auf den Schnittbogen und stecke sie an verschiedenen Stellen fest.

Luckily the BWOF patterns are multisized, so it’s not too difficult to size them up.

How I’m doing it I’ll show for one piece, the upper front. That is the red, curved contour. (The pattern sheet looks disturbing if you see it for the first time, but one gets used to it.)

I start with putting some plastic foil over it and fix it with pins. (I prefere rather thik plastic foil over tracing paper, because you can see through mor easily. But that is a matter of taste.

First thought might be to extend the contour by 1 cm or something to get the next size. This might even work for very simple patterns, but on more complicated ones or if there are functional seamlines (in BWOF patterns most seams are not mereley decorative, but also functional) the result is usually not very good.

Hilfslinien festlegenMit einem Lineal ziehe ich dann Linien, an jeder Ecke, an jedem Paßzeichen.

Jede Linie verbindet jeweils alle Größen einer Ecke bzw. eines Paßzeichens. (Die durchgezogene, etwas dickere rote Linie ist die Kontur für Größe 46.) Dieses Teil hat vier Ecken und zweiPaßzeichen, wobei ein Paßzeichen für alle Größen identisch ist.

Ich habe mit der Bildbearbeitung noch schwarze Punkte auf die jweiligen Stellen gesetzt. Die Punkte sind nicht ganz auf einer Linie, aber mit dem Touchpad ist das Zielen nicht so einfach. (o: Meine Linien sind gerade, wenn auch dünn. Letzteres ist wichtig, denn sie sollen ja exakt sein. Außerdem wird die Linie über die größte Größe hinaus verlängert.

Im using a ruler to connect all sizes for each edge and each mark of the pattern piece. The thick red line is the contour für size 46 and I extend my lines som centimeters beyond the largest size.

This piece has four edges and two marks. One mark is the same for all sizes, so there is nothing to connect.

I’ve added the black dots later on the computer. They are not perfectly aligned, but with my touchpad this is not so easy. (o: The lines are straight, you can trust me. And they are thin, because a certain precision is needed.

Neue Punkte bestimmenDann nehme ich mein Geodreieck und messe. Wieder für jeden Punkt bzw. für jede Linie einzeln.

Ich messe den Abstand zwischen der zweitgrößten Größe und der größten Größe (hier zwischen Größe 44 und 46) und markiere auf meiner Linie (blau gestrichelt) den gleichen Betrag in die andere Richtung.

Auf dem Bild sind es 0,5cm zwischen der Ecke der gestrichelten Linie (Gr. 44) und der Ecke der durchgezogenen Linie (Gr. 46). Im Abstand von 0,5cm zur durchgezogenen Ecke markiere ich auf meiner Hilfslinie (blau gestrichelt) einen neuen Punkt.

Es ist nötig wirklich für jeden Punkt neu zu messen, denn die Abständen werden nicht rundherum die gleichen sein!

(Ich bin mir auch bewußt, daß ich damit keine “echte” Größe 48 bekomme, denn beim Übergang auf die “Plusgrößen” ändert sich die Gradierung und der Abstand zwischen Größe 46 und 48 wäre eigentlich größer als zwischen 44 und 46. Aber da mir die “normale” Größe 48 von den Proportionen her ohnehin nicht gut paßt, ist das so eine gute Lösung.)

With my ruler I’m measuring the distance between the largest size and the second largest size, that means between size 46 (red line) and size 44 (red dottet line). This distance I’m adding on my blue line to mark the new edge. (The picture shows an edge of the pattern.)

On the picture it’s 0,5cm from size 44 to size 46, so I’ll mark my new edge another 0,5cm beyond the red line on my blue line I’ve marked before.

The measures have to be taken for each edge and mark separately, because there will not be the same distance all over the piece!

(And I know that I’m here not exactely sizing up one size, because somewhere in the region of 44/46/48 the grading changes to the “plus sizes”. That means the distance from 46 to 48 would be bigger than from 44 to 46. But as a “plus size 48” doesn’T have good proportions for me, this solution is a good one.)

P-A-Challenge 2007: Na gut, dann halt die Jacke

Nachdem ja wegen des fehlenden Materials sonst nichts mehr ging, habe ich mir doch die Jacke vorgenommen. Ich habe ja meist mehrere Projekte gleichzeitig am Haken, aber allmählich nimmt das Chaos überhand… kann ja nichts wegräumen, an dem ich noch arbeite.

Schnitt McCalls Aber den Schnitt für die Jacke könnte ich ja dennoch mal angehen.

Ich will hierfür diesen McCalls Schnitt benutzen, den ich sehr liebe. Ich finde diese “einer für alles” Schnitte ohnehin sehr praktisch. Stoffe und Details geändert und vom Strandurlaub über die Businessgarderobe bis zum Abendoutfit ist alles drin. Die Jacke, den Mantel und die Hose habe ich schon genäht.

Die Jacke, so zumindest meine Erinnerung, paßte eigentlich gut, nur eine FBA wäre eine Optimierung. Ich hatte sie genäht, bevor ich diesen Anpassungstrick kannte.

Since I couldn’t do anything else I finally decided to start with the jacket. I’m normally doing several projects in the same time, but my space now looks more chaotic than normal. I couldn’t range ongoing projects, could I? So… one more.

I intend to use this McCall’s pattern I really love. I like in generall the idea of these wardrobe patterns. One pattern and with few alteration and different fabrics you can create outfits from holiday to business to evening wardrobe. I’ve sewn te jacket twice, once as jacet, once as coat. And I rememberd that it did fit quite well. Only I FBA might optimize it. (The last time I’ve used this patterns was beforde i knew how to do that.

Für eine FBA braucht man den Brustpunkt. Also die Jacke schnell angezogen, um dessen Lage zu überprüfen. Knöpfe geschlossen, Stecknadel durch den Brustpunkt. (Der Jacke….) Hm. Die Ärmel sind auch etwas eng am Oberarm. Bißchen knapp am Rücken. Der Knopf auf der Taille schließt. Aber… er spannt auch.

Da werden wohl ein paar Änderungen mehr nötig sein. Gut, wenn ich die FBA mache wird es an Taille un Hüfte auch weiter. Am Rücken könnte es dann auch reichen. Ansonsten sind ja Teilungsnähte da. Und den Oberarm solte man auch weiter machen können.

Eine Menge Änderungen für einen Schnitt, den ich nehmen wollte, weil er schon paßt.

For the FBA I need to know where the breastpoint is. So I put on the jacket. Marking the breastpoint with a pin. (On the Jacket…) Hm. Well. The sleeves ar a little… snung.. around my upper arm. The waist button kan still be closed… but… well… fit… not really.

So some more alteration will be needed. The FBA will give more room around waist and hips. That’s good. Maybe this will create more room an the back, too. End the upper sleeve… should be possible to enlarge that. Quite some things to do for a pattern I intended to use because it fits…

Während ich so den Folienschnitt meditiere kommt die Erkenntnis über mich: Die Jacke und damit der Schnitt sind einfach eine Nummer zu klein. Glücklicherweise habe ich das Originalschnittmuster auch noch Und es geht bis Größe 22… Na gut, dann kopiere ich den Schnitt in Größe 22 neu und nähe eine Testjacke.

Was irgendwie der Schritt war, den ich aus zeitgründen vermeiden wollte… :o)

While I’m still meditating my pattern enlightenment comes over me: The jacket and the pattern… are just too small. Luckily I still have the original pattern and it goes to size 22. Well… I’m copying the pattern in 22 and I will do a test garment. Which was exactely the step I hat planned to avoid… :o)

P-A-Challenge 2007: Erste Überlegungen zum Oberteil

Schnitt von burdaDer Rock ist zwar noch nicht fertig, aber das hindert mich natürlich nicht, auch schon mal vorsichtig über das Top nachzudenken. Die Aufgabe sieht ja ein gesamtes Outfit vor. (Welcher Depp hat sich eigentlich das ausgedacht? Ach so… ich war das. 😮 )

Vorgesehen dafür habe ich den Strickstoff. Langweilig, ich weiß, aber es bietet sich irgendwie an… Damit es nicht ganz so langweilig wird, dachte ich an einen Raglanschnitt.

Und weil bei meinem Arbeitstempo die Zeit bei weitem nicht reicht, um für alle Teile erst ein Probeteil zu nähen, benutze ich einen alten Schnitt. Ein Burda-EASY Plus, Nummer 8441 (schon lange wieder aus dem Programm genommen, wie immer, wenn ich mal einen burda-Schnitt mag..), der mit relativ wenigen Änderungen… nun ja, tragbar wurde. Paßformsensibel ist ein weites Shirt ja nicht so sehr. Und der Strickstoff ist extrem weich, der hat und hält ohnehin keine Form.

The skirt isn’t finished yet, but I’ve started thinking about the shirt. The Challenge demands a whole wardrobe, not just one piece.

I’ll take the knit fabric for the shirt, that’s not really thrilling, but the easiest solution. To make it a little less boring I decided to use a raglan style pattern. And as a very slow worker I won’t have the time to test another pattern, so I picked one from my “archive”.

An old (discontinued after a short time and long ago, that’s what always happens with Burda-patterns I like) Burda-EASY in Plus size. I’ve altered it to fit sufficiently well and used it three times, so far.

Daß der Strickstoff alleine nicht reichen würde war klar, also wollte ich die Ärmel aus einem anderen Stoff nähen. Meinen schwarzen Zusatzstoff, den Silicon Popelin hatte ich dafür im Auge. Schwarz in der Nähe meines Gesichtes ist nicht optimal… aber wird gehen müssen.

Schnitteile an Stoff angepaßt.Ein kurzes Anhalten des Strickstoffes zeigte allerdings, daß nur die Ärmel aus einem anderen Stoff nähen nicht reichen wird. Zumindest nicht, wenn ich nicht vorhabe, bauchfrei zu gehen. (Nicht daß nicht genügend Bauch zum zeigen da wäre… so quantitativ… *g*)

Also muß oben eine Passe abgetrennt werden. Was nicht weiter schwierig ist, einmal quer durchschneiden, neue Nahtzugabe dran, fertig. Und bei der Gelegenheit auch gleich noch kurze Ärmel aus den langen gemacht.

It was quite clear from the beginning, that the knit fabric alone wouldm’t be enough for a whatever in my size. So I had been planning to make the sleeves from the black silicon popelin I had bought in addition to the challenge fabrics. Black close to my face isn’t the best choice, but as long as it’s only the sleeves it should be okay.

A closer look to the knit-fabric revealed, that, if I want the shirt to cover my tummy, I would have to add more fabric. Also to the front and back. This led to the decision to make a kind of a yoke.

A very easy thing to do: Just draw a line, cut and add new seam allowances. (Okay, I didn’t cut the pattern I had, I made a fresh copy. With short sleeves, the other change on this pattern.

Allerdings… mit der Passe kommt der schwarze Stoff nahe an mein Gesicht, nicht ganz erwünscht… Ich drehe und wende die Stoffe ein wenig hin und her…und stelle fest, daß der Toile de Jouy vom Rotton her eigentlich ganz gut zum Strickstoff paßt. Im Strickstoff sind ja viele Rottöne drin… Einfach nur hinnähen ist mir aber zu unruhig. Und zu langweilig… Da muß ich mir noch was einfallen lassen.

The yoke is a good idea to deal with the shortness of the knit. But then I’ll have the black fabric close to my face….. not really good. A little tossing around of all the so far unused fabrics showed, that one of the red hues of the knit is not so far from the red of the Toile de Jouy. So I’ll try to combine those two. Only the contrast between the clear Toile de Jouy and the deep red of the knit is to strong for my taste. So I’ll have to find a solution to deal with that…