
„Biker“ jacket: sleeve vent and sleeve hem
 Ein paar Schritte sind noch nötig, um den Ärmelsaum und den Schlitzbeleg fertig zu stellen. Durch den Beleg, den Reißverschluß und den dicken Stoff ist das Material da ganz schön dick. (Wenn ich das vorher gesehen hätte, hätte ich den Ärmelsaum etwa einen Zentimeter weiter gemacht. 😀 ) Also erst die Nahtzugaben auseinander bügeln und dann den Ärmelsaum hochbügeln. So gut wie möglich flach bügeln.
There are some more steps necessary to finish sleeve hem and the facings. With facing, zipper and the rather thick fabric there is a lot of material bulging. (If I had thought about it before I would have made the sleeve about 1cm larger at the hemline. 😀 ) So first pressing the seam allowances to both sides and then pressing the sleeve hem up. Flatten it as good as possible.
 Dann den Beleg über den Saum klappen und noch mal bügeln, büglen, flach bügeln.
Then folding the facing over the hem and pressing, pressing, pressing, pressing flat.
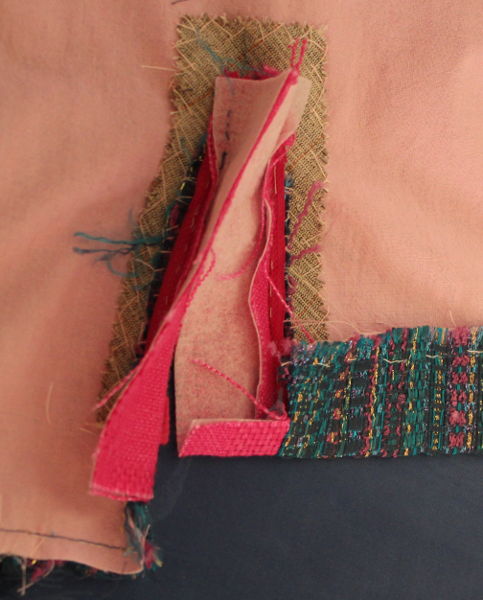
Danach habe ich eher unsystematisch Material aus der Nahtzugabe am Ansatz des Beleges rausgeschnitten. Da sowohl mein Hauptstoff als auch mein Belegstoff relativ leicht ausfransen, war ich da etwas vorsichtig. So nach Gefühl.
Then I cut out some material from the seam of the facing. Since my main fabric and the facing fabric fray quite easily I tried to be careful. And my cutting did not follow any rules, but it was very chaotic. Just guessing.
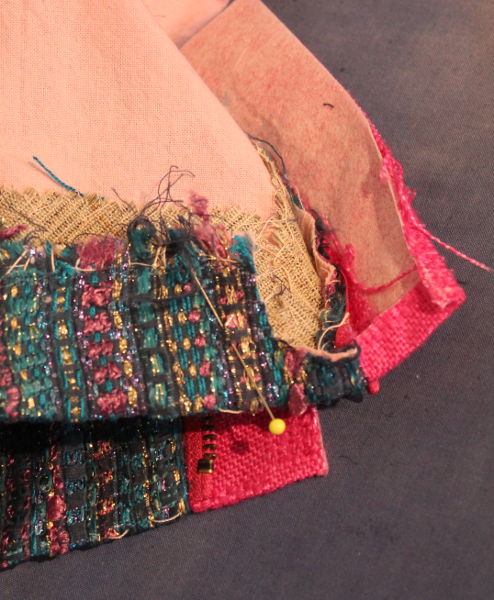 Anschließen wird die Ärmelnaht geschlossen und der Saum genäht. Der Bereich unter dem Beleg bleibt frei. Da wird die Saumzugabe dann noch mal zurückgeschnitten. Die Stecknadel zeigt an, bis wohin der Beleg geht. Beleg und zurückgschnittene Saumzugabe sollten noch wenigstens einen Zentimter überlappen.
Next step is sewing the sleeve seam and hemming it. I do not sew the hem under the facing, because there I can cut some more fabric from the hem. The pin show the width of the facing. So facing and the cut back hem allowance should overlap at least 1cm.
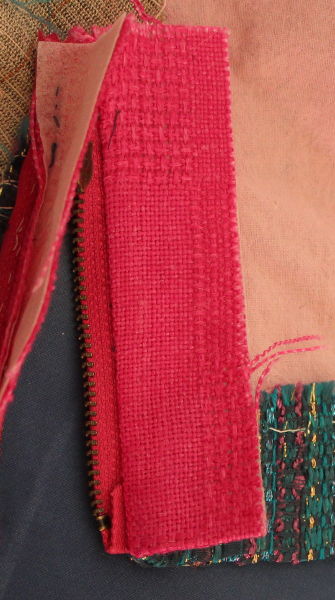
 Der Beleg wird dann von Hand am Saum angenäht. Dabei schlage ich den Beleg im unteren Bereich noch mal nach innen, damit die Kante sauber ist. Sie verschwindet zwar weitgehend unter dem Futter, aber nur weitgehend.
The facing is attached to the hem allowance with invisible hand stitches. At the lower end I am folding the hem to the left side, to get a very clean allowance. It will be mostly covered by the lining, but not completely.
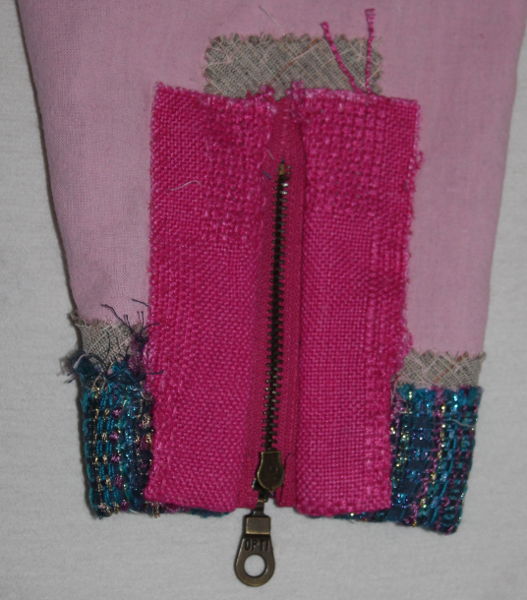
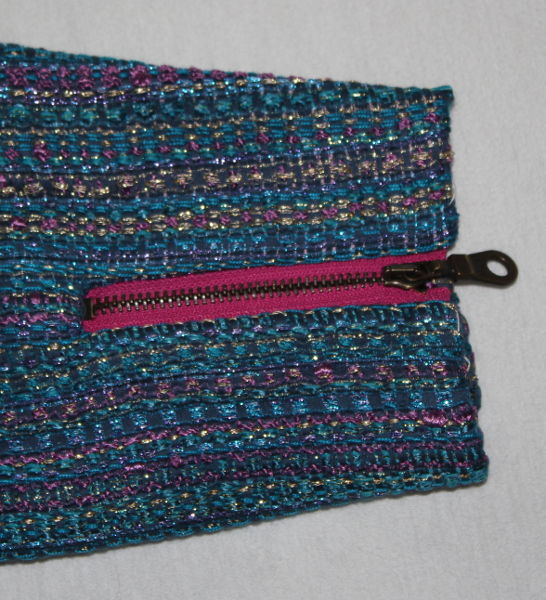 Und so sieht der Reißverschluss dann im fertigen Ärmel aus. Knallt gut. 🙂
And that’s what the zipper looks in the finished sleeve. Nice effect. 🙂
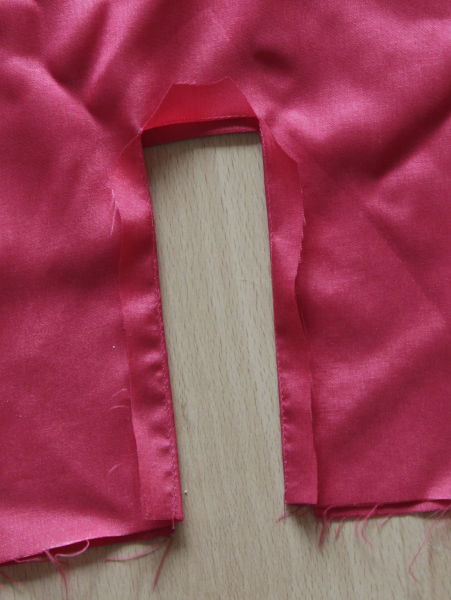 Der Beleg soll natürlich nicht hinter dem Futter verschwinden, also bekommt der Futterärmel auch den passenden Ausschnitt. Ich nähe ein breites „U“ mit Steppstich ab, dann wird das mit etwa einem Zentimeter Nahtzugabe ausgeschnitten und die Nahtzugabe auf die linke Seite gebügelt.
Since the facing will not be covered by the lining, so the lining needs a vent also. I am staystitching a „U“ from the hem upwards. I am cutting back the fabric, keeping 1cm seam allowance. Then I am pressing the seam allowance to the left side of the fabric sleeve.
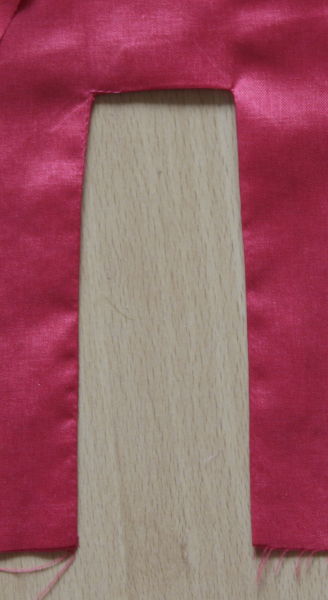 Und so sieht der Ausschnitt im Futter von der rechten Seite aus. Der wird später am Beleg von Hand angenäht.
That’s how the vent opening looks from the right side of fabric. That will be attached to the facing by hand later.