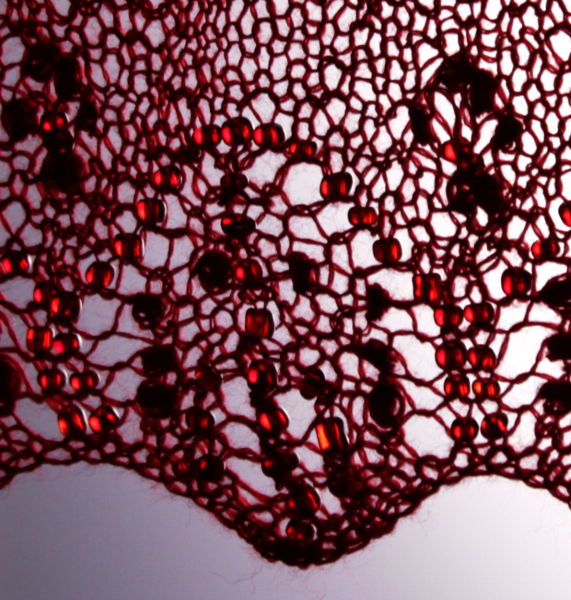
Red Lace

Endlich ist mein Lace Tuch fertig. (Und photograpiert, was bei einem so langen Teil auch nicht einfach ist.)
Finally my knitted lace shawl is finished. (And I managed to take a picture, which is not always easy for such a long piece.)
Die Anleitung ist eine Variation der Estnischen Strickspitze und stammt von Katherine Bryant. Das Tuch nennt sich „Spring: flowers and butterflies“ und ich habe die Anleitung kostenlos bei ravelry runterladen können. Wobei es im Grunde keine richtige Anleitung ist, sondern nur die Strickschrift (die m.E. in der letzten Zeile einen Fehler hat, den man aber leicht sieht und korrigieren kann) sowie die Empfehlung, zum Anschlagen den „Chinese Waitress Cast On“ zu benutzen.
The shawl is a variation of estonian lace and comes from Katherine Bryant. The pattern is called „Spring: flowers and butterflies“ and I downloaded the pattern for free at ravelry. Though it has not real instructions, it’s just the charts (which have, I think, a mistake in the last row, but that can easily be corrected) and it recommends to use the „Chinese Waitress Cast On.“
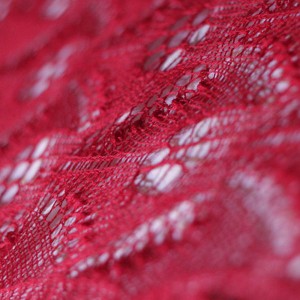
Wie bei estnischer Spitze typisch ist das Muster eine Kombination aus Löchern und Noppen, was mir gut gefällt. Eine Anleitung, wie man die Noppen arbeitet oder wie mit den doppelten Umschlägen zu verfahren ist gibt es nicht, da ich aber schon mal diese Art von Spitze gestrickt habe, habe ich es einfach genauso gemacht, wie es dort beschrieben war. Der Anschlag ist tatsächlich sehr schön von beiden Seiten, aber unendlich umständlich und langwierig. Ich brauchte auch drei verschiedene Anleitungen, davon ein Video, um in der Kombination davon zu begreifen, wie es ging. Und beim zweiten Mal dann wieder. (Das Tuch wird von den Rändern zur Mitte gestrickt und dann in der Mitte mit Maschenstich verbunden. Was ich gut hinbekommen habe, was bei meiner feinen Wolle aber wirklich eine Herausforderung war, eine halbwegs gleichmäßige Fadenspannung beim Nähen hinzubekommen.)
As typical for Estonian Lace it’s a combination of yarn overs and nubbs which gives an interesting texture which I like. There are no instructions how to do the nubbs or what to do with the double yarn overs, but I had already done Estonian Lace so I used the more detailed instructions from this other pattern. The Chinese Waitress Cast On really does look good from both sides, but it is really complicated and takes for ever. I needed three different instructions (one a video) from the internet to finally understand how to do it. And for the second one again. (The shawl starts on both ends and is finally sewn with kitchener stitch in the middle. I was able to make it look good, but the process was not fun at all. Especially with my very fine wool the get an even tension.)
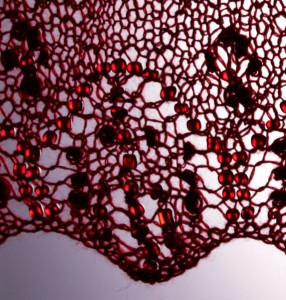
An den Randbordüren wird das Tuch mit Perlen gearbeitet. Auch hier gibt es keine Anleitung, wie diese eingearbeitet werden sollen (da gibt es ja auch unterschiedliche Möglichkeiten), ich habe sie nach dem Stricken mit einer Häkelnadel über die jeweilige Masche gezogen. Das war ziemlich aufwendig.
For the border the shawl is worked with beads. Again there are no instructions how to add them (and there are several techniques how to add beads to knitting), I used a fine crochet hook to pull the bead over the knitted stitch at the indicated place.
Als Garn hatte ich Merino 30/2 von Zürcher Stalder, das ich vor einigen Jahren mal auf der Creativa gekauft hatte. Es strickt sich sehr gut, ist aber extrem fein. (Ich habe 2,75mm Nadeln verwendet.) Im Grunde muß ich im Nachhinein sagen, daß die Glas Perlen wohl zu schwer für das Garn sind. Außerden tragen die Perlen außer Glitzer nicht viel zum Muster bei, würde ich das noch mal stricken, würde ich sie wohl (und erst recht bei diesem Garn) weglassen.
The yarn was Merino 30/2 by Zürcher Stalder, which I’d purchased some years ago on the Creativa trade fair. It knits very nicely, but is very fine. (I’ve used 2.75mm/ US#2 needles.) From the retrospecive view now I have to admit, that the glass beads are basically to heavy for my yarn. Also the do not really add something to the pattern except sparkle. So if I would do the pattern again, I would do it without beads.
Das Tuch gefällt mir auch gut, aber das Stricken war irgendwann dann doch etwas langweilig, denn der Rapport für das Hauptmuster ist zwar relativ groß, aber nicht wirklich kompliziert. Der Vorteil ist aber, daß man eigentlich das Muster gut „sieht“ und daher auch schnell merkt, falls man einen Fehler gemacht hat.
I quite like the result, but knitting became a bit tedious over the time. The repeat for the main pattern is quite big, but not really complicated. An advantage is, that it is easy to „see“ the pattern yo if there is a mistake it becames evident very fast.

 Dieses Jahr ging ich doch tatsächlich auf meine erste Karnvealssitzung hier in Köln. Und da ich mit Kostümen da noch nicht gut ausgestattet bin, mußte wenigstens ein witziges Kopfteil her.
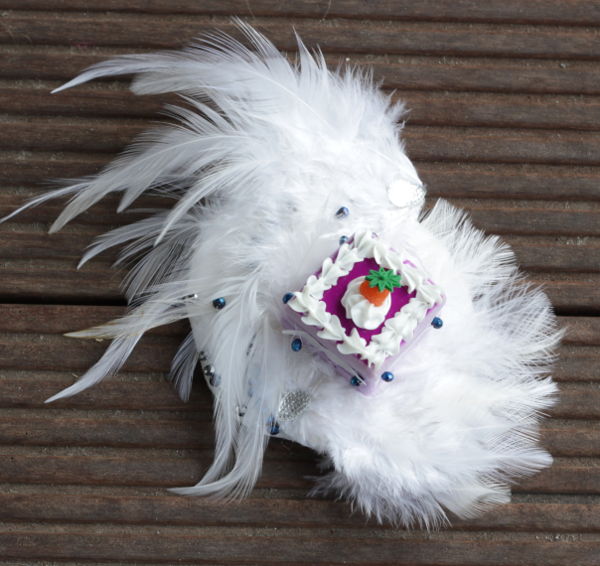 This year I went to a Carneval event for the first time since I am in Cologne. So I am not well equipped with costumes but at least a funny head piece had to be made.
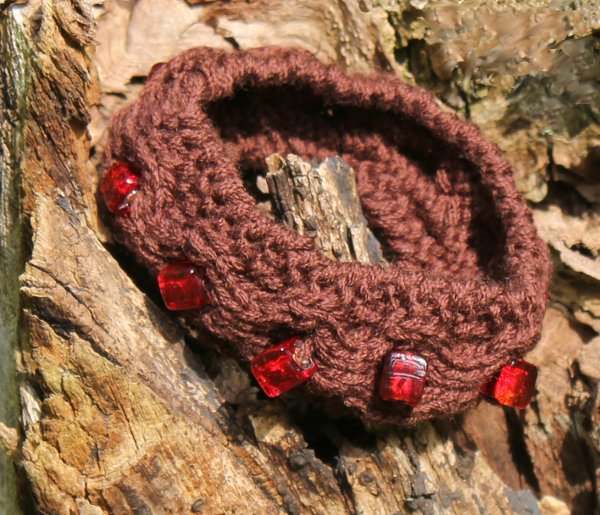
 Auf der Unterseite habe ich noch mal ein Stück Stoff gegen genäht und dann eine Haarspange aufgenäht.